Agent Guide: How to Manage a Repair Request
How to Manage a Repair Request
Manage a repair request
- Sign in to Wavity ITSM. Log in with your agent credentials. You will land on your default landing page.
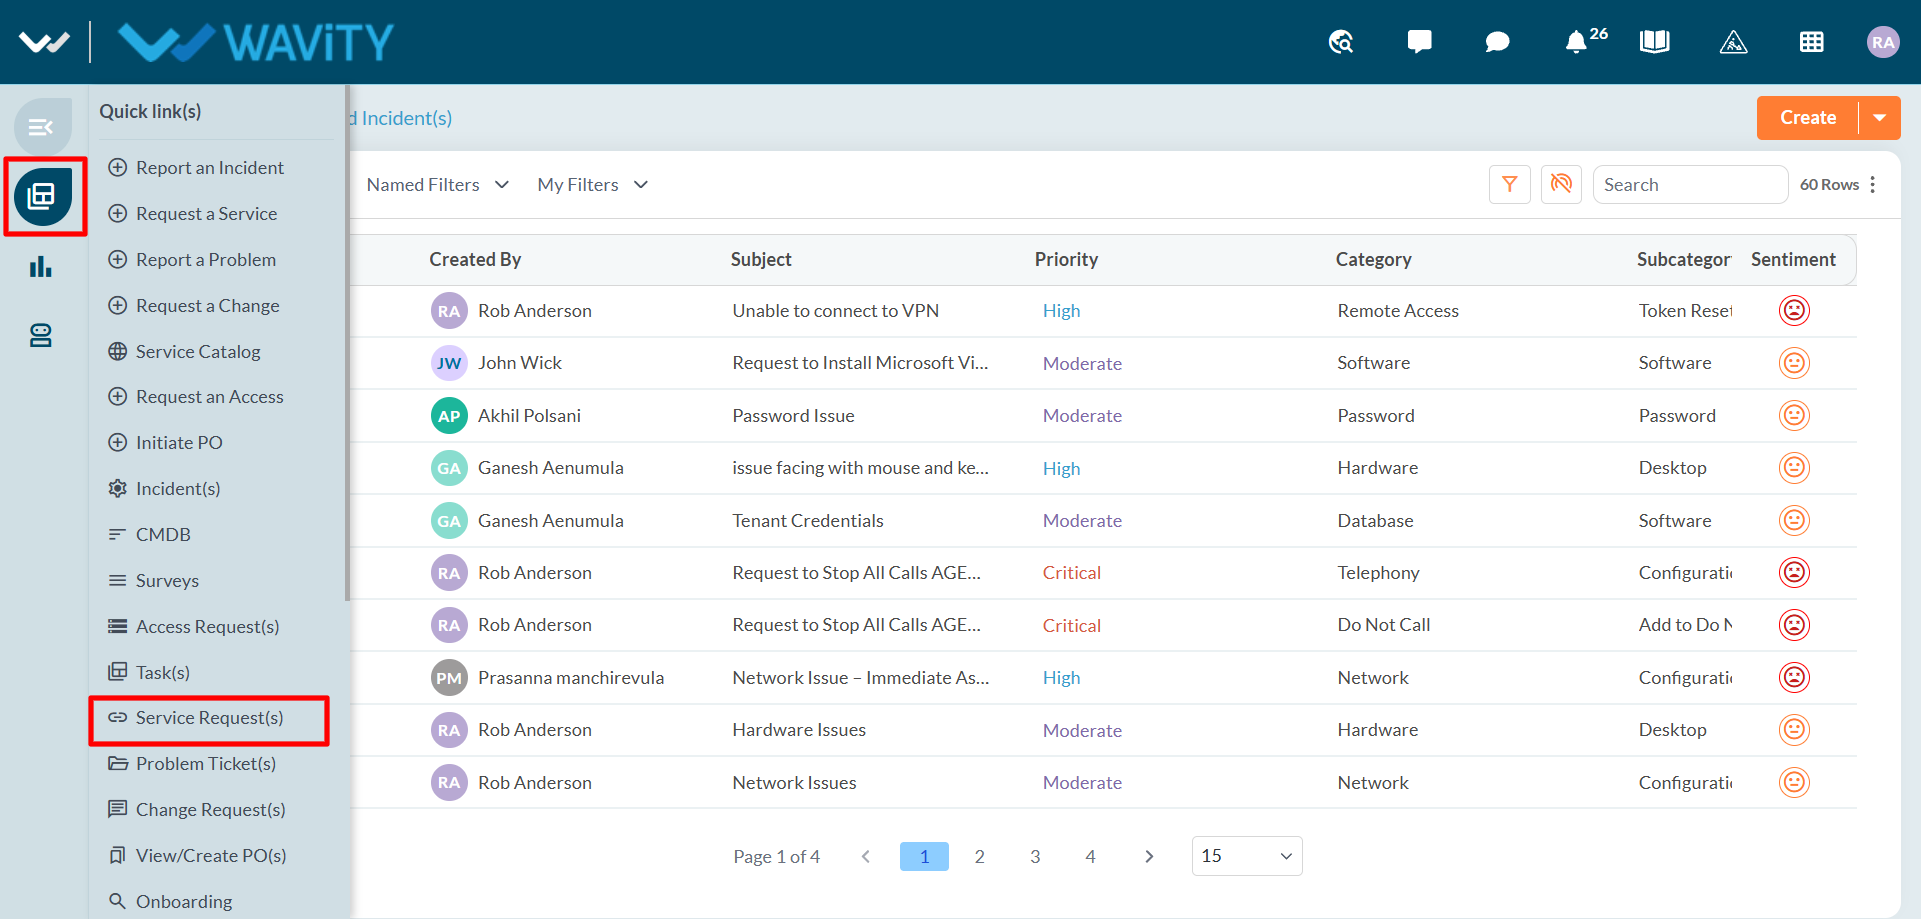
- Open Service Request(s). Click the menu icon at the top of the left navigation bar to open Quick link(s), then click Service Request(s).
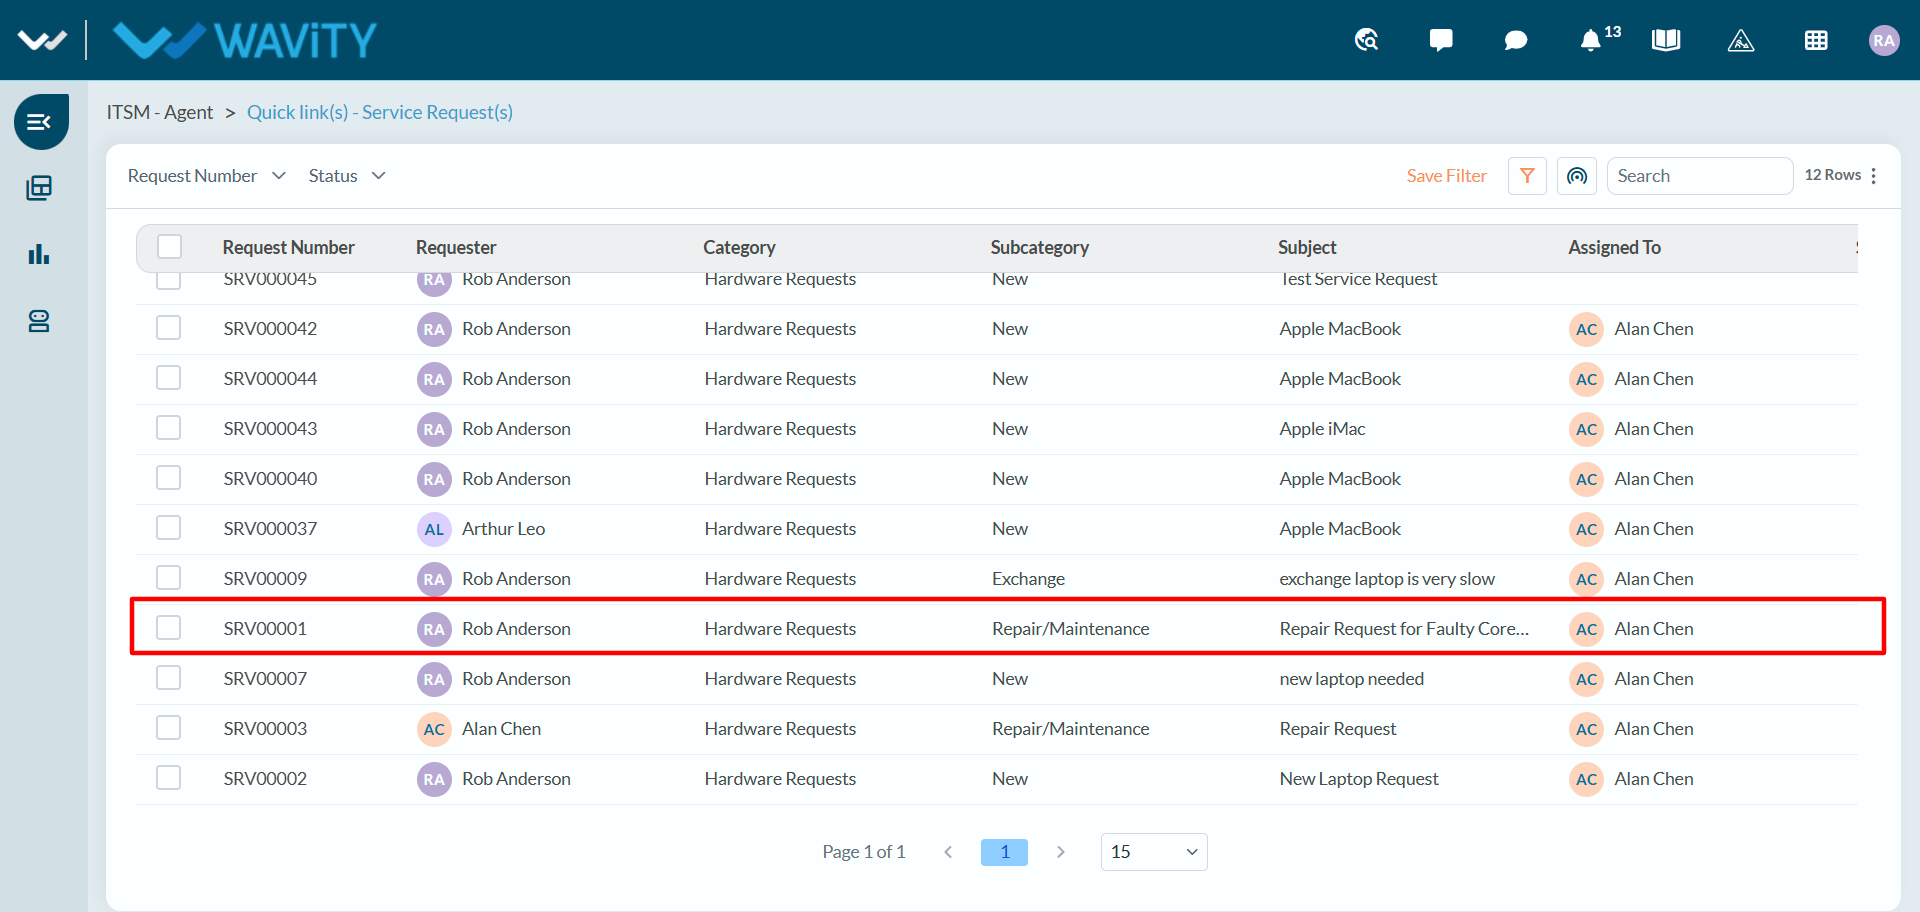
- Open the repair request. In the list, click the request you want to work on. Repair requests show Repair/Maintenance in the Subcategory column
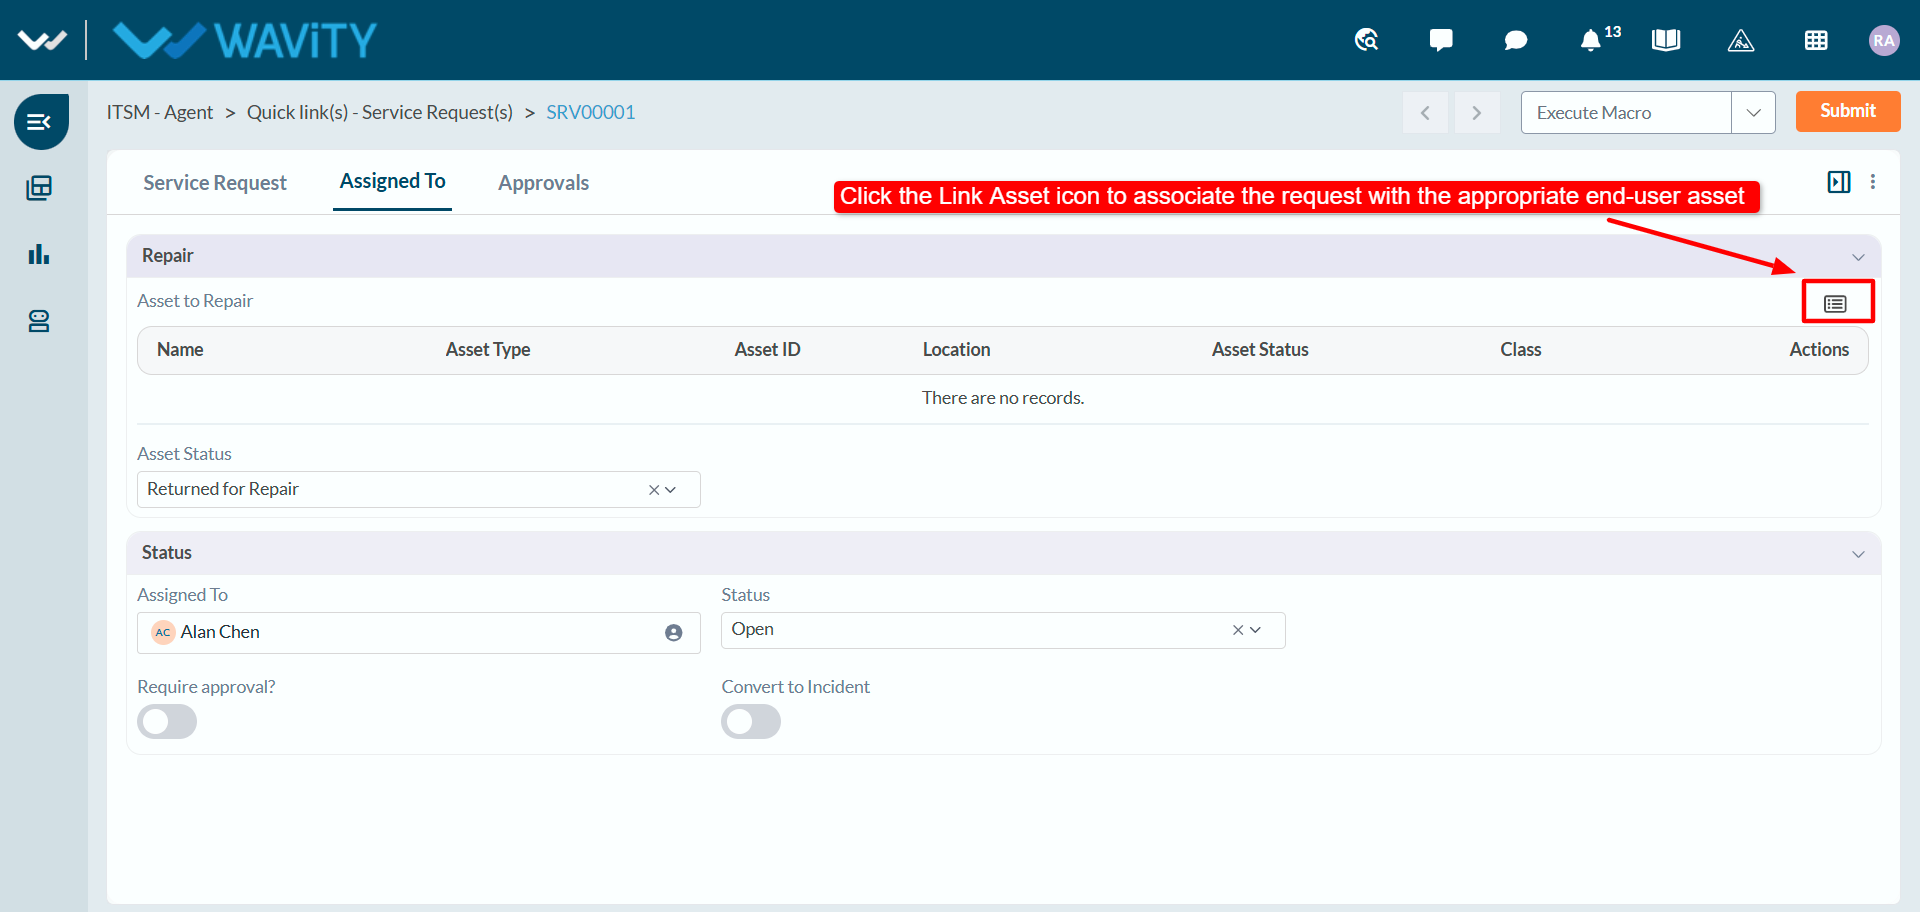
- Link the asset to repair. Open the Assigned To tab. In the Repair section, click the Link Asset icon on the right of Asset to Repair.
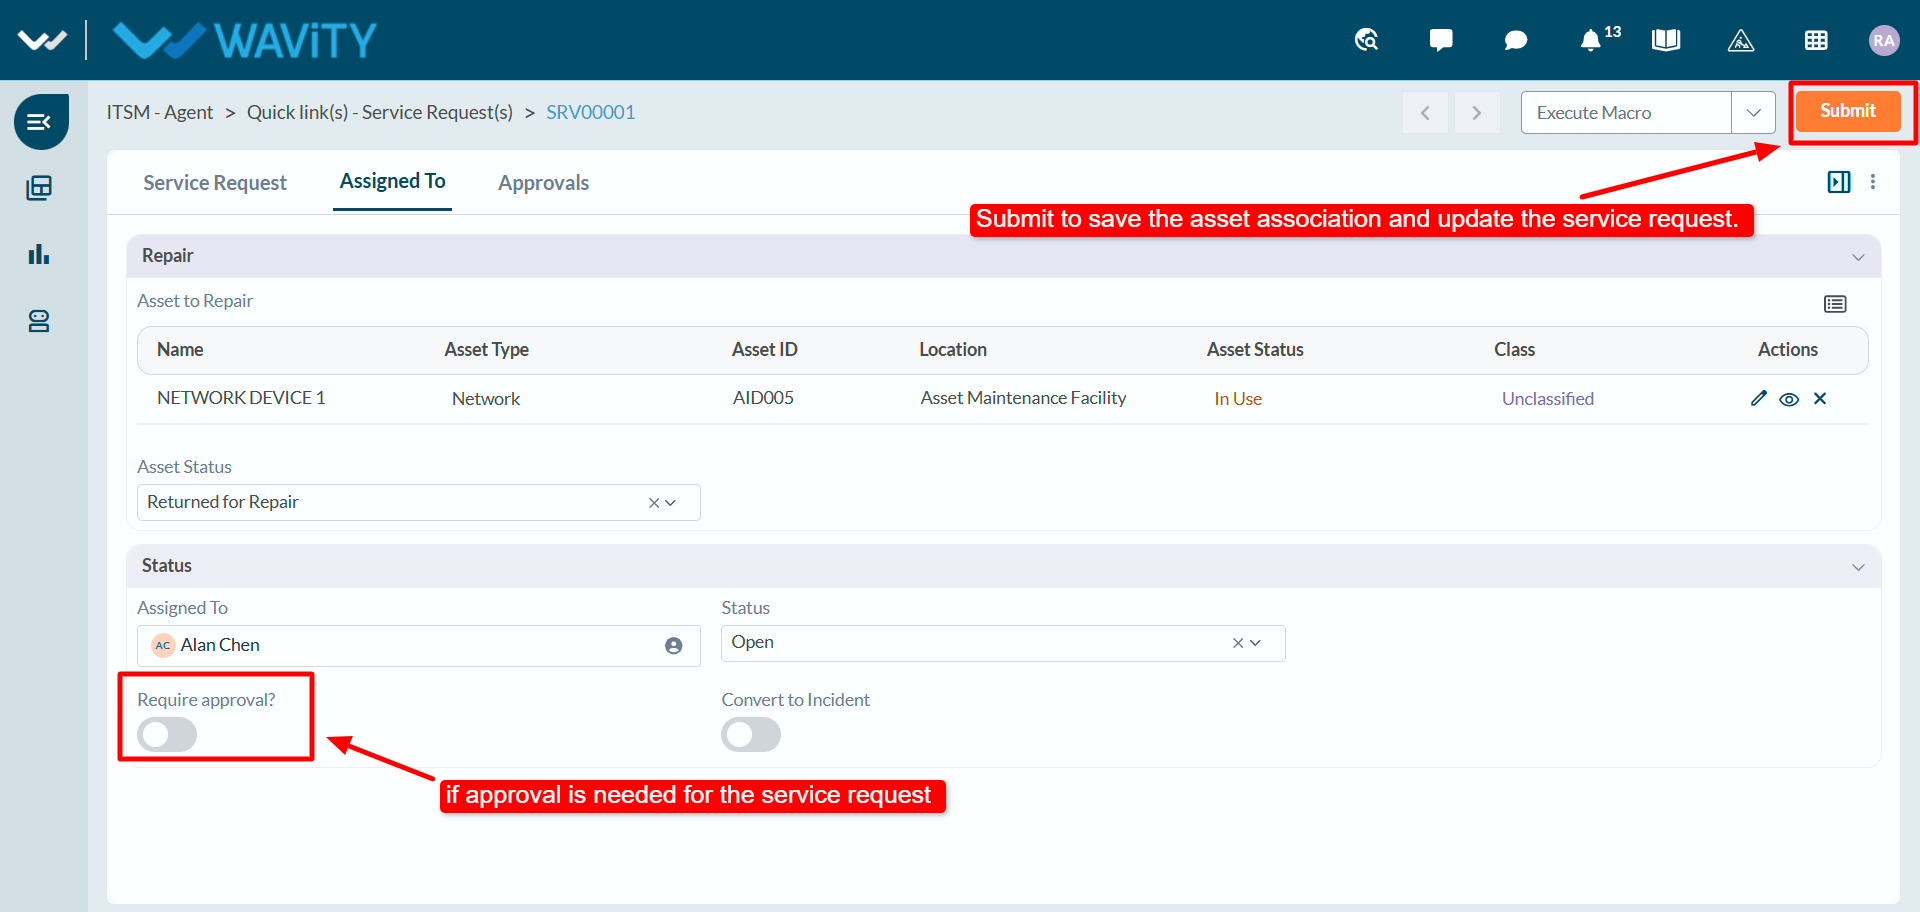
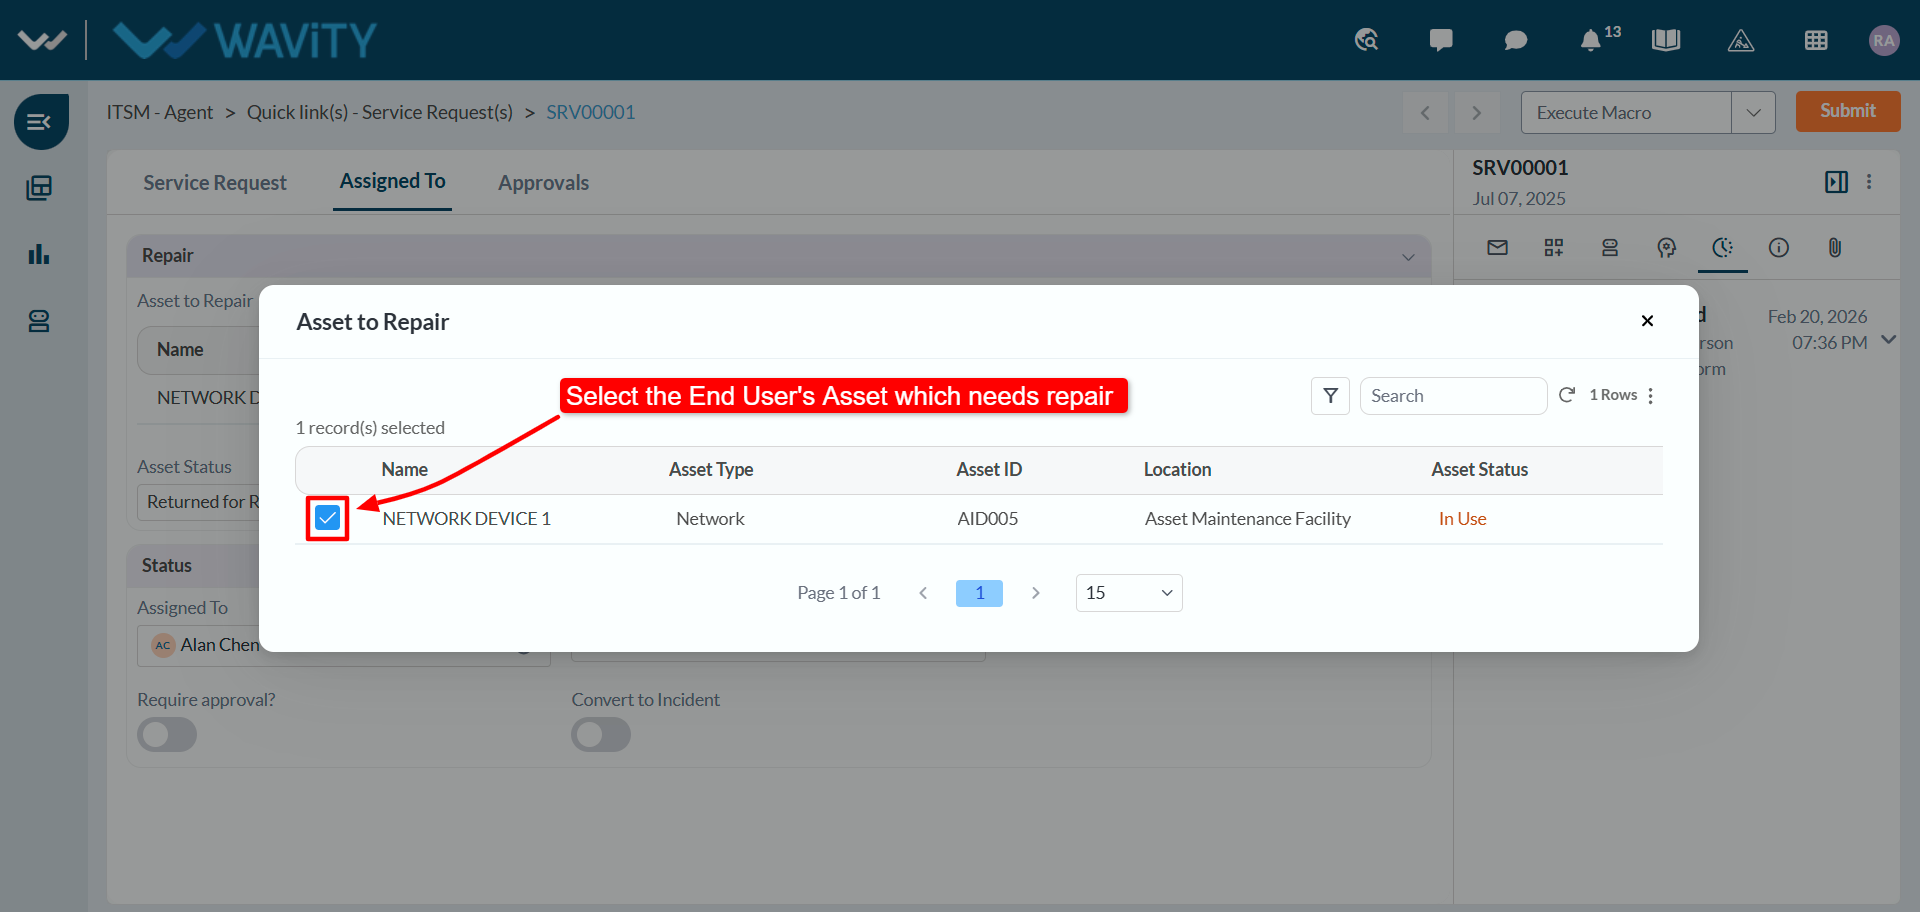
- Select the asset. The Asset to Repair window lists the end user’s current assets. Select the checkbox next to the asset that needs repair. It is added to the Asset to Repair table, where you can edit, view or remove it using the icons under Actions.
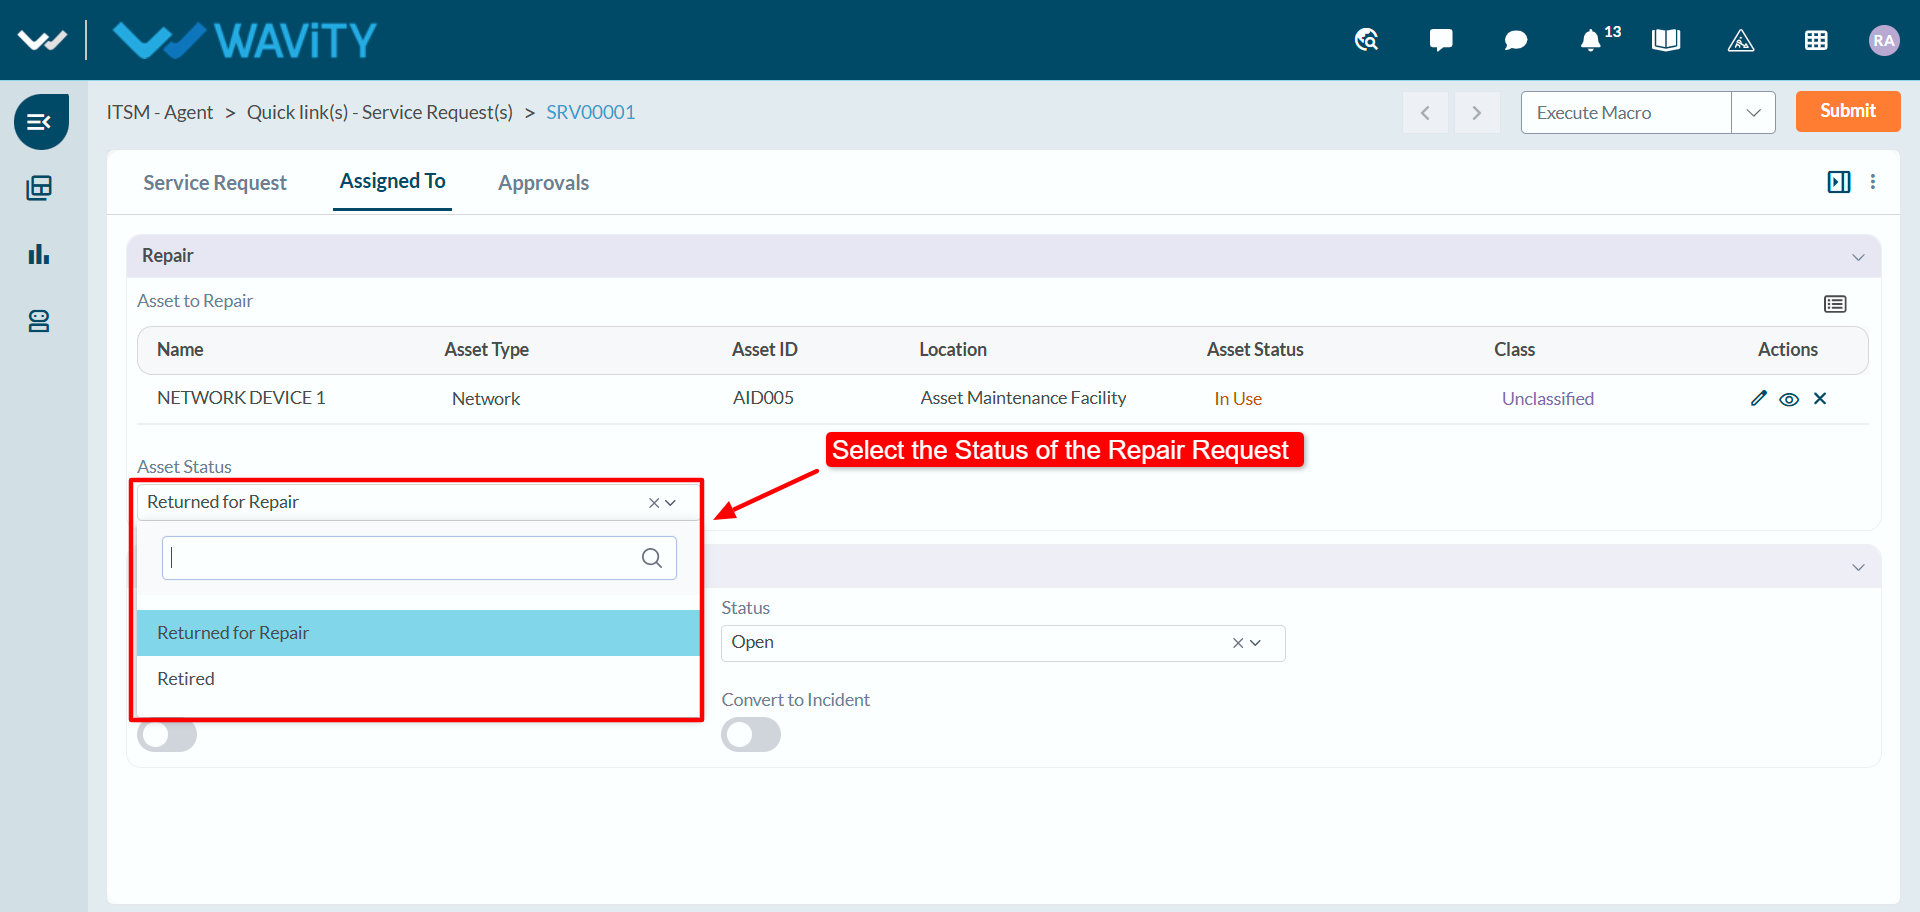
- Update the asset status. If the user has handed the asset in for servicing, set Asset Status to Returned for Repair. Choose Retired if the asset will not be repaired and is being taken out of use.
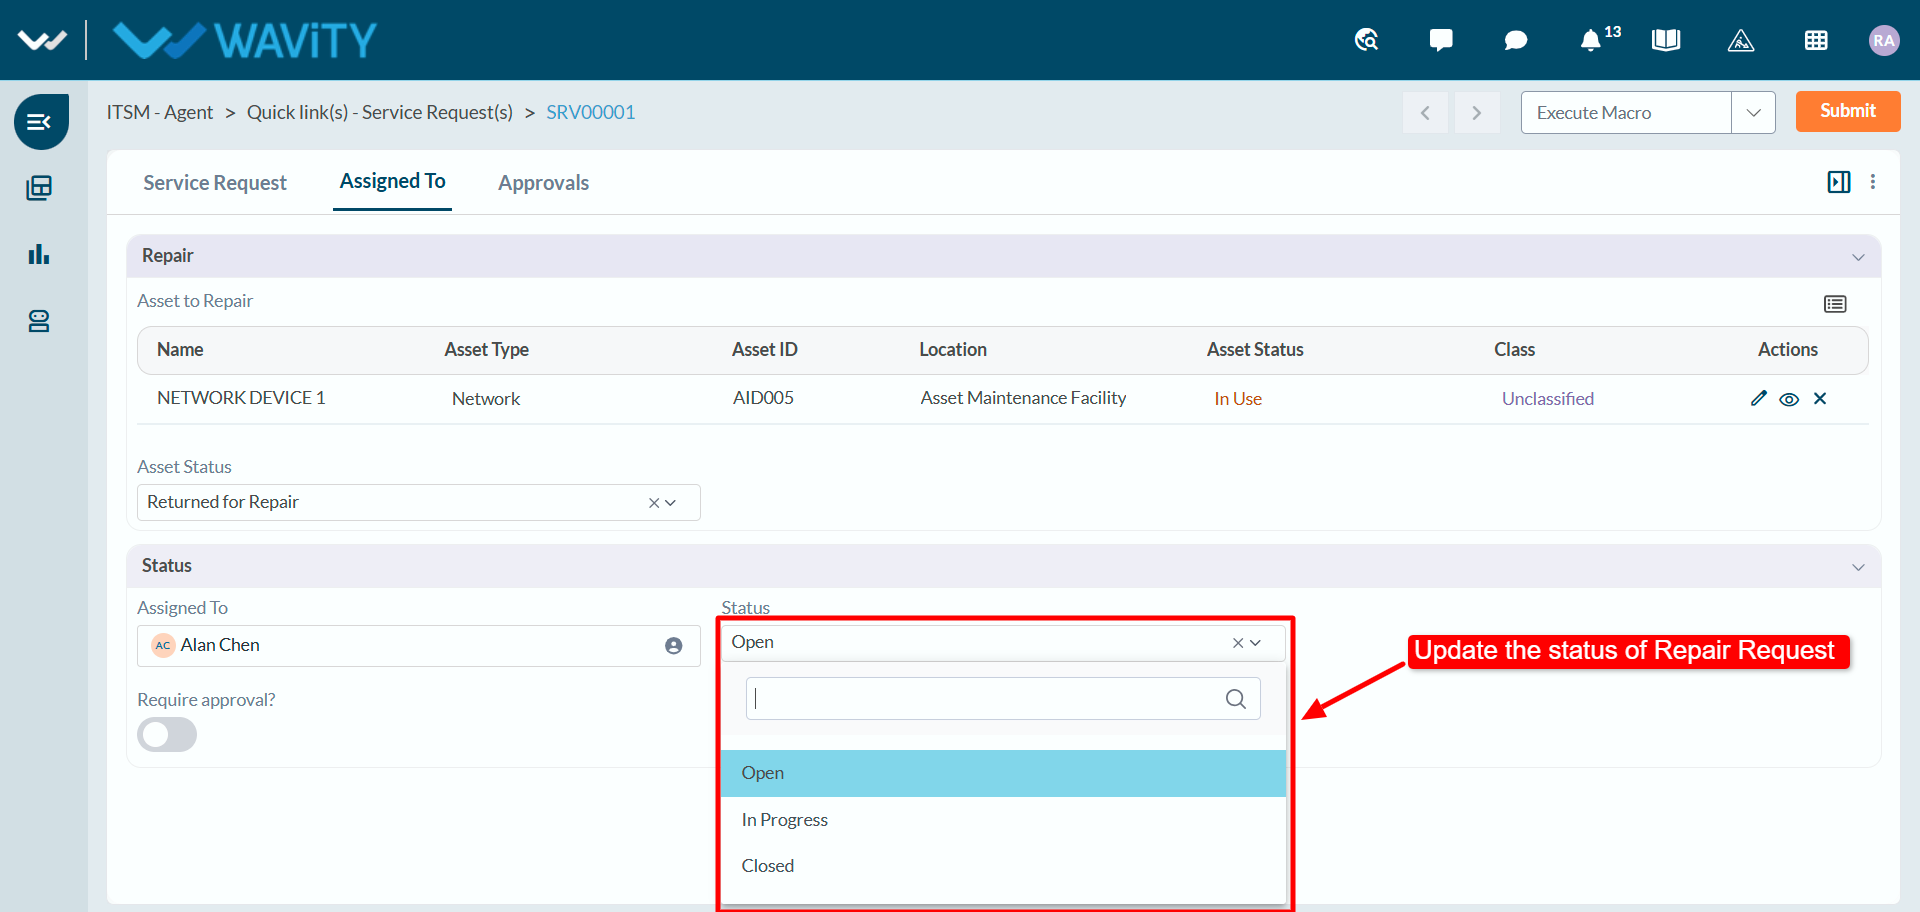
- Update the request status. In the Status section, choose the request’s current state from the Status dropdown: Open, In Progress or Closed. The end user receives an email notification when the status changes.
- Request approval (if required). If the repair needs approval, turn on Require approval?. Additional approval fields appear so that a manager or other authorized user can approve or reject the request.
- Save your changes. Click Submit in the top-right corner to save the linked asset and update the service request.