How to Enable Microsoft Teams Integration
How To Enable Microsoft Teams Integration
Microsoft Teams Integration
The Wavity-Microsoft Teams integration brings your internal and support teams together, enabling seamless and efficient cross-team collaboration. With this integration, you can manage support tickets directly within Microsoft Teams, making it easier to stay informed and respond quickly.
Key Features
Once integrated, you can perform the following actions within Microsoft Teams:
Create, view, and update support tickets directly within Microsoft Teams, while receiving instant notifications from Wavity for ticket assignments, priority changes, agent replies, and public or private notes.
Automate ticket workflows based on predefined conditions, such as priority or subject, and receive real-time notifications in Teams channels whenever tickets are created or updated.
How to Set Up Microsoft Teams Integration in Wavity
To get started with the Wavity-Microsoft Teams integration, follow these steps to install the required apps in both Wavity and Microsoft Teams.
Configuration Steps in Wavity:
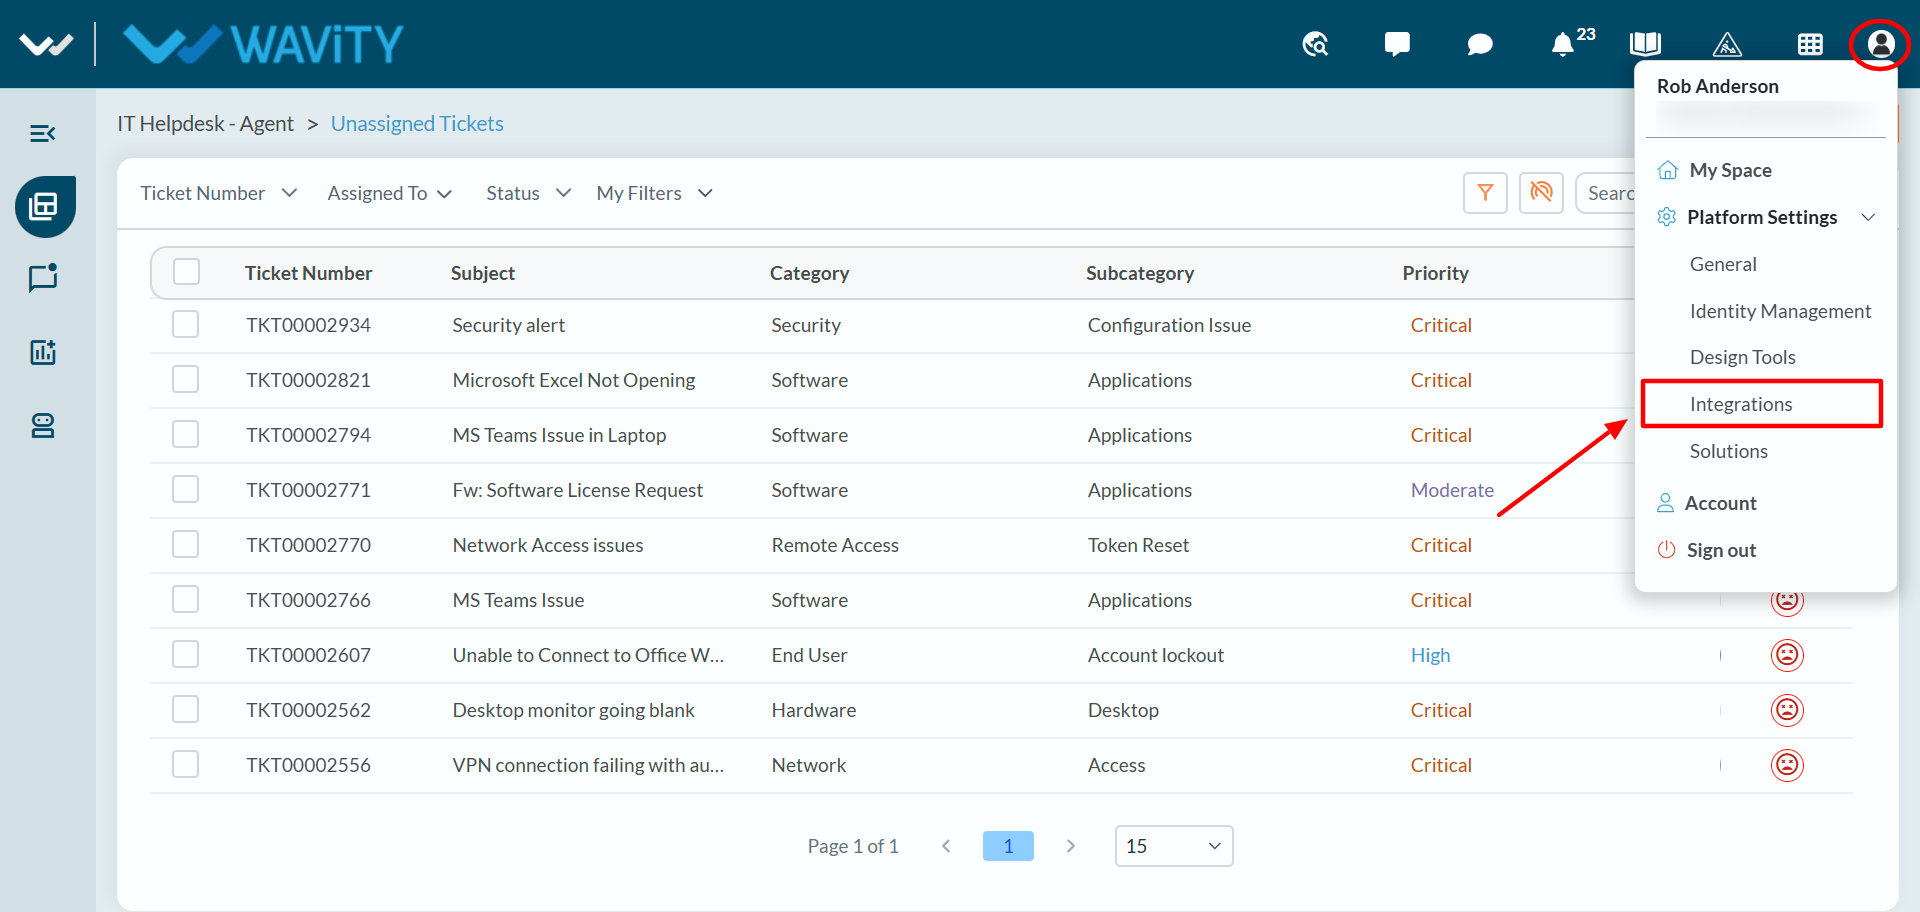
Step-1: Sign in to Wavity using administrator credentials, click your profile, and navigate to Integrations under ‘Platform Settings’.
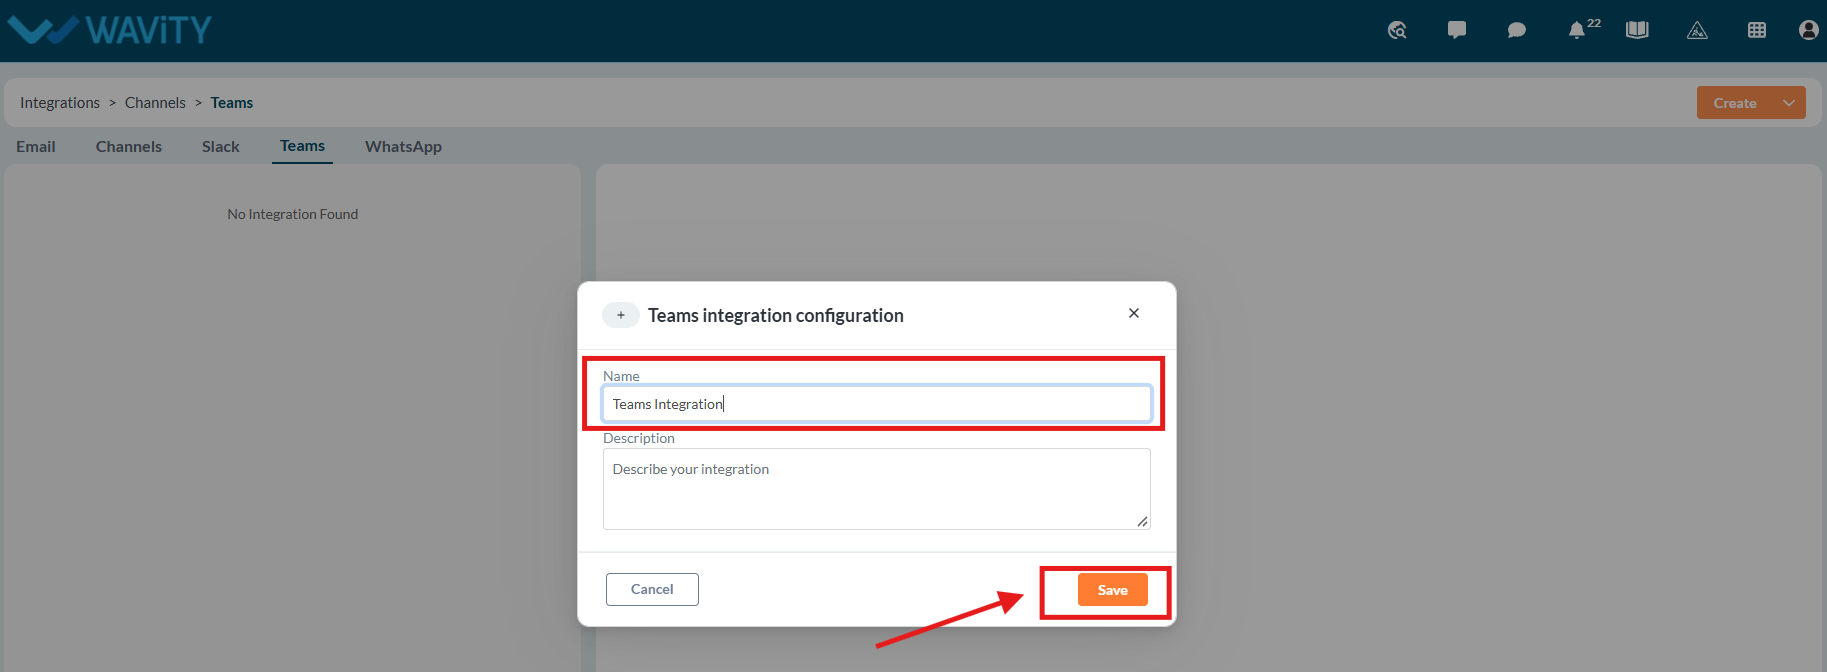
Step-2: Navigate to the Teams tab and click Create.

Step-3: Enter the Teams Instance Name, provide a Description (optional), and click Save to create the instance. After clicking Save, A pop-up will appear where the system will prompt you to log in to link your Microsoft Teams administrator account.
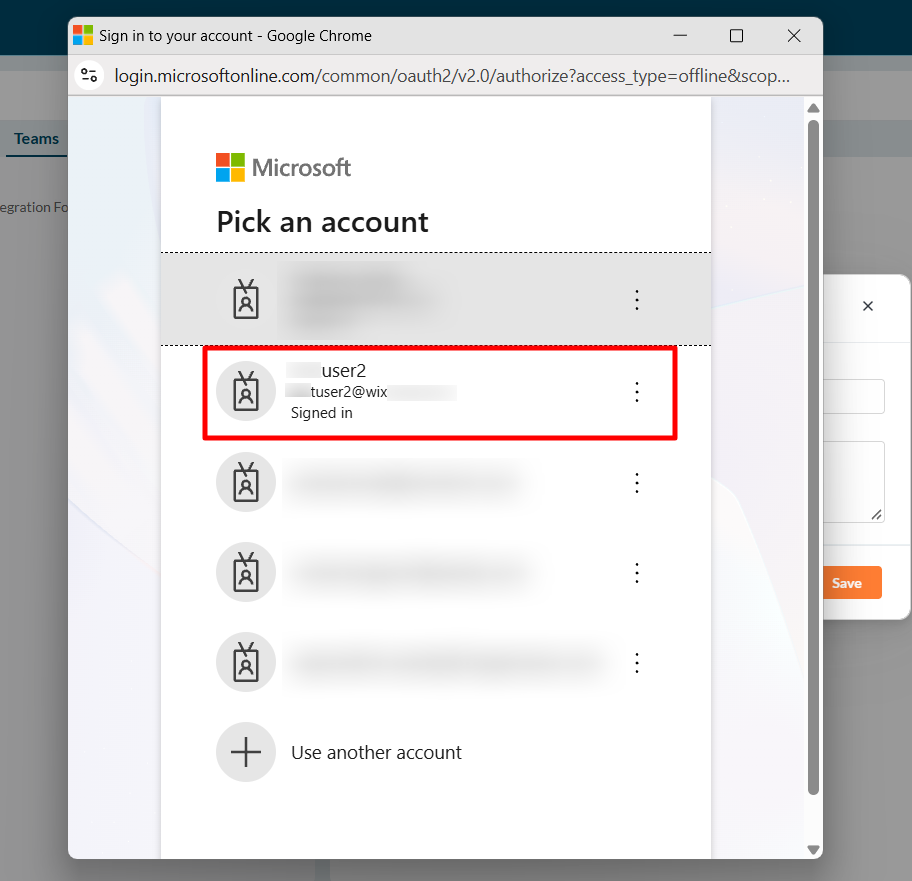
Step-4: Select your Microsoft administrator account to link it to Wavity.
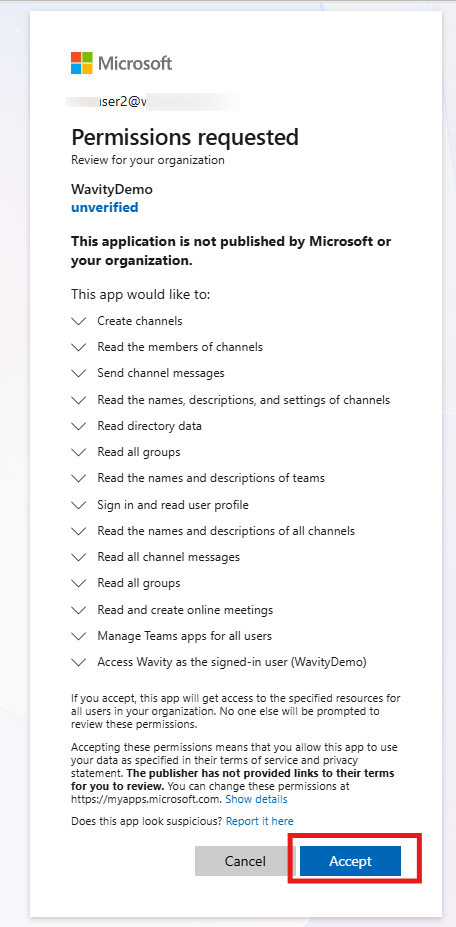
Step-5: Select the checkbox to grant consent on behalf of your organization, then click Accept to proceed.
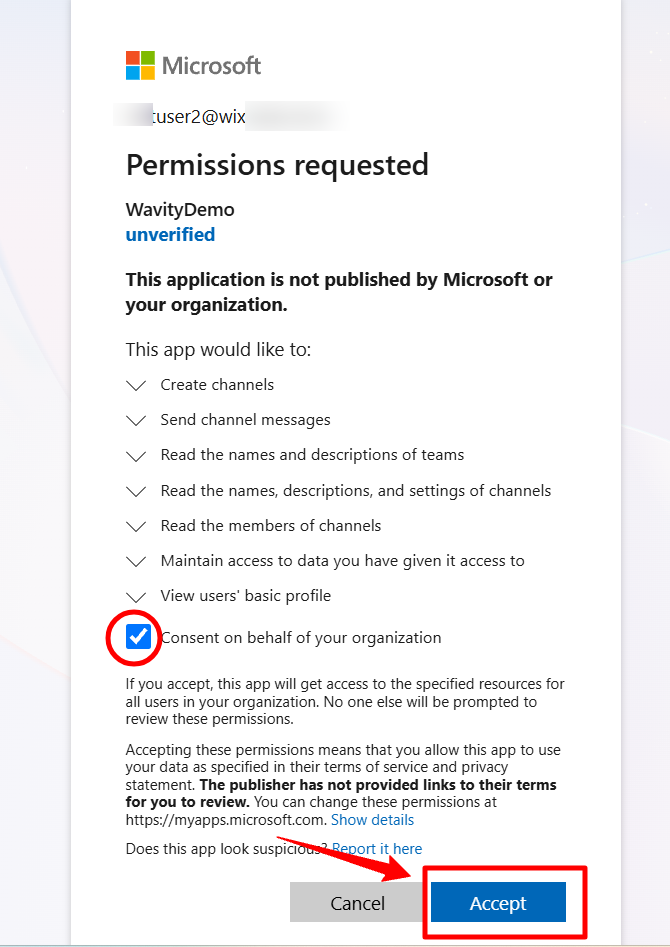
Step-6: After clicking Accept, sign in with the Microsoft administrator account again. Click Accept, with this constant admin will provide tenant wise permissions to Wavity.
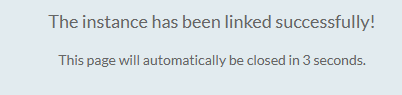
Step-7: Once the Microsoft Teams integration is successfully linked, the administrator will see a confirmation message stating that the instance has been linked successfully. After 3 seconds, the window will close automatically, and the administrator will be redirected to the Teams configuration settings.
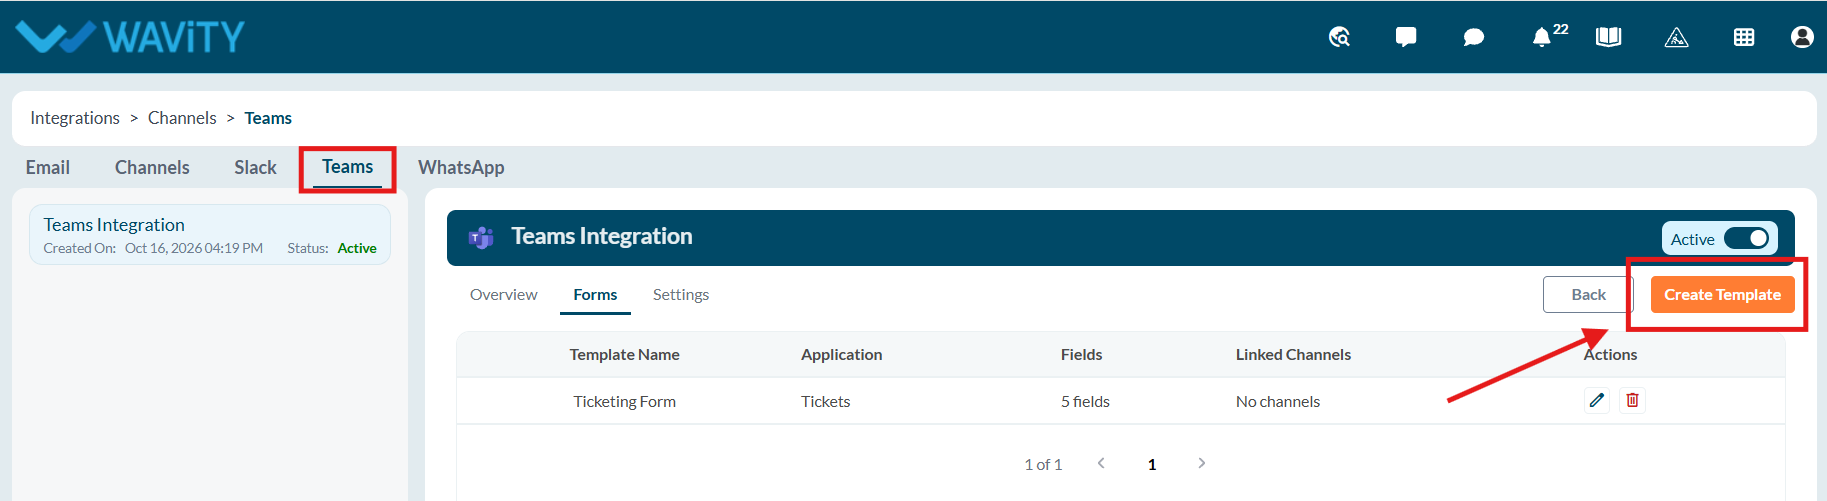
Step-8: Please create a form that allows users to create tickets directly from Microsoft Teams.
Step-9: The Microsoft Teams owner must first add the bot to the relevant team or channel. Once the bot is added, the Wavity administrator can link the channel to the appropriate form. For detailed instructions on adding the bot to a Microsoft Teams channel, please refer to the How to Add a Bot/App to Microsoft Teams section of this document.
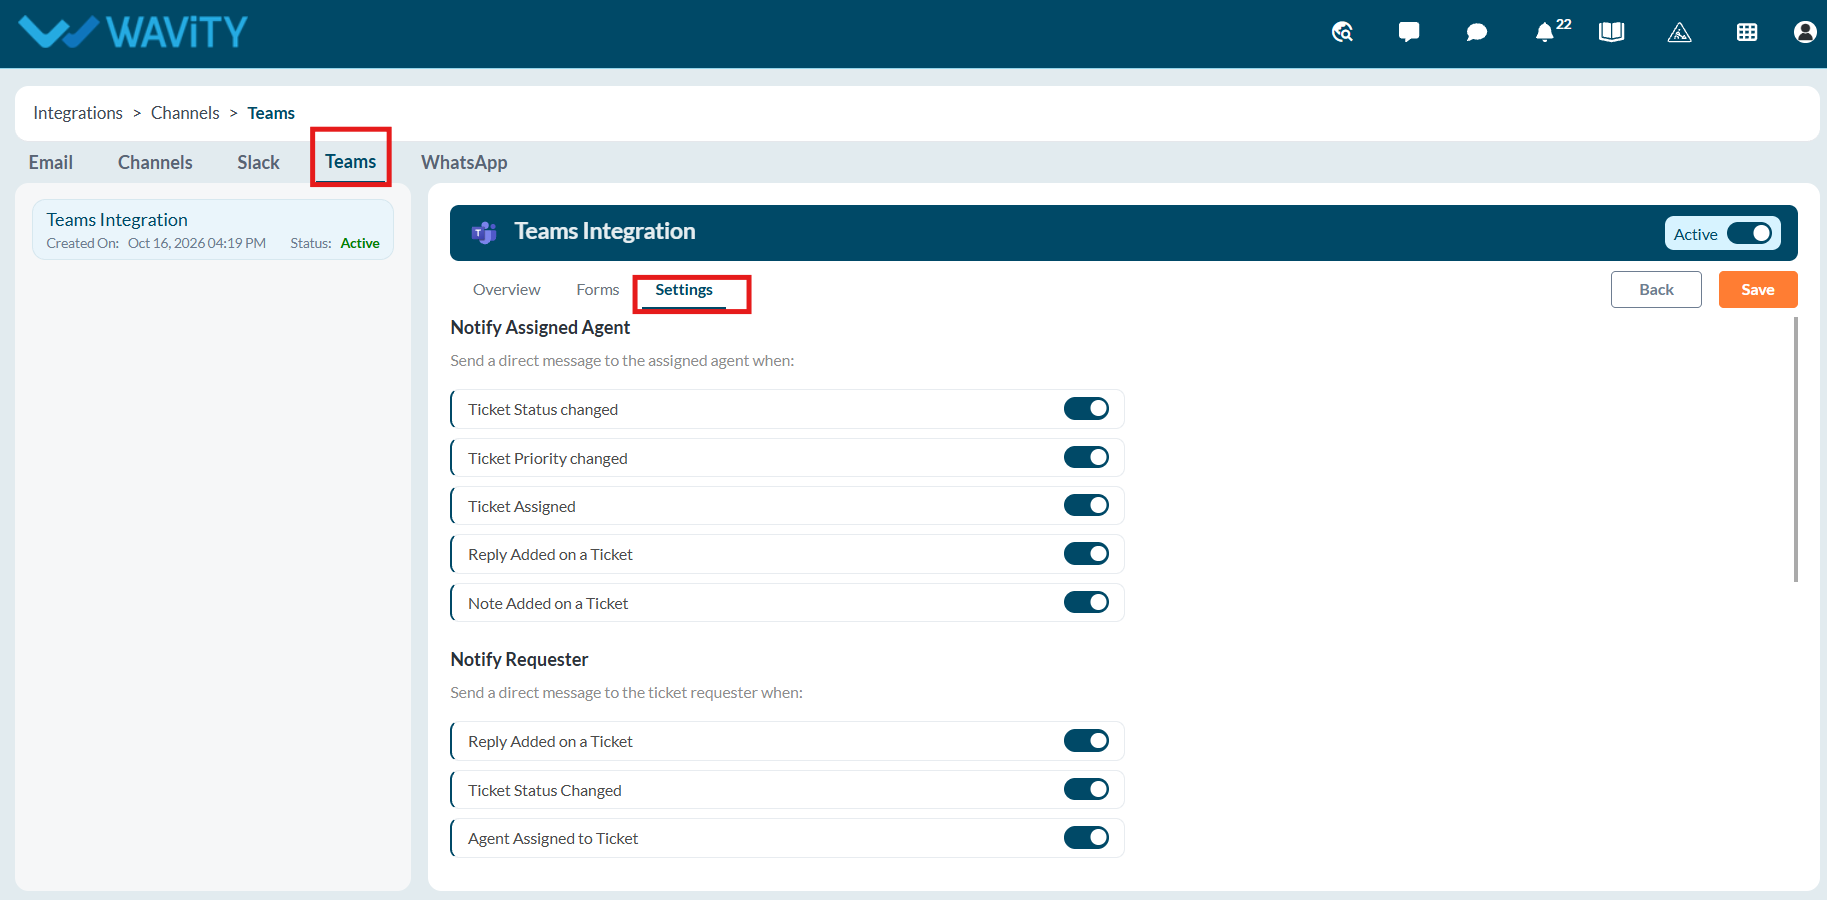
Step-10: To enable Microsoft Teams notifications for end users and agents regarding ticket creation, updates, and assignments, the administrator must enable the corresponding notification toggles in the Teams Settings tab, based on the organization’s policies.
How to Add a Bot/App to Microsoft Teams:
Step-1: Sign in to Microsoft Teams, navigate to Apps in the sidebar, and open the Store. Search for Wavity, then select the Wavity Bot from the search results.
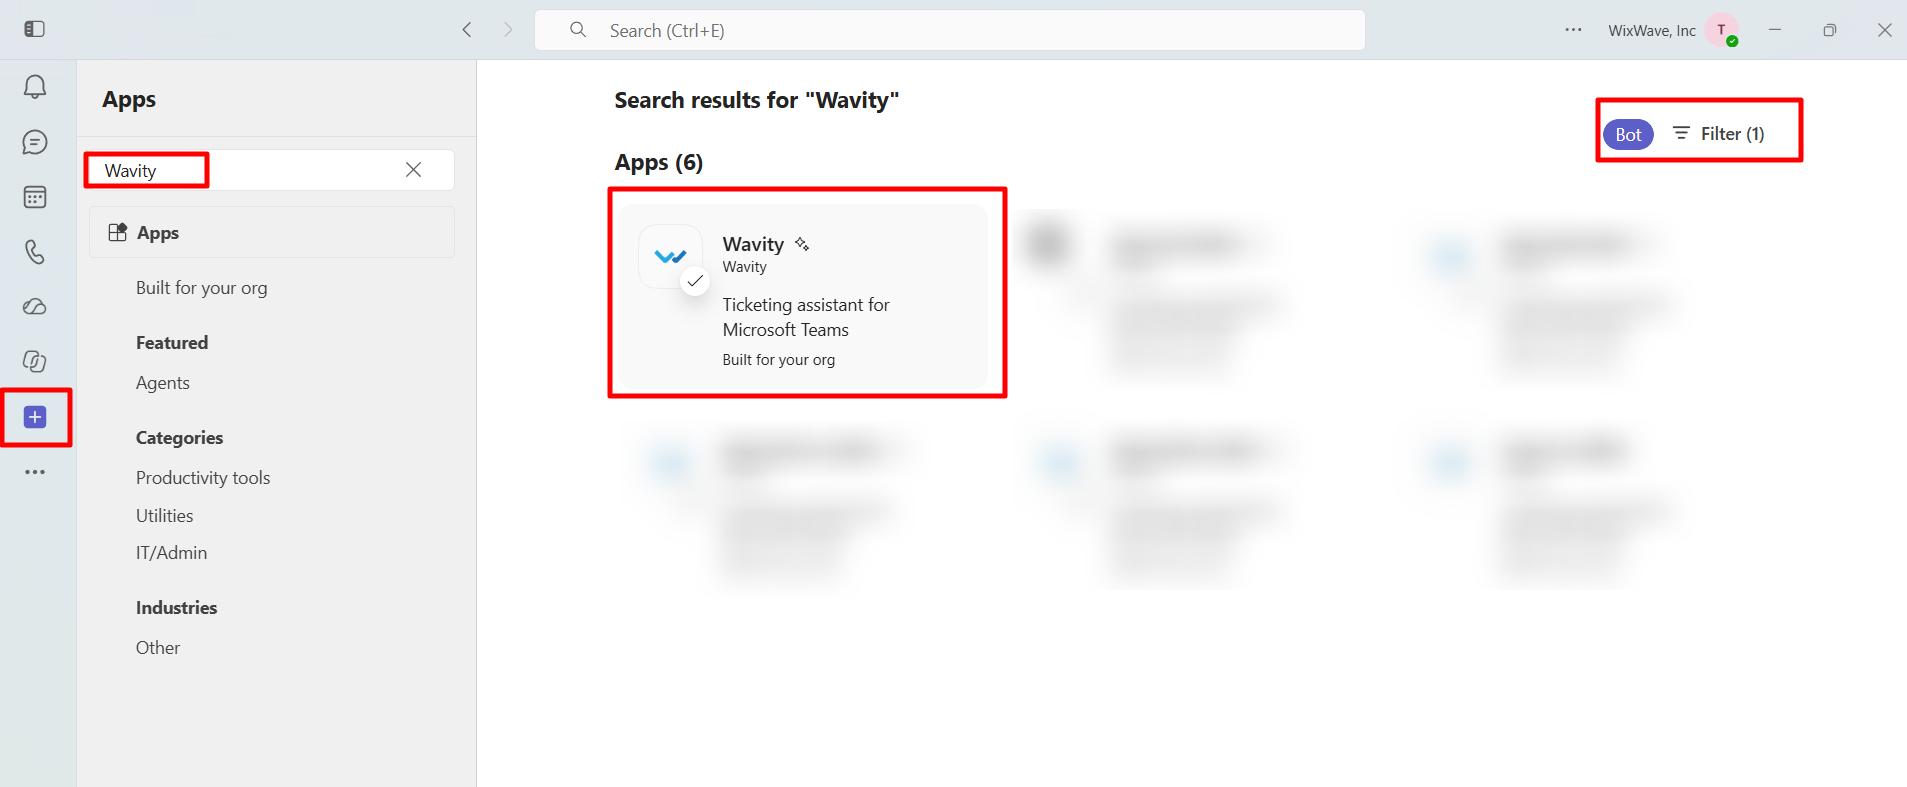
Step-2: Select the Wavity App and click Add to Teams. Once the app has been added successfully, select your preferred channel to add the Wavity Bot. In this example, we have selected the HR channel.
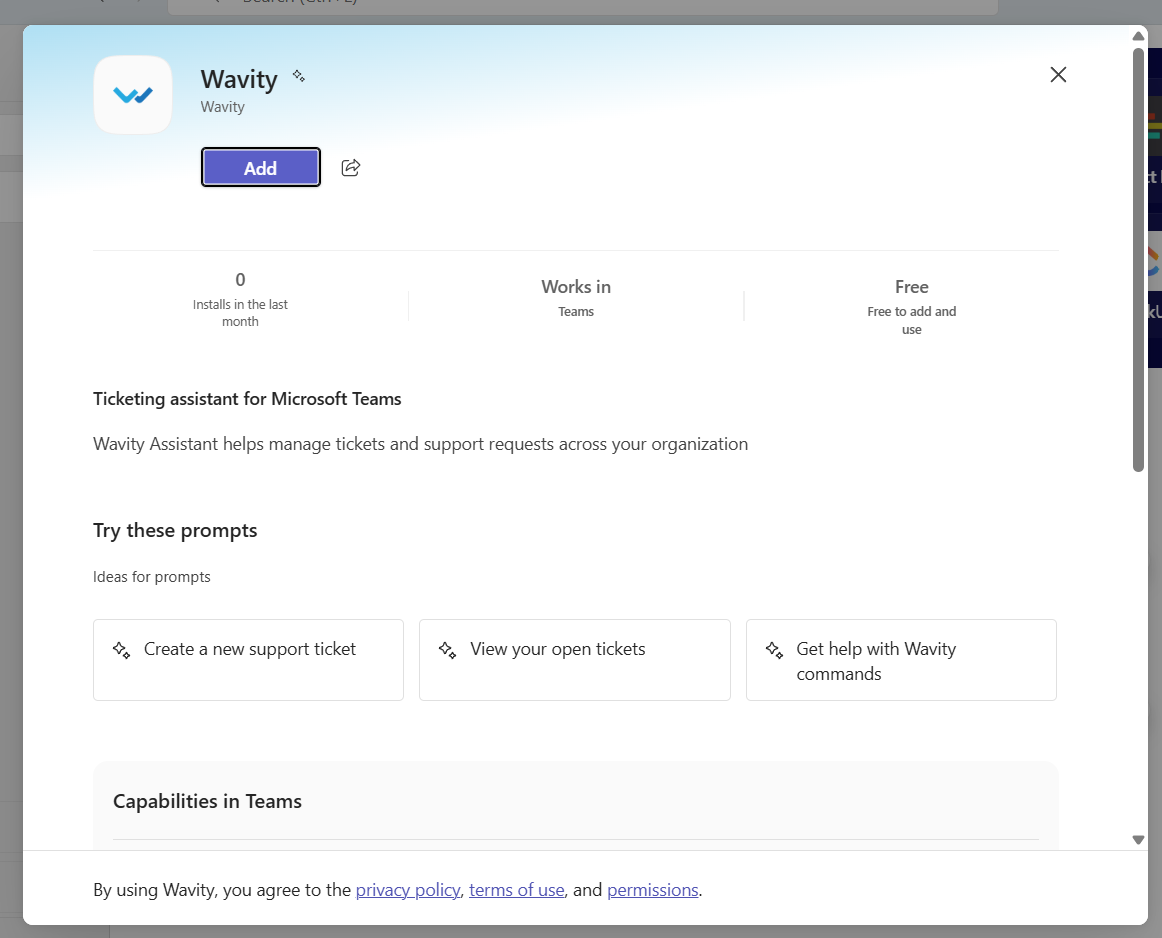
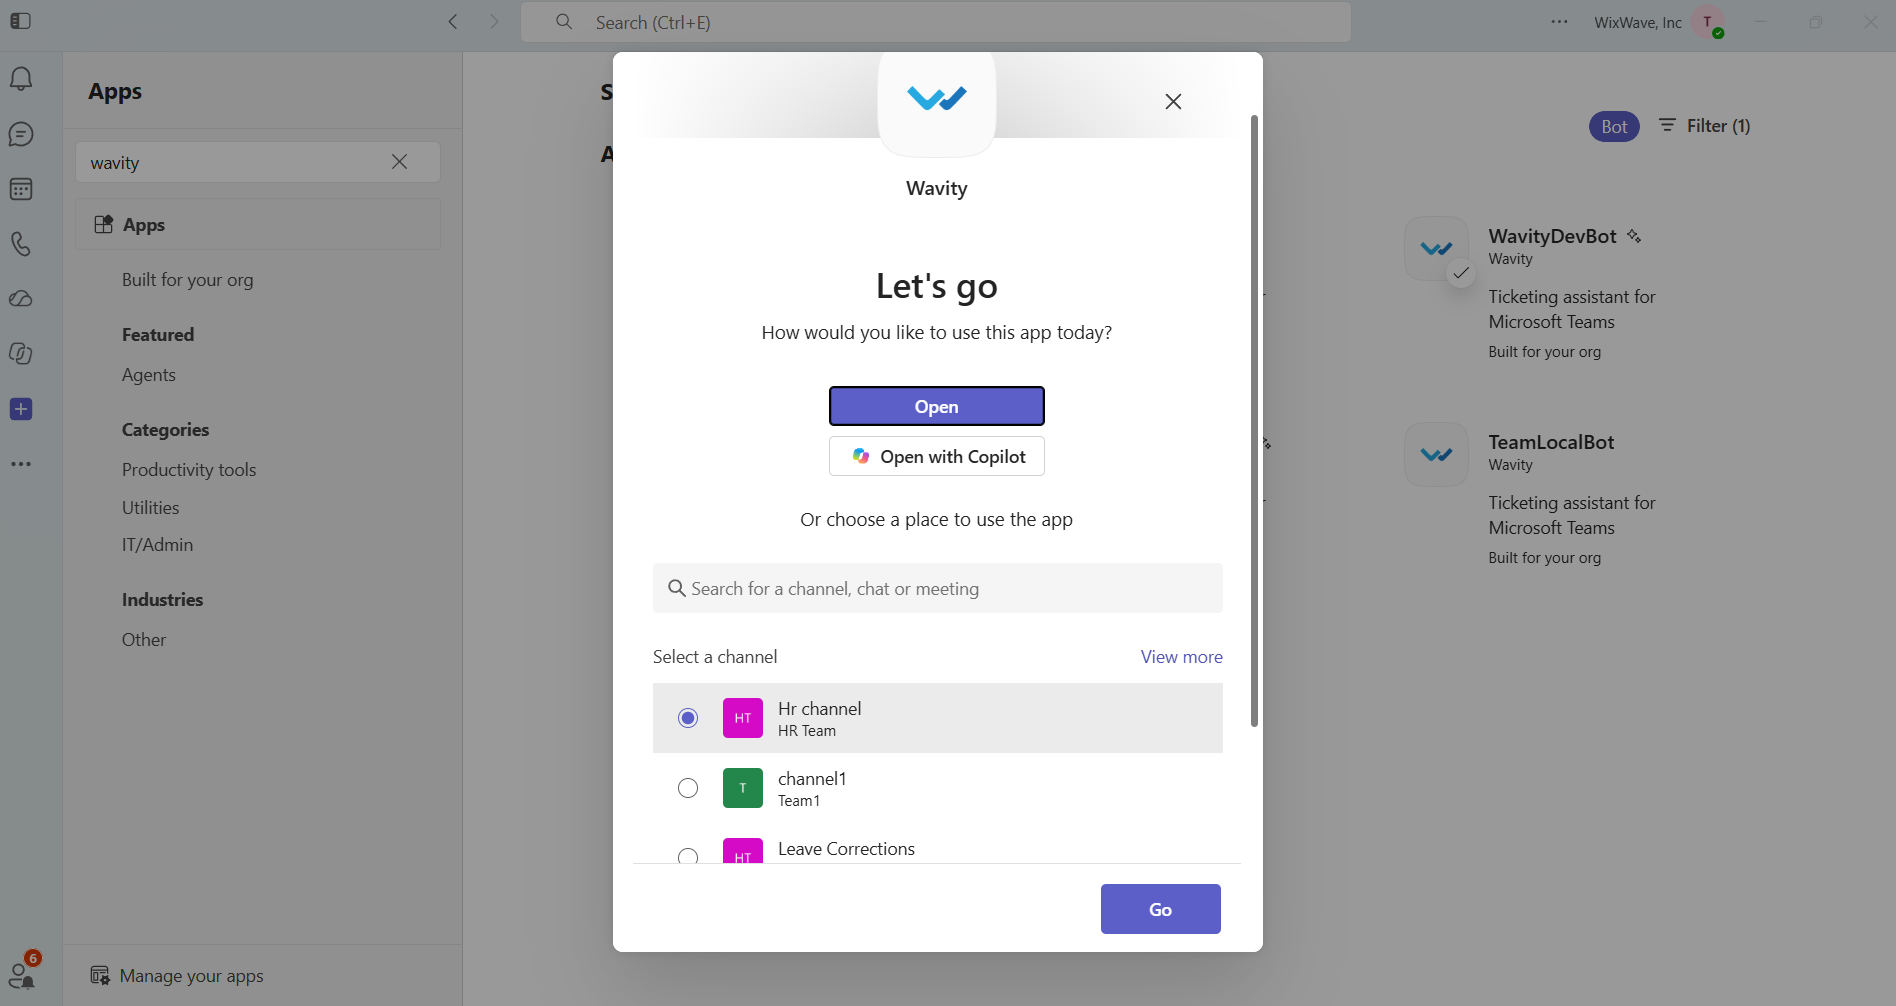
Step-3: The added Microsoft Teams channel can now be linked to a form/template in Wavity.
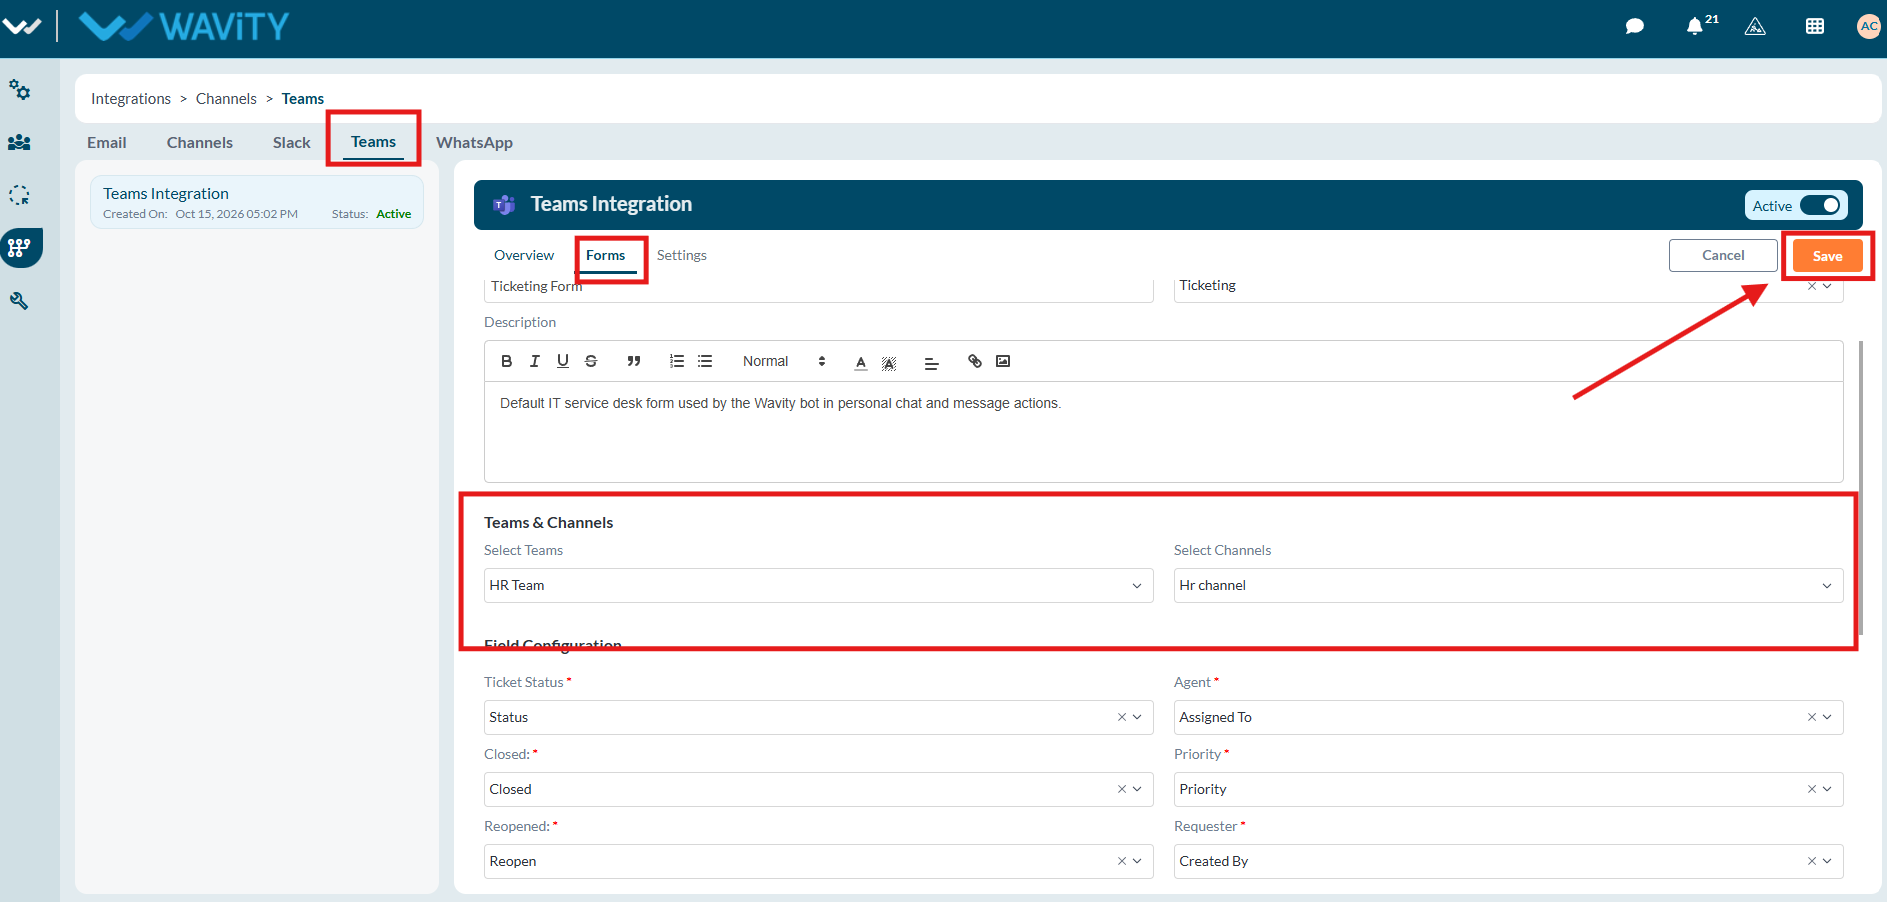
Step-4: Log in to Wavity, open the required form/template, and select the appropriate Team and Channel, save the changes. Once configured, the selected form will open whenever a user creates a ticket through that Microsoft Teams channel.
Creating Support Tickets via Microsoft Teams Chat:
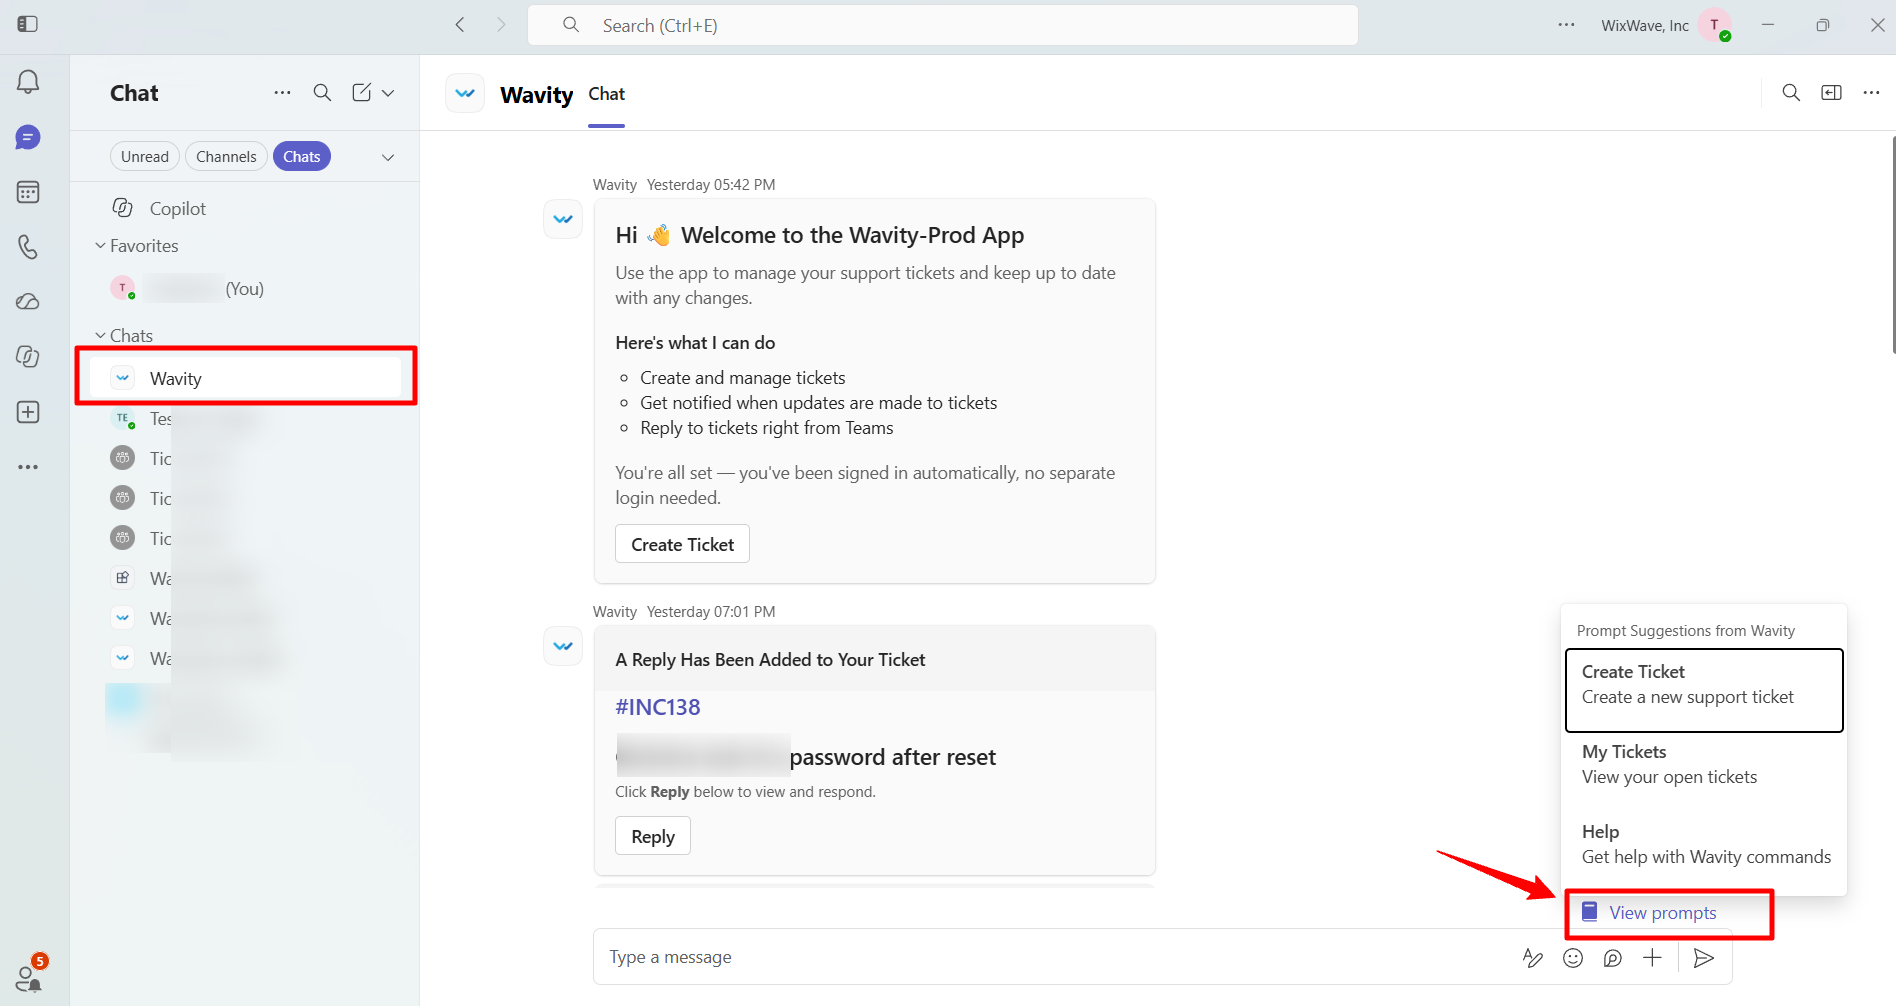
Step-1: Open the Wavity Chat and select View Prompts. Choose Create Ticket to create a new ticket, My Tickets to view your existing tickets, or Help for further guidance.
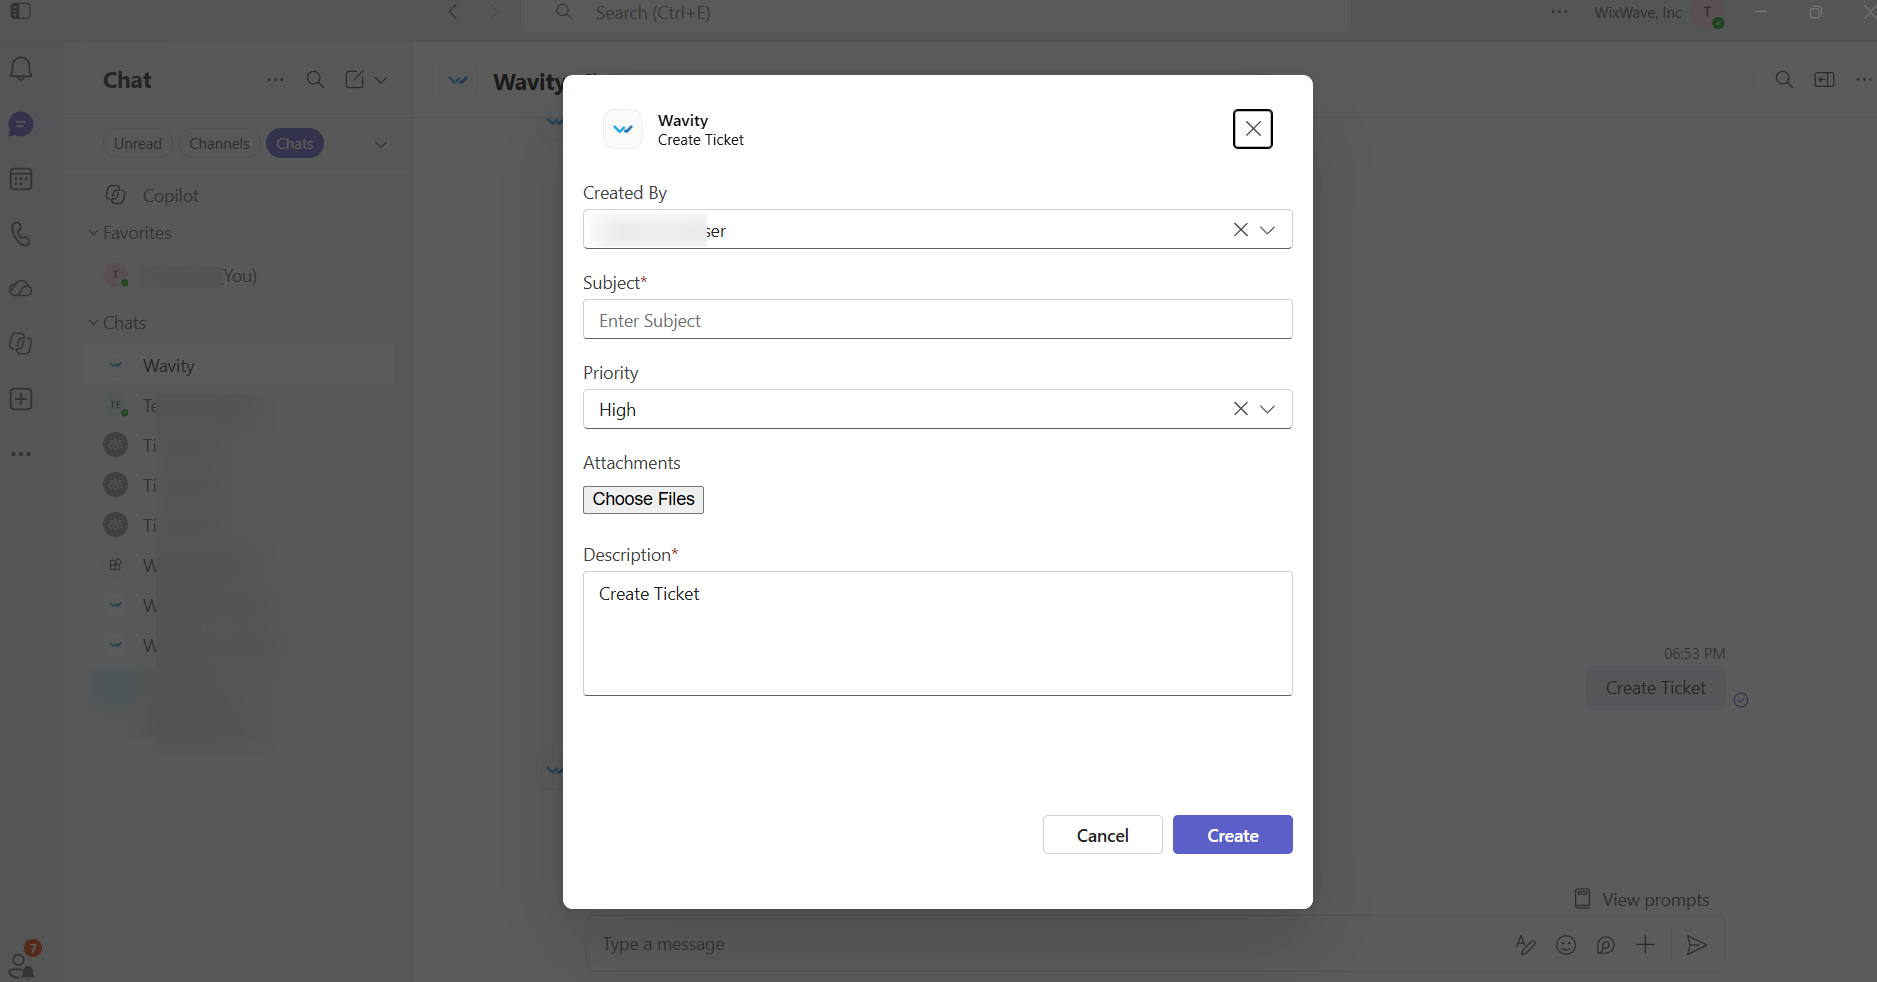
Step-2: Fill in the required form details and click Create to submit the ticket.
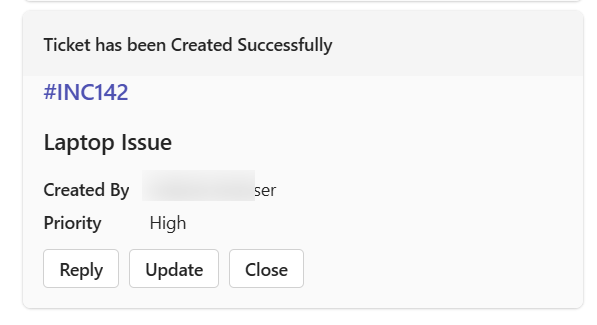
Step-3: After submitting the ticket, the user will receive confirmation with the ticket details.
Creating Support Tickets via Microsoft Teams Channel:
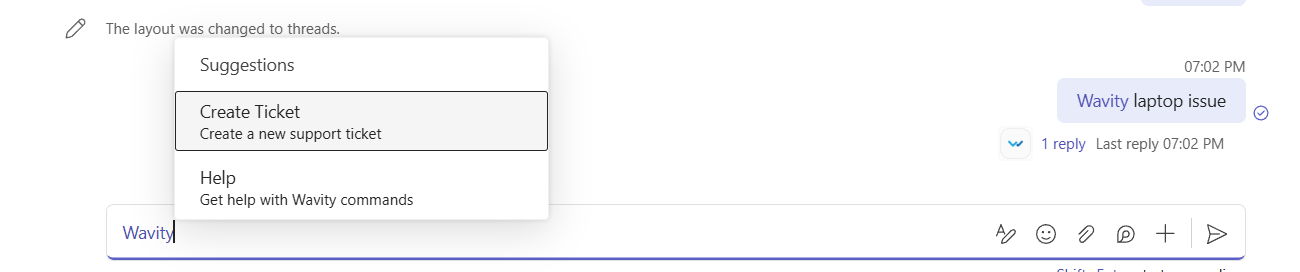
Step-1: Navigate to your preferred Microsoft Teams channel and type @Wavity to select the app.
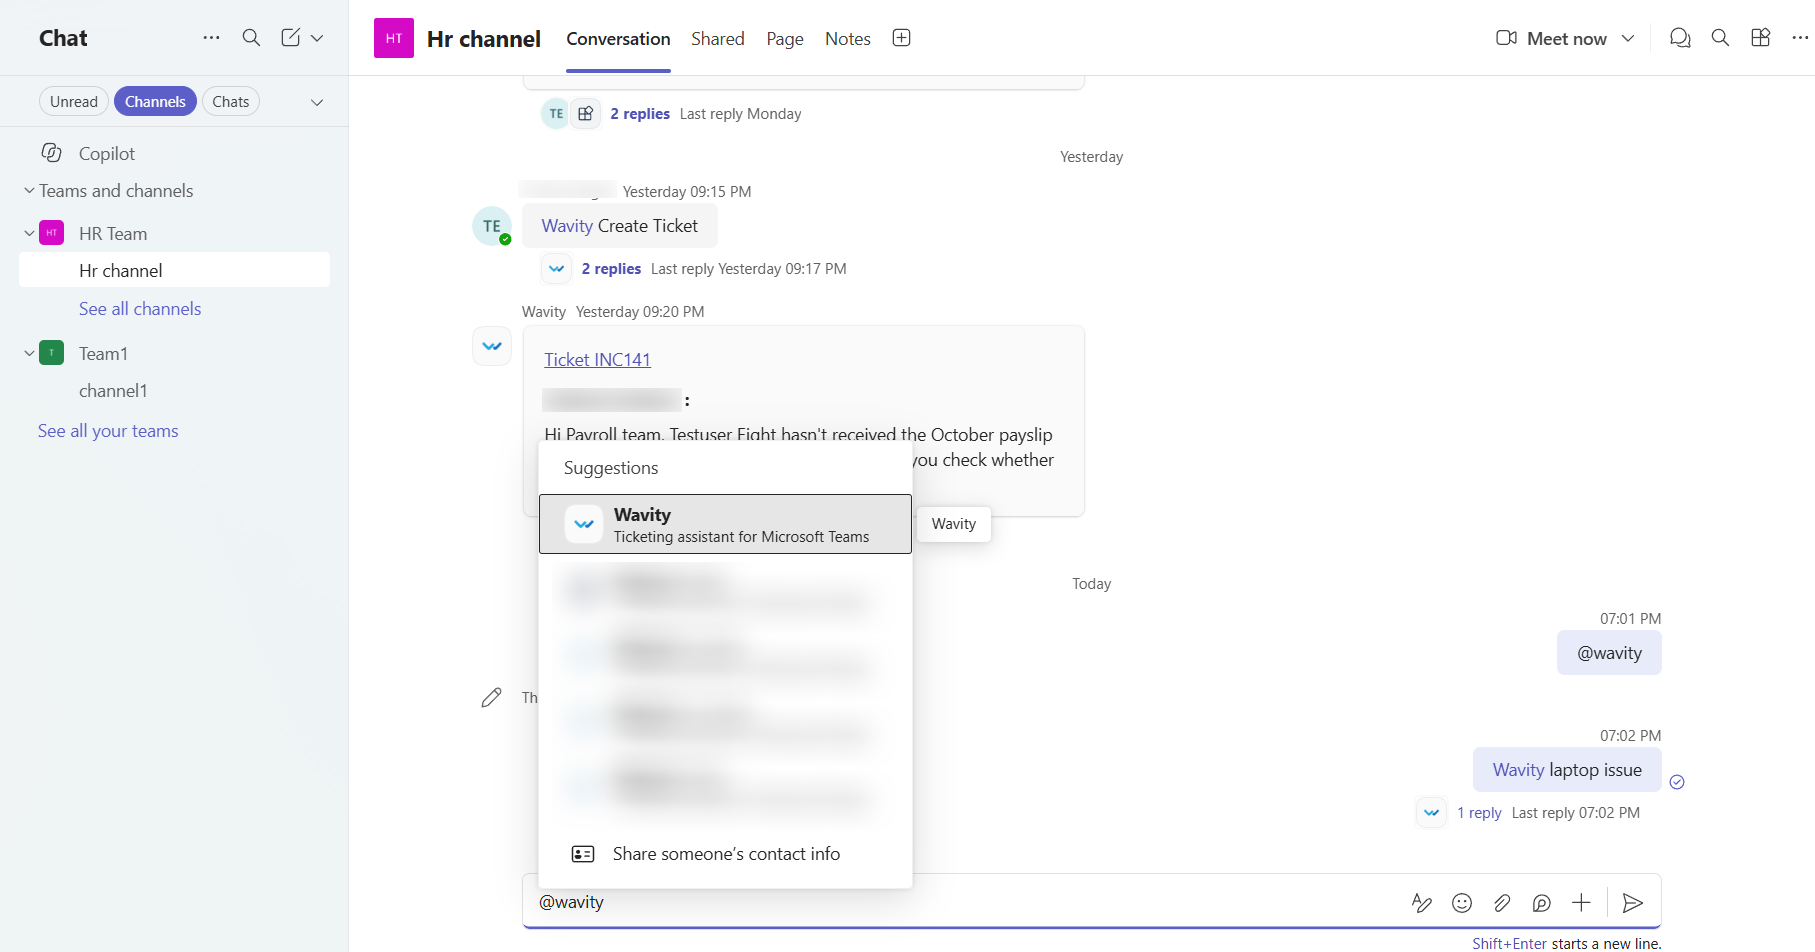
Step-2: Create Ticket or enter your issue directly in the message box. After you send the message, the bot will respond with a Create Ticket form button. Click the button, fill in the required details, and submit the form to create your ticket.
Creating Tickets from Microsoft Teams Chat Message Extensions:
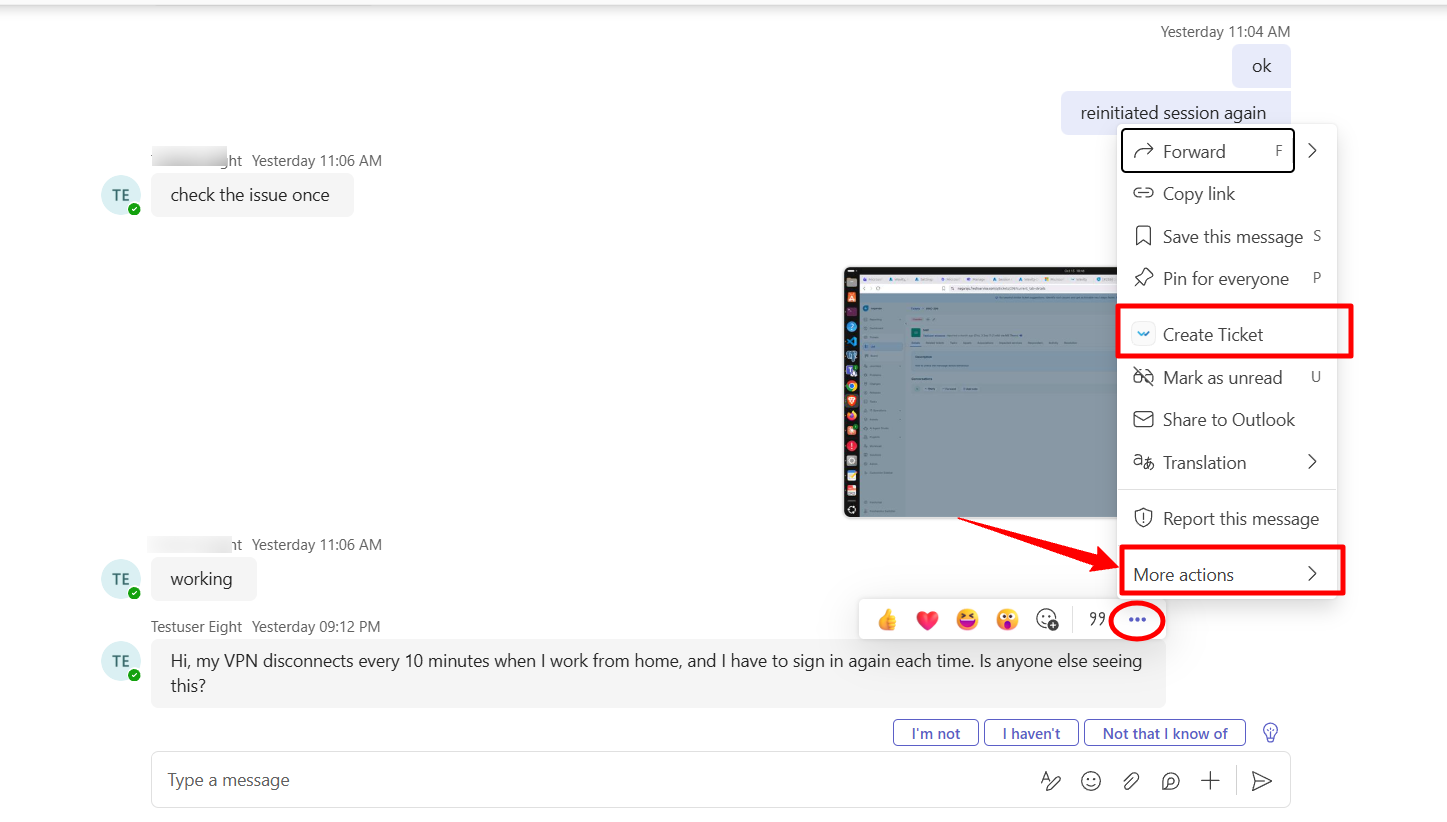
Step-1: Right-click or hover over any message in your chat and select Wavity- Create Ticket. If the option is not visible, click More actions and choose Wavity Bot- Create Ticket.
Viewing Support Tickets in Microsoft Teams Chat:
Step-1: Open Wavity Chat, navigate to View Prompts, and click My Tickets.
Step-2: You will see two options: Created by Me and Assigned to Me. Select your preferred option to view the corresponding ticket details.
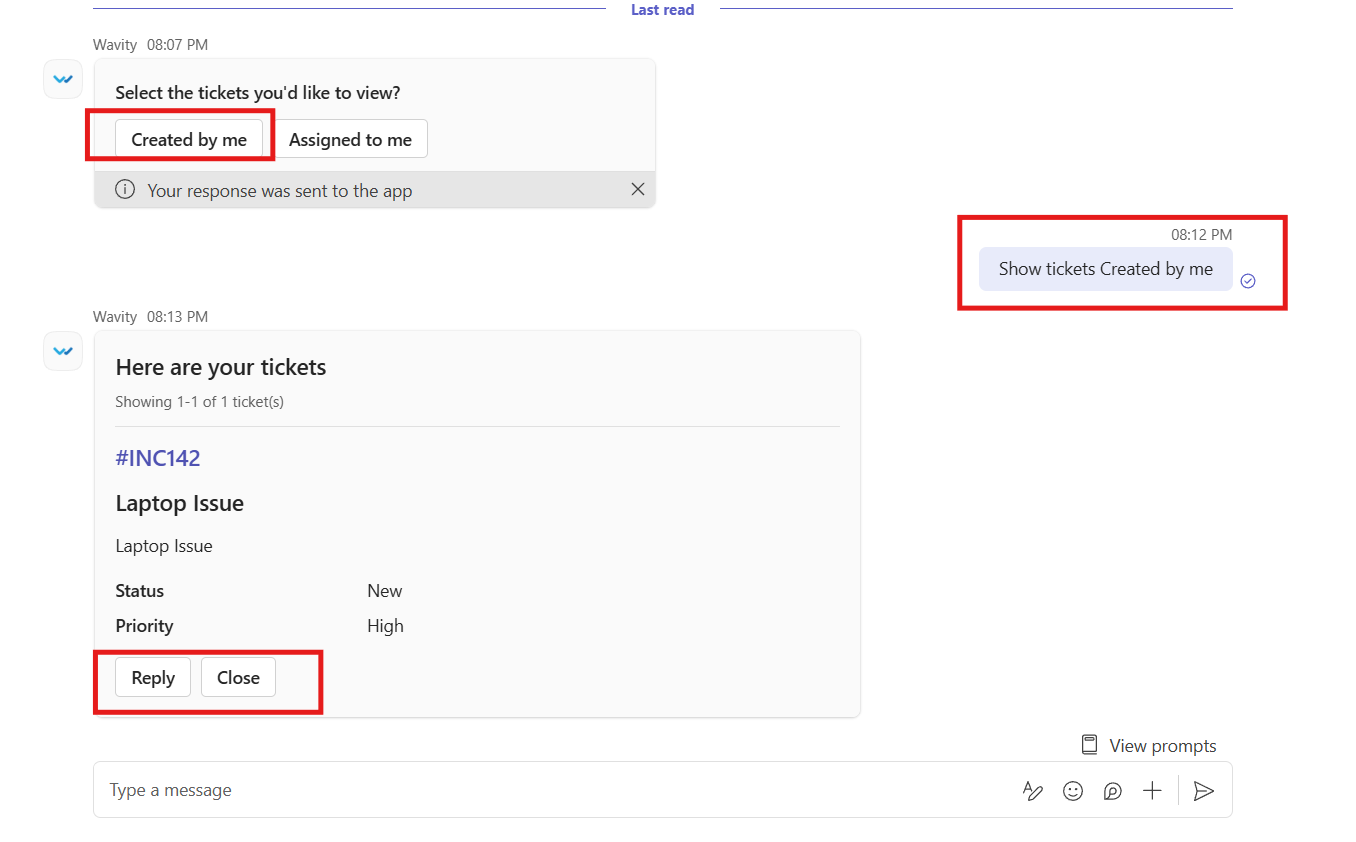
Step-3: To add a comment to an existing ticket, click Reply. If the issue has been resolved, click Close to close the ticket.