How to Enable SSO Using Google
How to Enable SSO Using Google
- Enabling SSO with Google Admin Console on the Wavity platform is a straightforward process that can be performed only by an administrator.
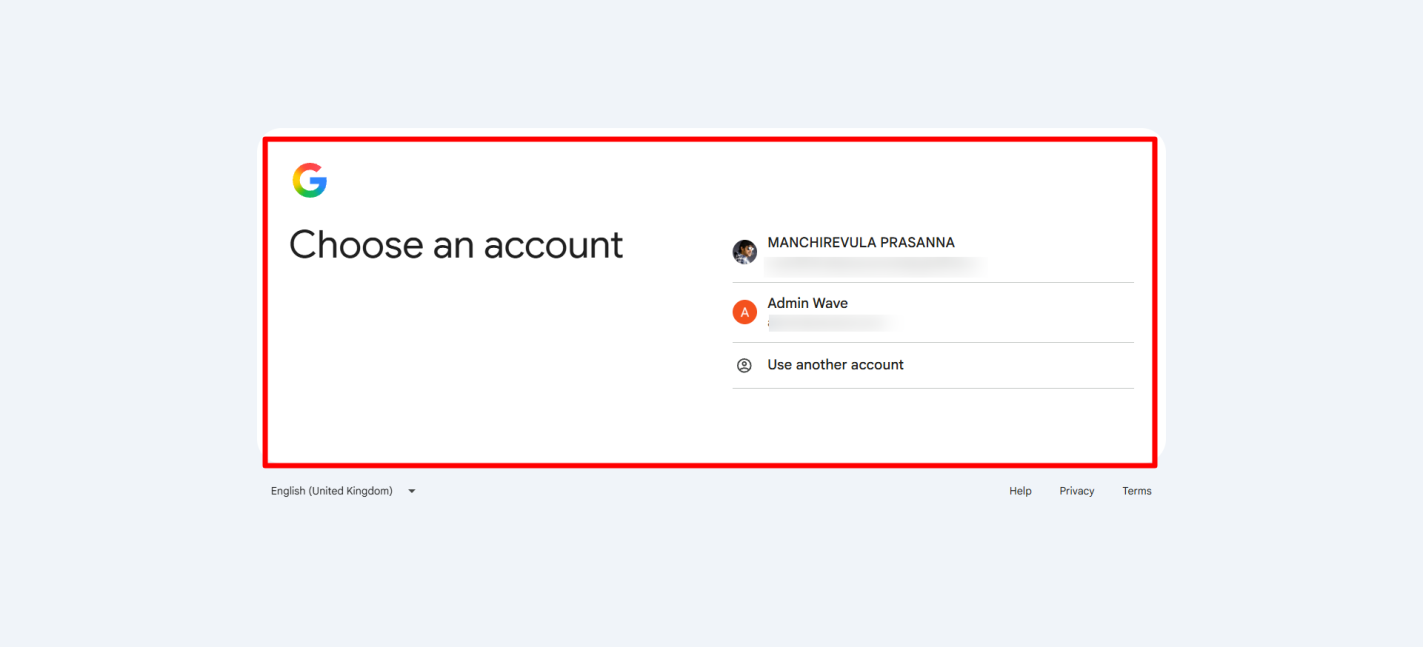
- Sign in to the Google Admin Console using an administrator account through the following link: https://admin.google.com/
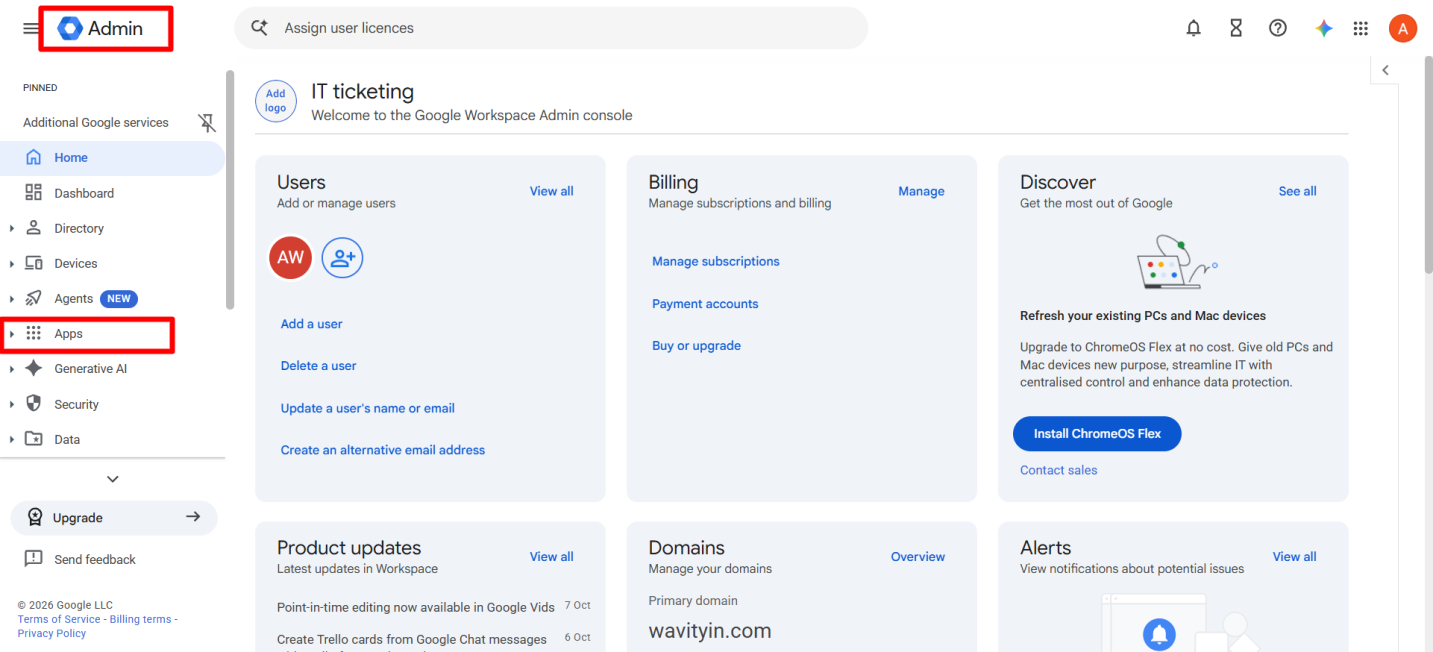
- From the Admin Console, select “Apps” from the left-hand menu.
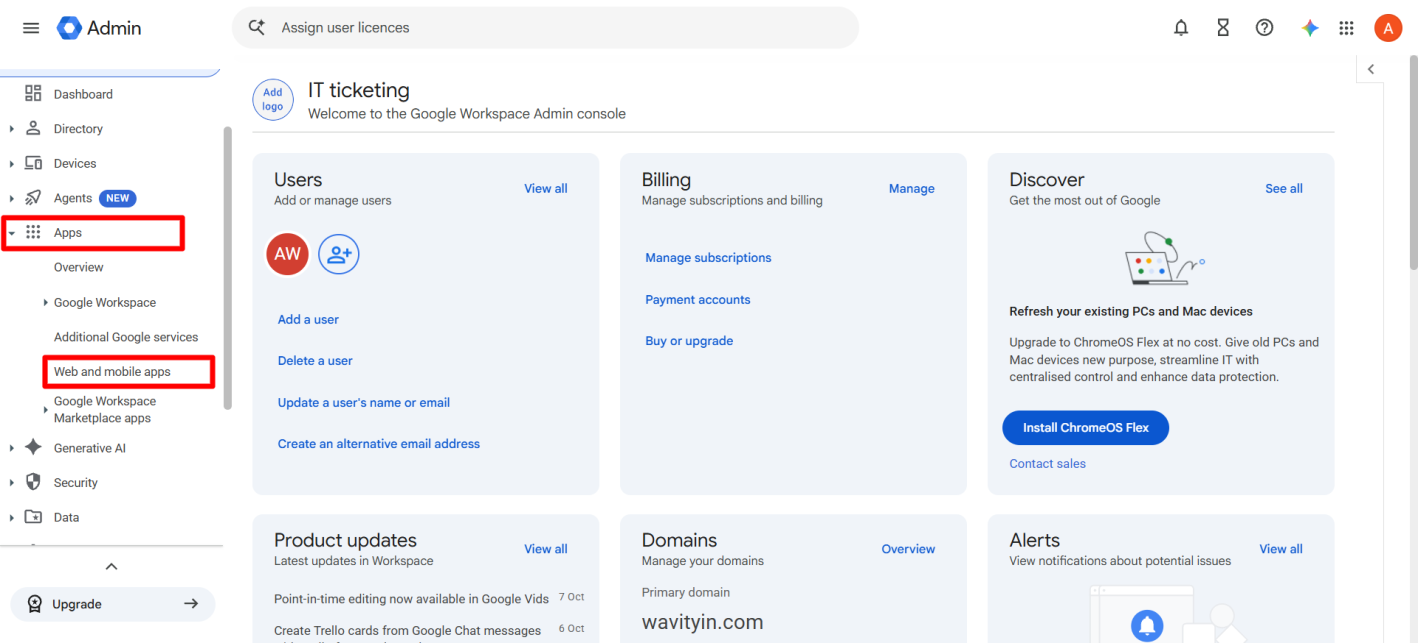
- Select “Web and mobile apps” from the Apps options.
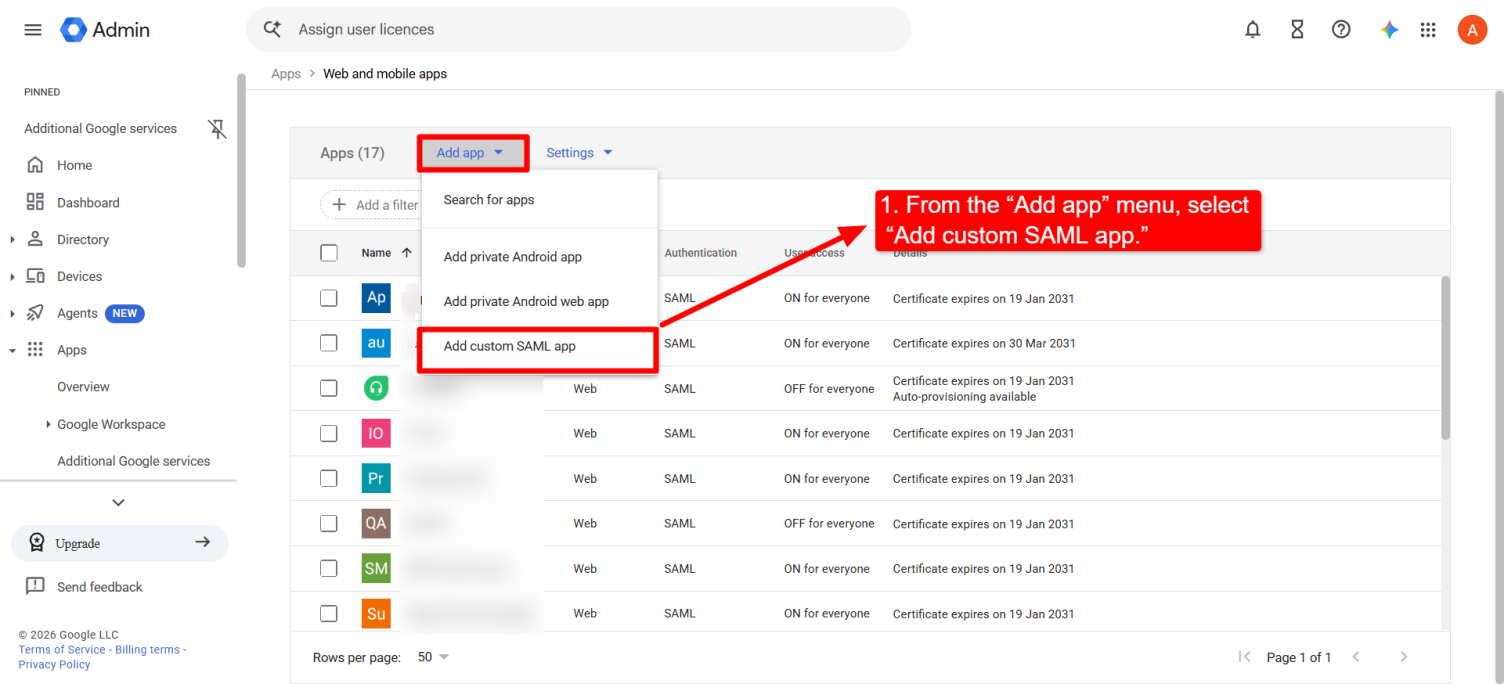
- After selecting “Web and mobile apps,” the Admin will be directed to the “All apps” page. From the “Add app” menu, select “Add custom SAML app.”
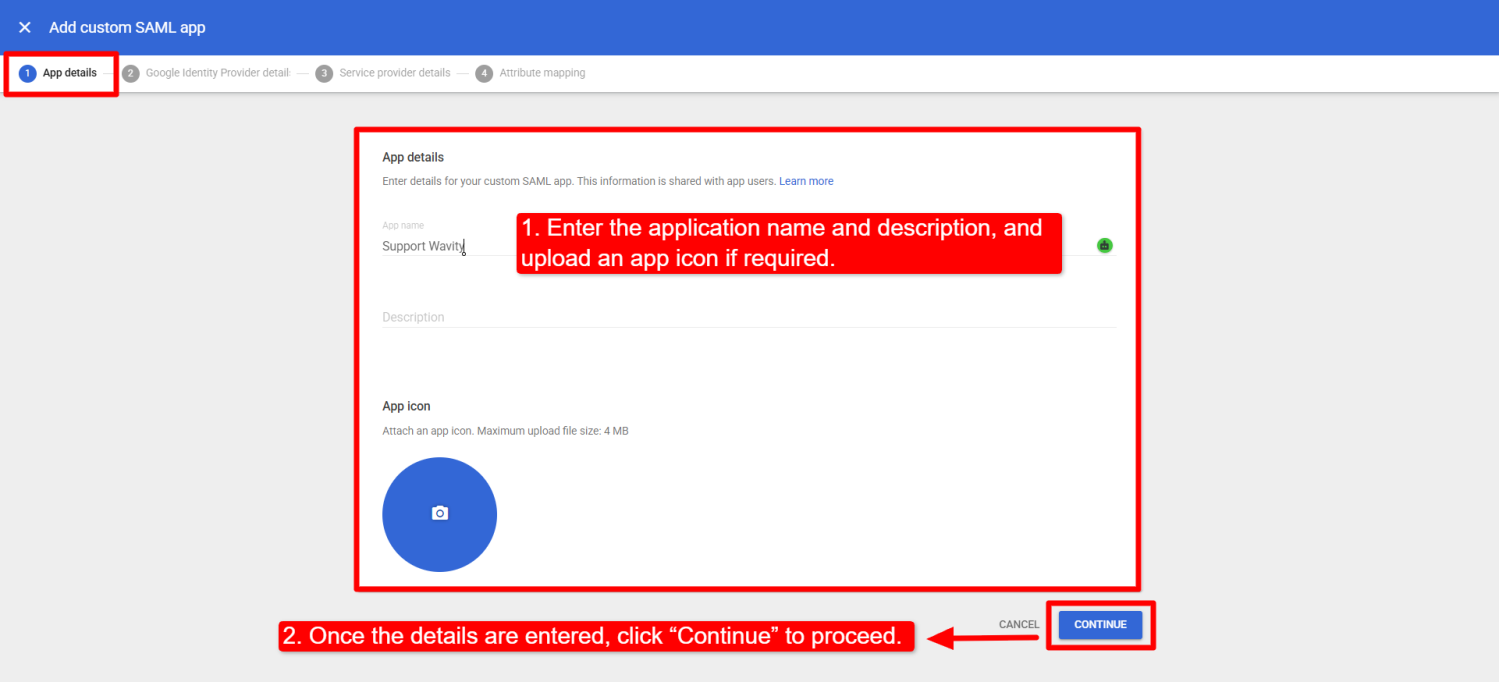
- The Admin will be directed to the “Add custom SAML app” page, where the application name and description are required. Adding an app icon is optional.
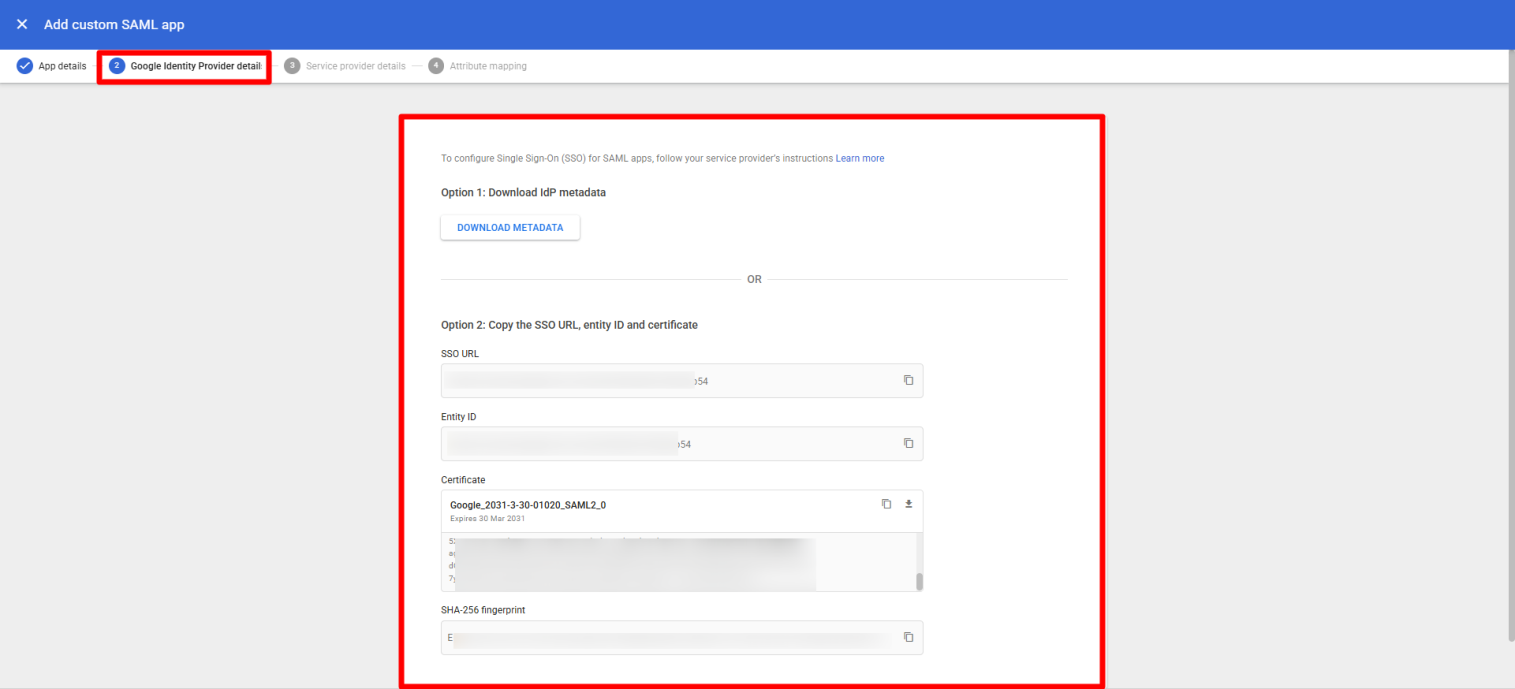
- The page will navigate to the “Google Identity Provider Details” section, where you can copy the required SAML details and enter them in the corresponding fields in Wavity
Steps to follow on the wavity platform
- Navigate to the Wavity platform and log in using administrator credentials, as only an administrator can enable SSO using google.
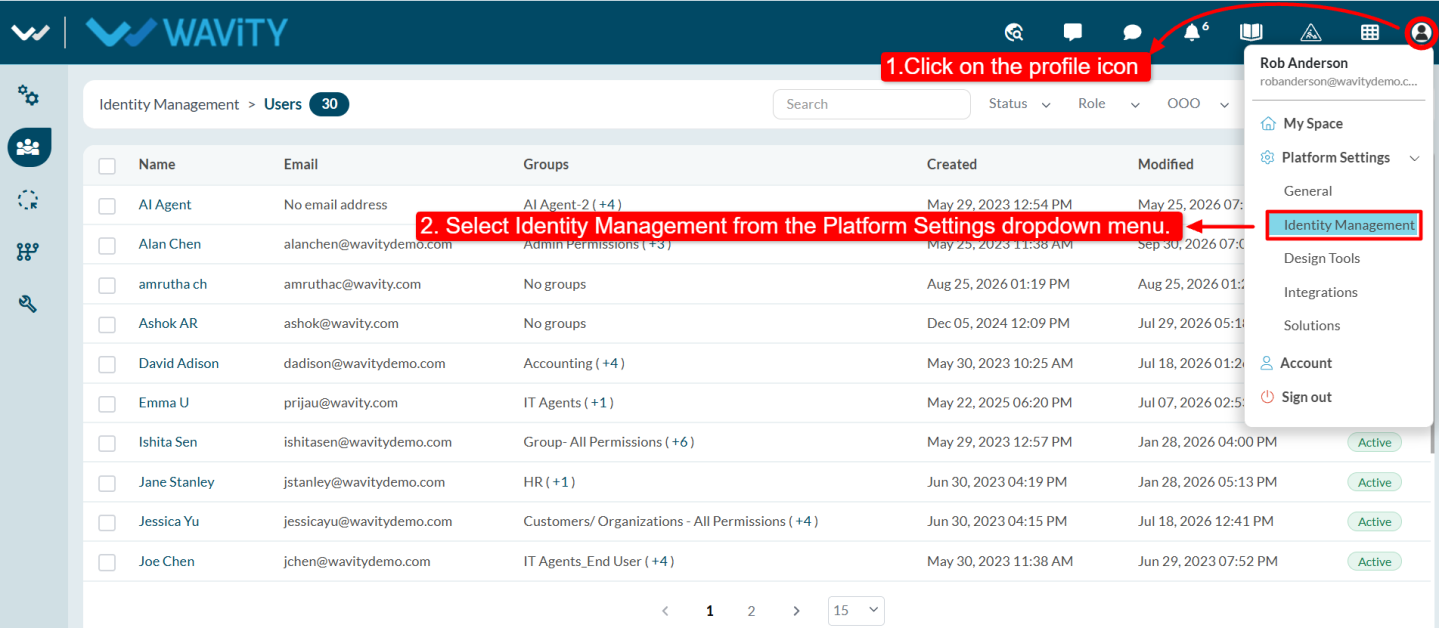
- Click on the profile icon select the Identity Management from the Platform Setting dropdown
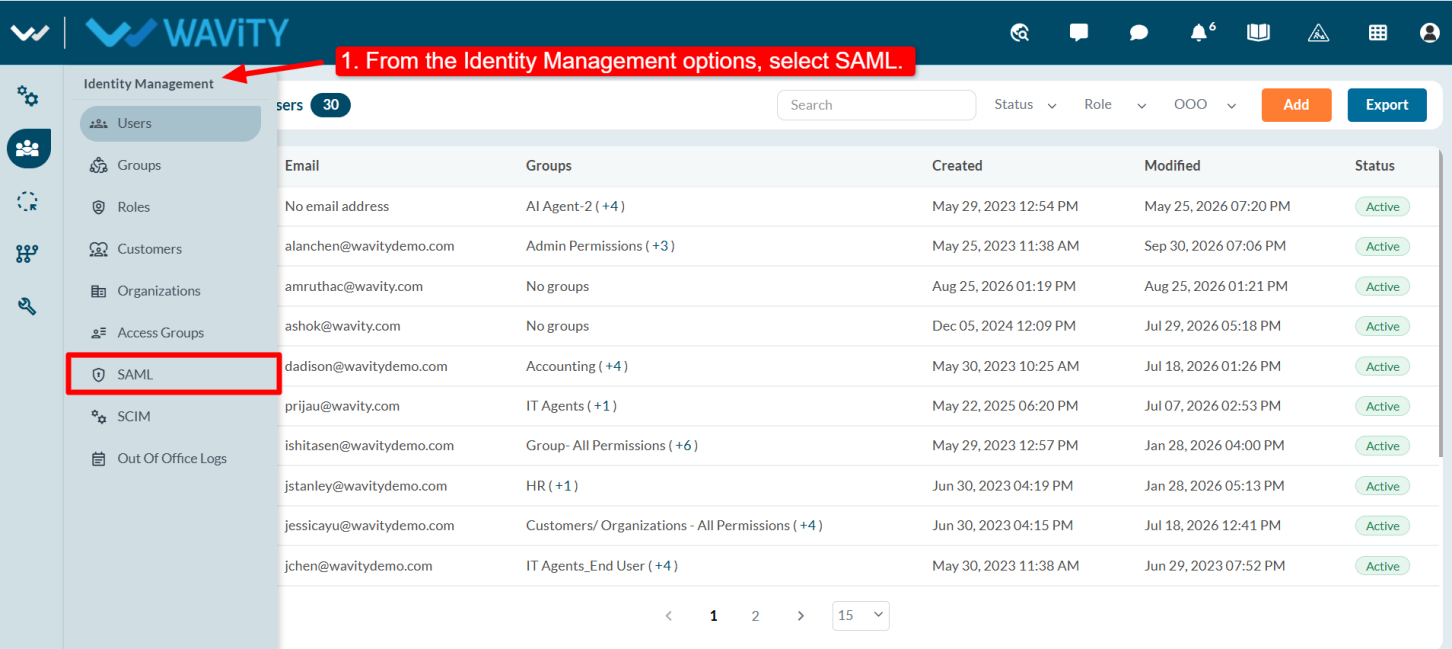
- From the Identity Management select the SAML option.
- Once you select the SAML option, the system navigates to the SAML page. Click Create to proceed.
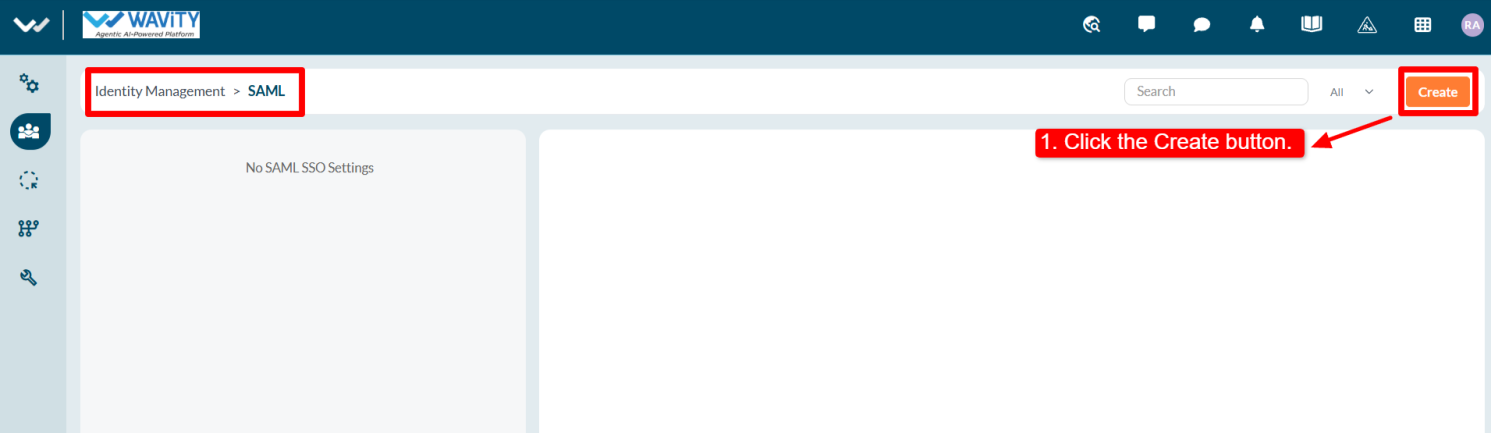
- In the “General Information” enter the Name and Description.
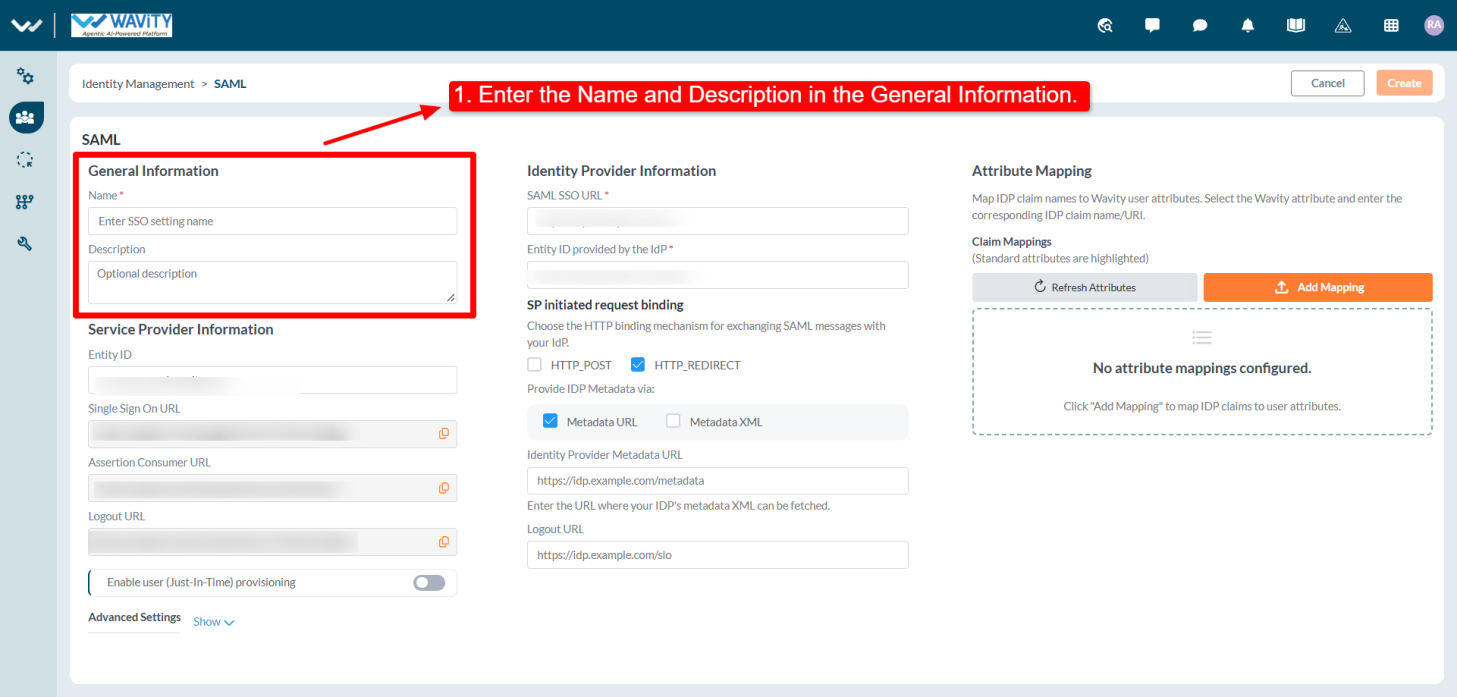
- In Google, download the metadata file and open it in Notepad. Copy the metadata content, then navigate to SP Initiated Request Binding in Wavity, select Metadata XML, and paste the copied XML content.
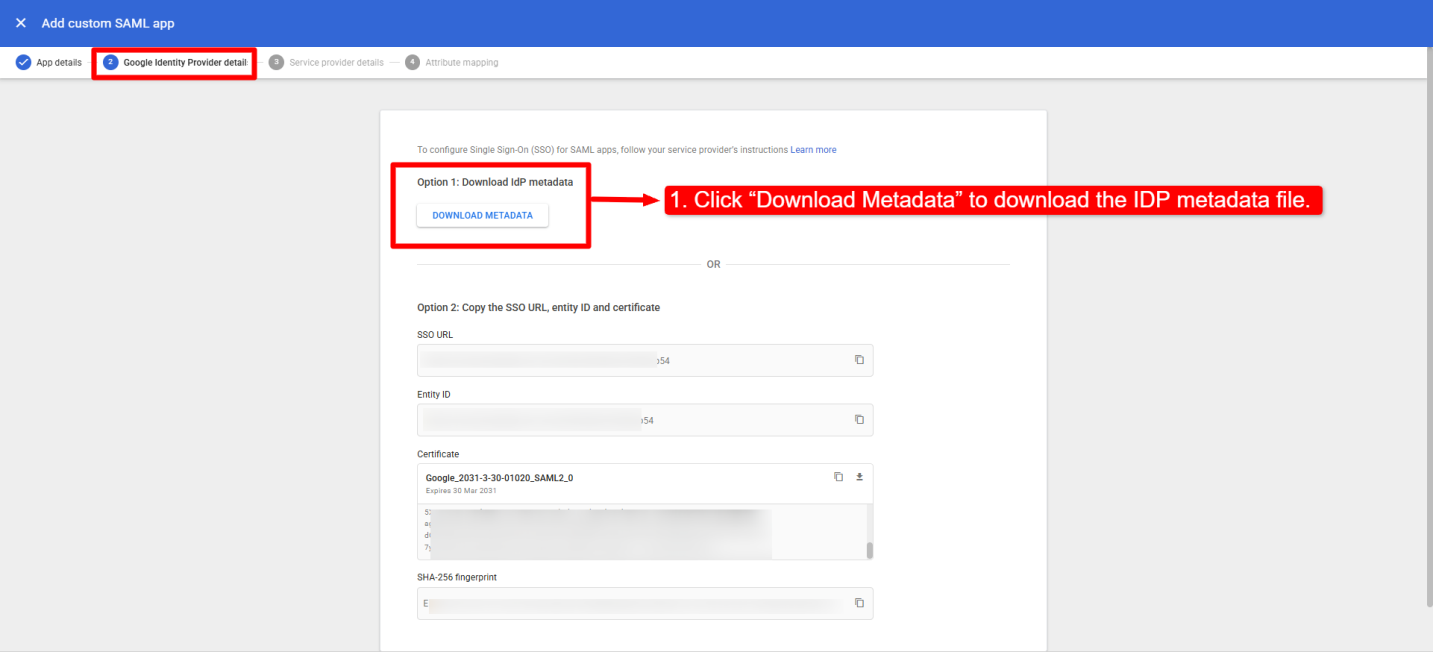
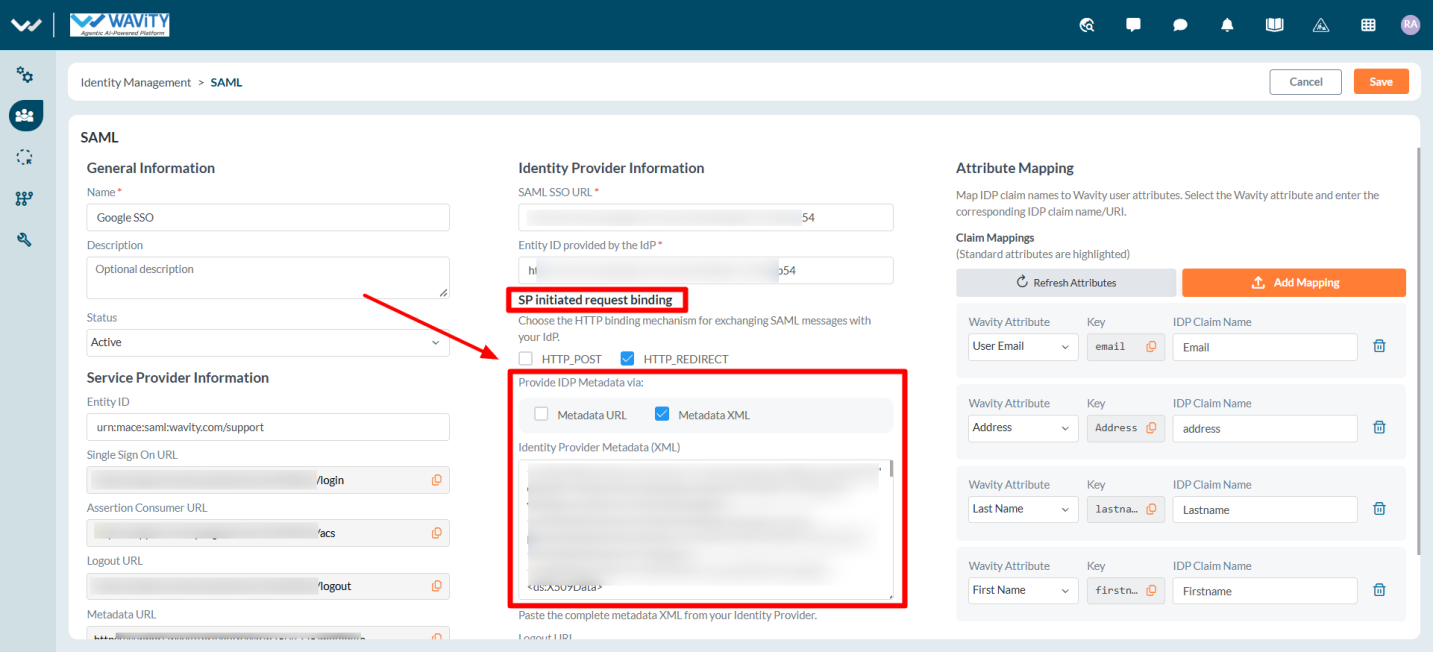
- Copy the SSO URL and Entity ID from Google admin console and enter them in the corresponding “SAML SSO URL” and “Entity ID provided by the IdP” fields under “Identity Provider Information” in the Wavity Platform
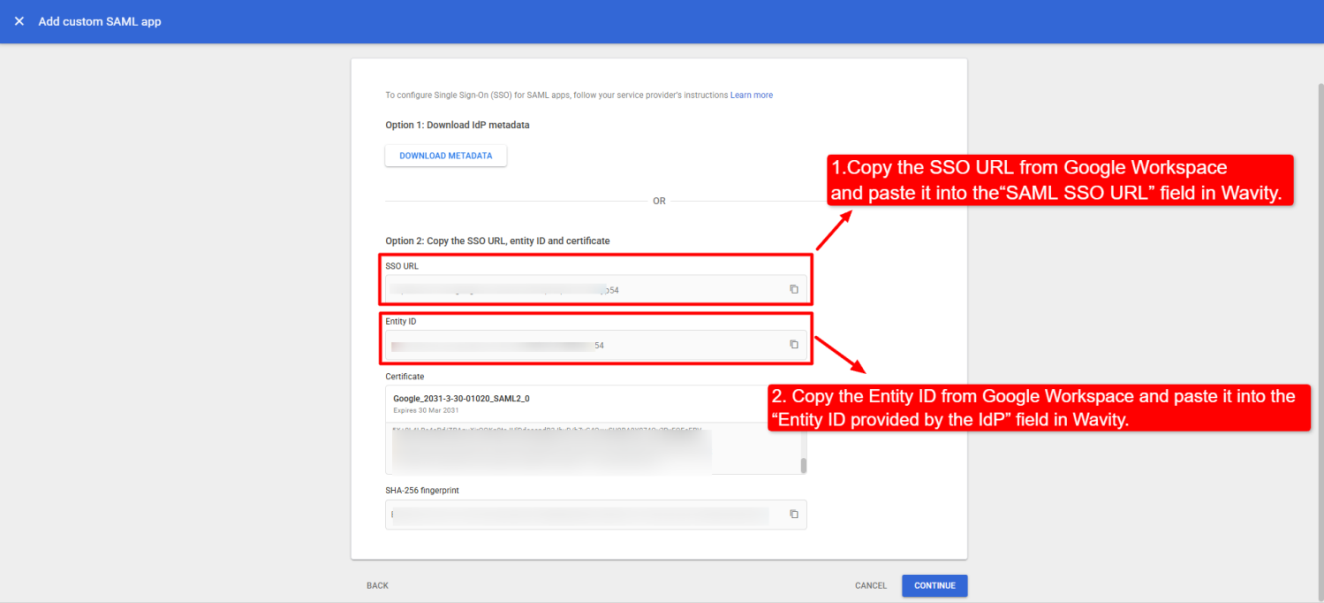
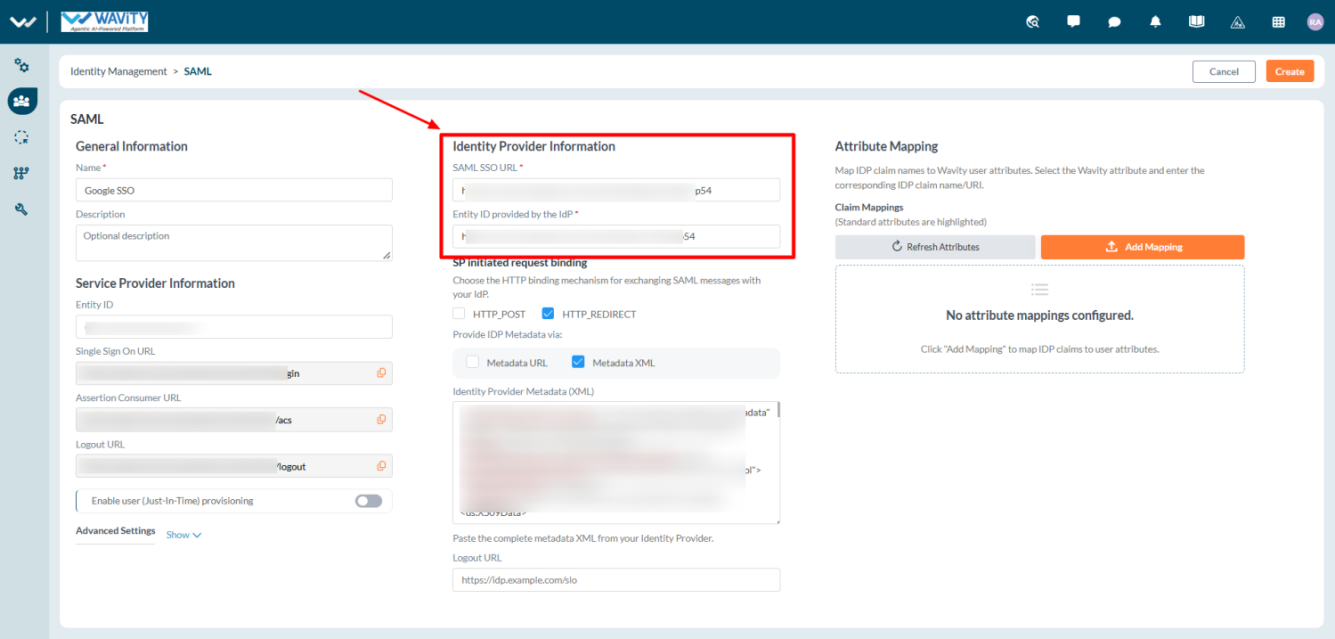
- After entering the required SAML details in Wavity platform, return to Google Workspace and click “Continue.”
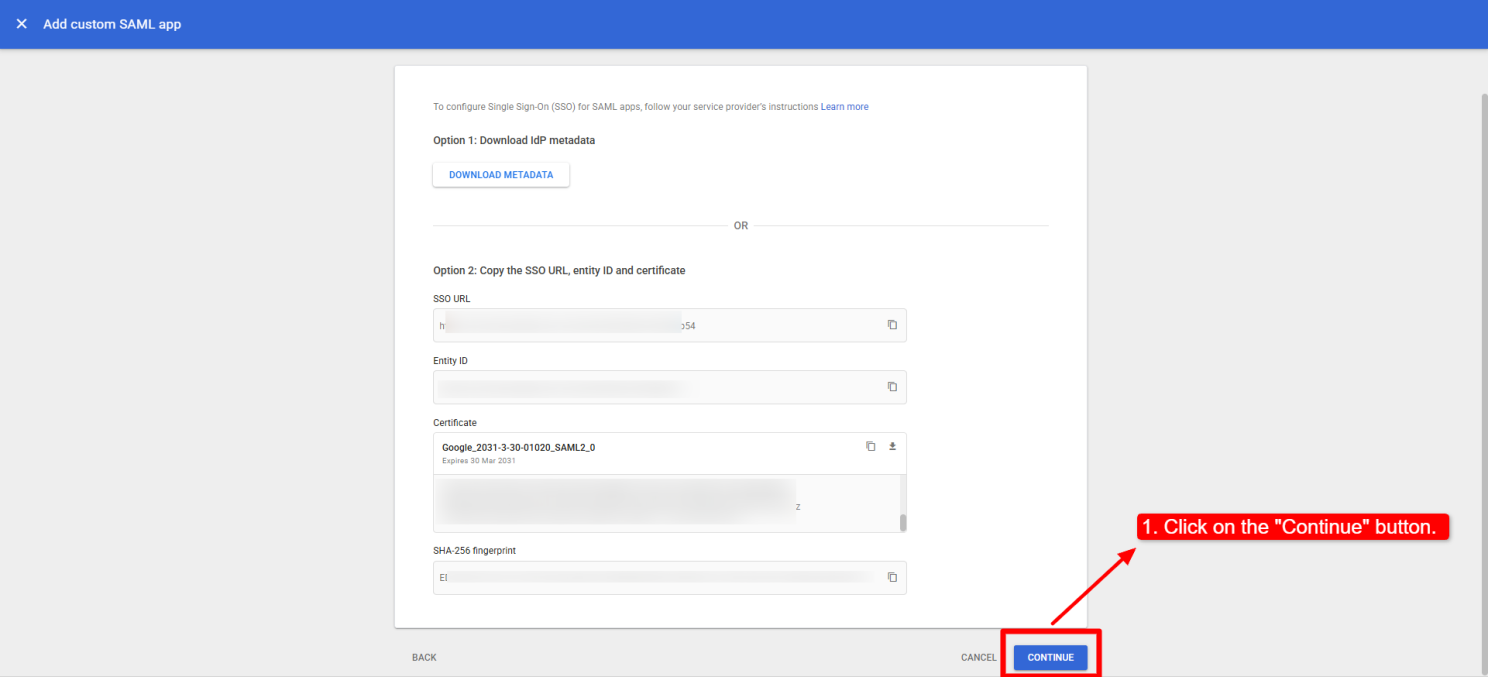
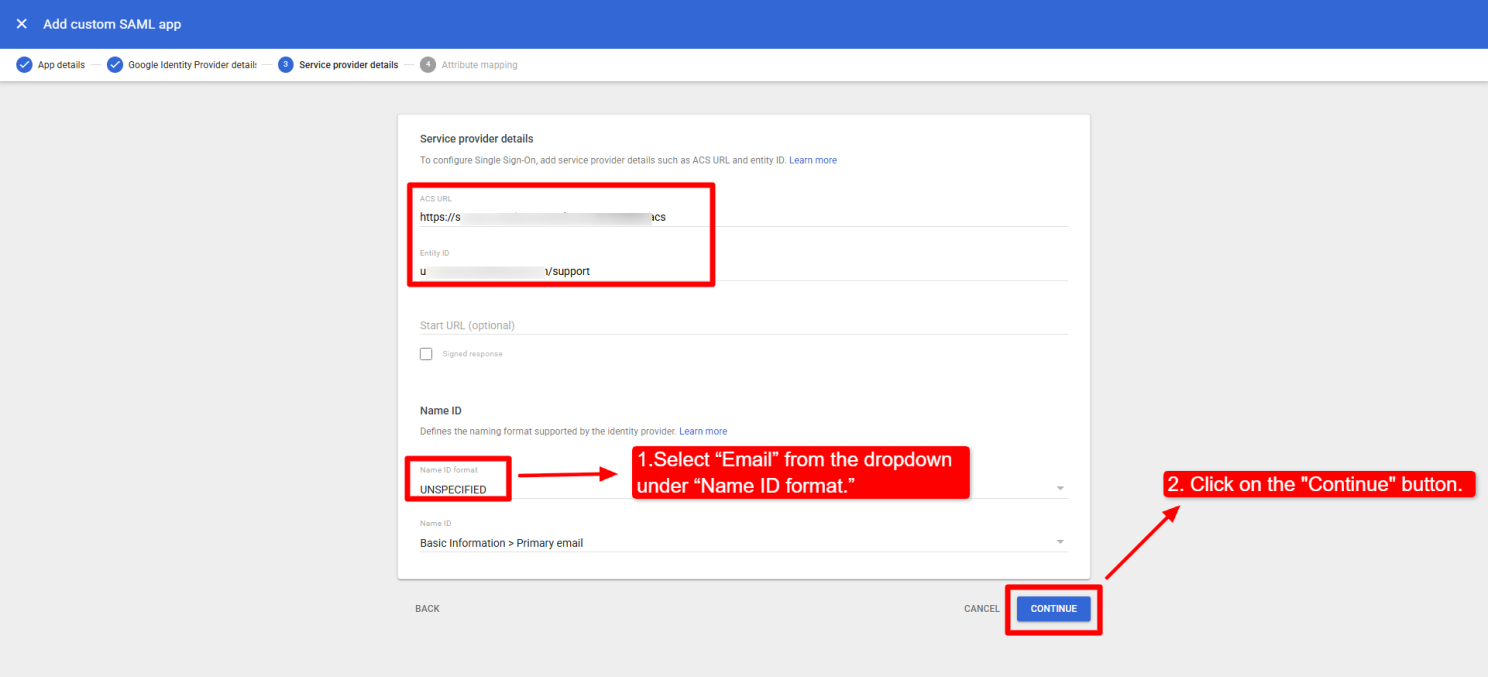
- The page will navigate to the “Service Provider Details” section, where the Admin needs to enter the required information from Wavity platform.
- In Wavity, copy the “Assertion Consumer URL” from the “Service Provider Information” section and paste it into the “ACS URL” field in Google.
- Copy the Entity ID from Wavity and paste it into the “Entity ID” field in Google. Admin can optionally append a unique identifier to the Entity ID using “/<yourorganizationname>”, without adding any spaces. Example: Entity ID/<yourorganizationname>
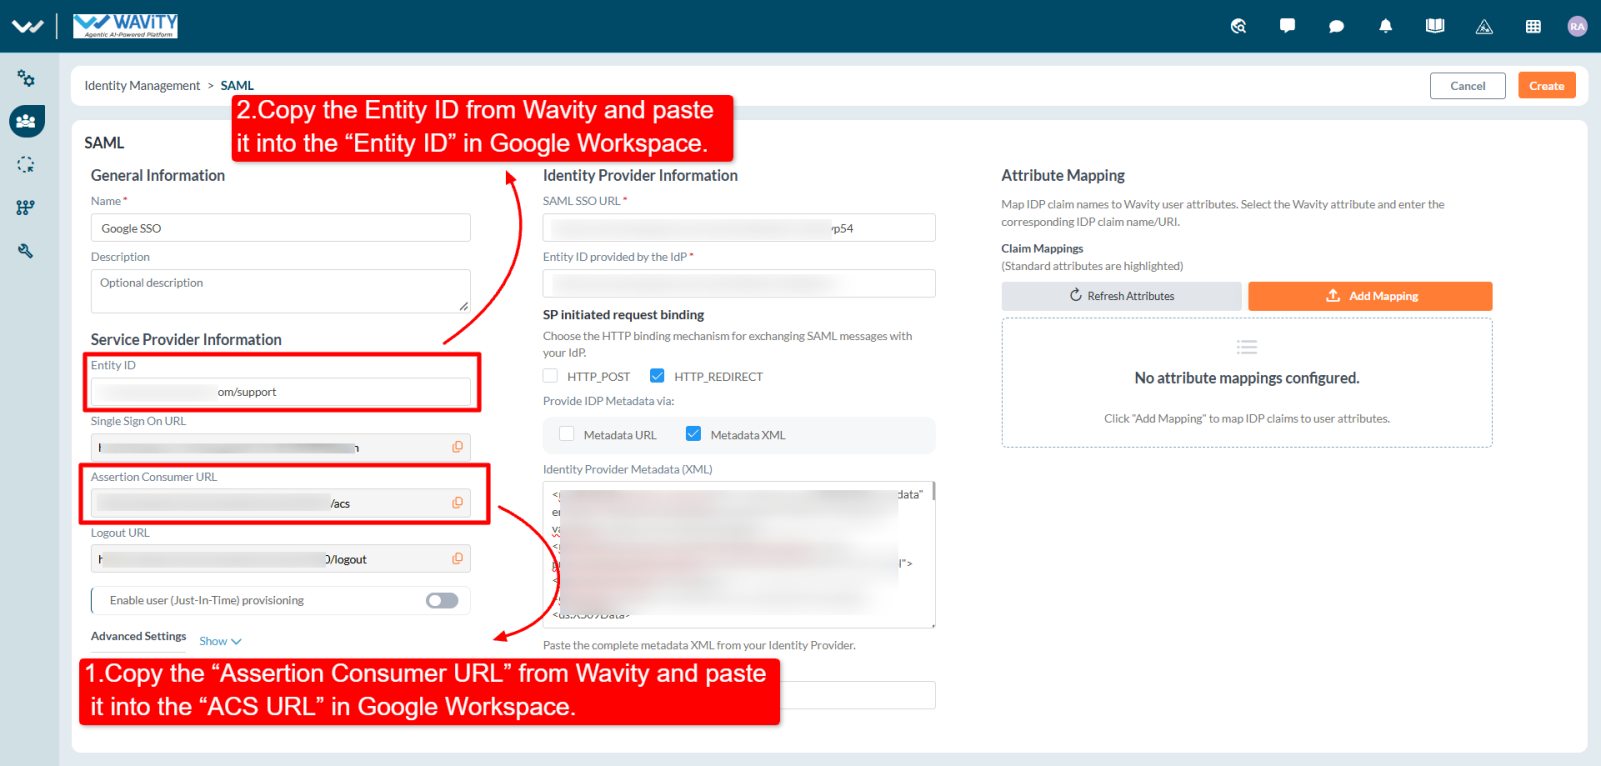
- After pasting the IDs and URL, click the Continue button.
- Note: Ensure that “Email” is selected from the “Name ID format” dropdown.
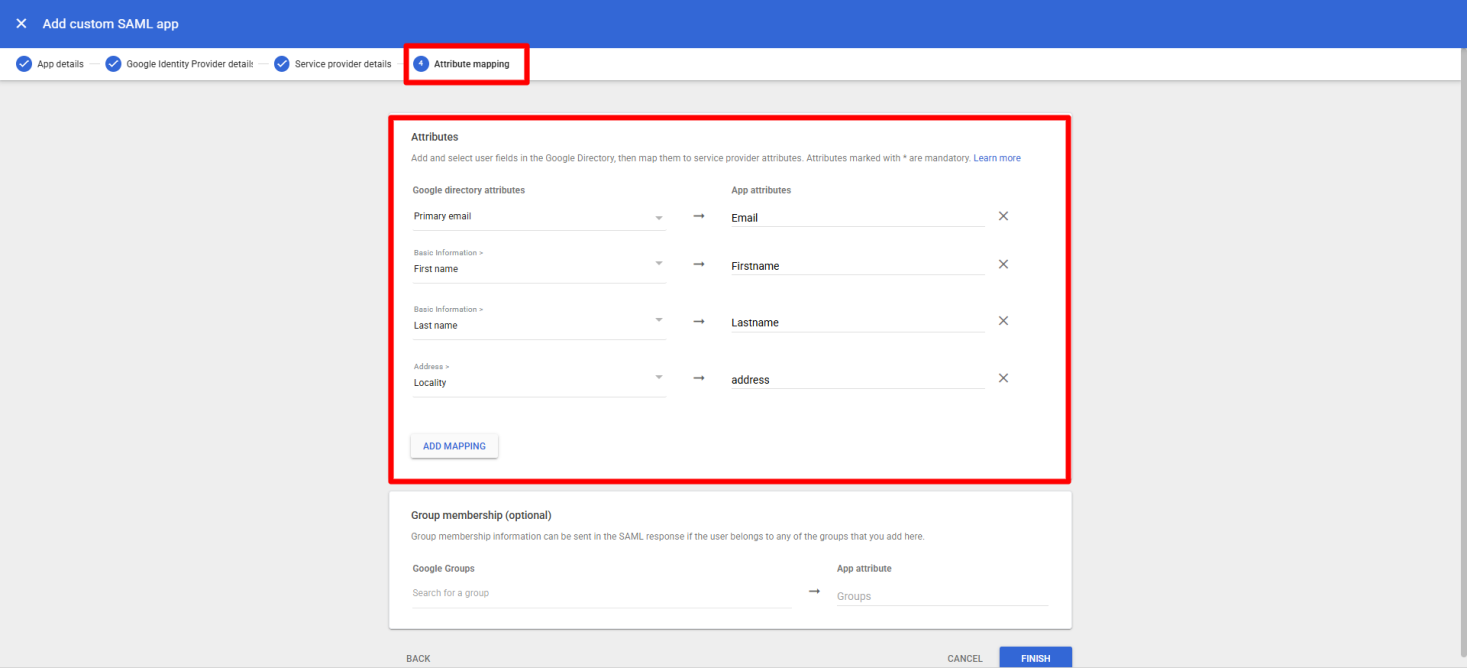
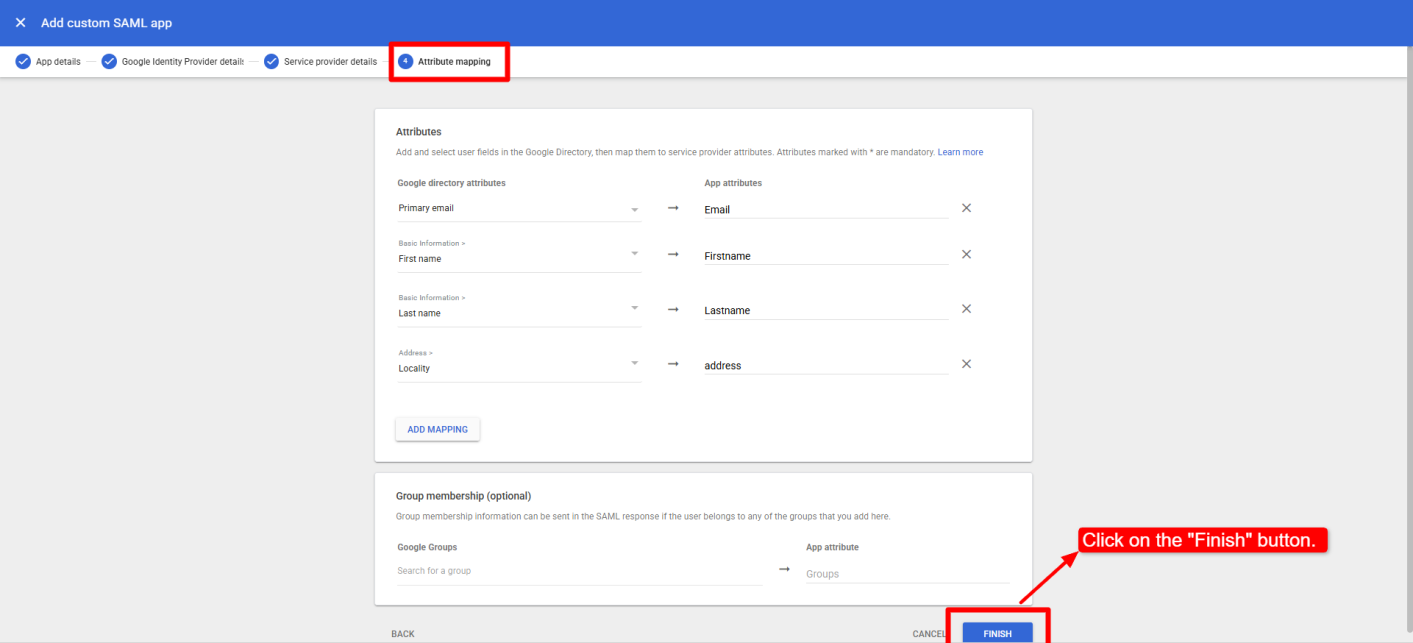
• Once the admin clicks the Continue button, the page will navigate directly to the Attributes section.
• Under the “Attributes” section, select the required Google Directory attributes from the dropdown.
• Map each Google Directory attribute to the corresponding App attribute by specifying the attribute name.Configure the following attribute mappings:
• Primary email → Email
• First name → Firstname
• Last name → Lastname
• Locality → address
• To add additional attribute mappings, click “ADD MAPPING” and select the required Google Directory and App attributes
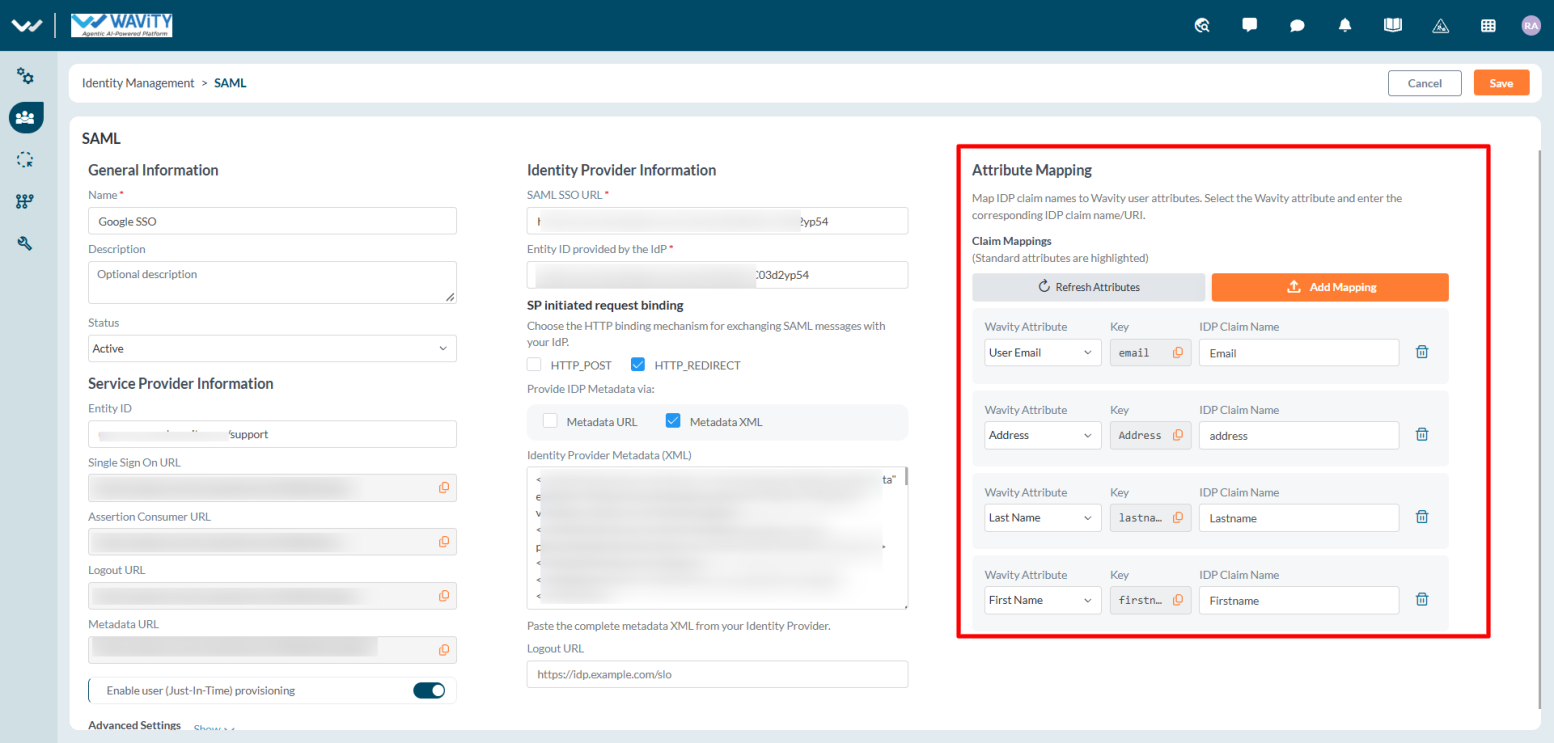
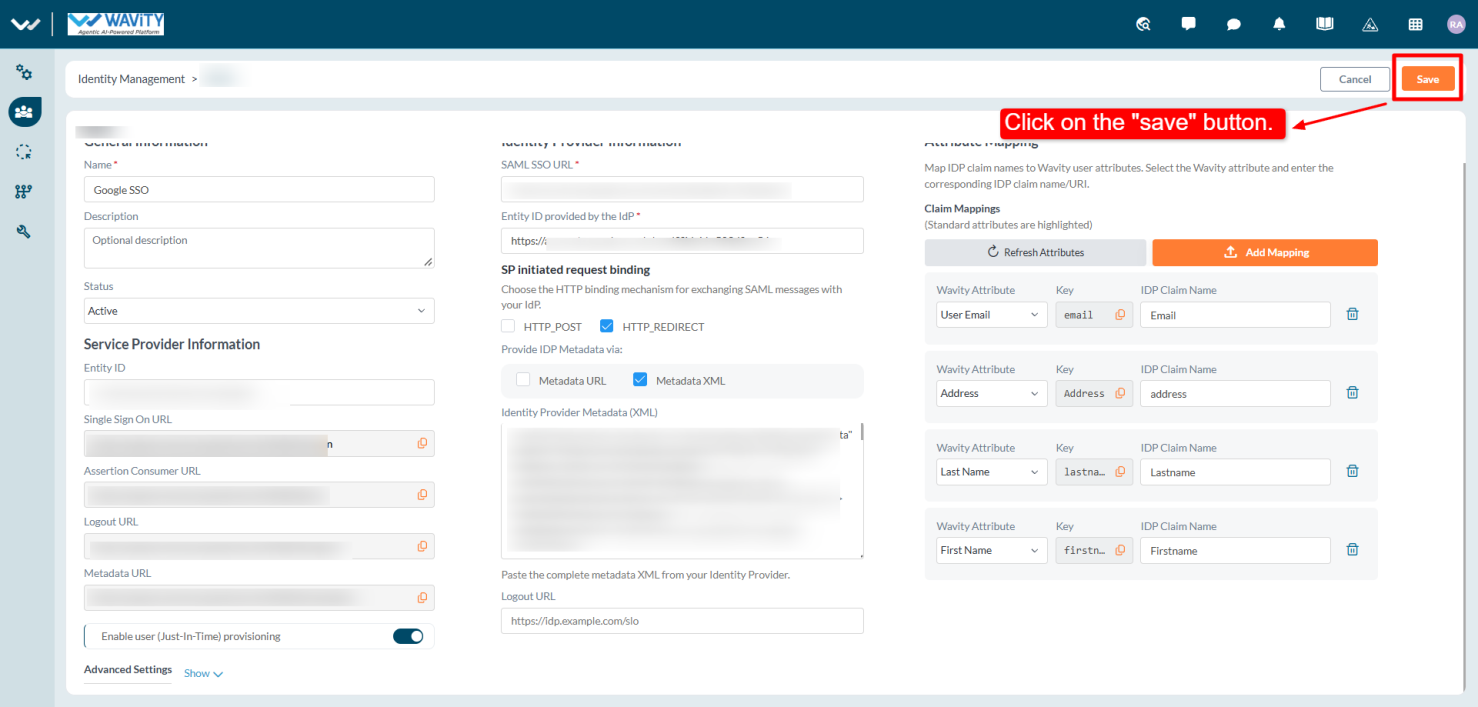
- Copy the App Attributes from google and paste them into the IDP Claim Name field under Attribute Mapping in the Wavity platform. Make sure to select the appropriate Wavity Attribute from the dropdown list.
- Admin should enable Just-In-Time (JIT) Provisioning, which allows Wavity to automatically create a user account when the user logs in through SSO for the first time.
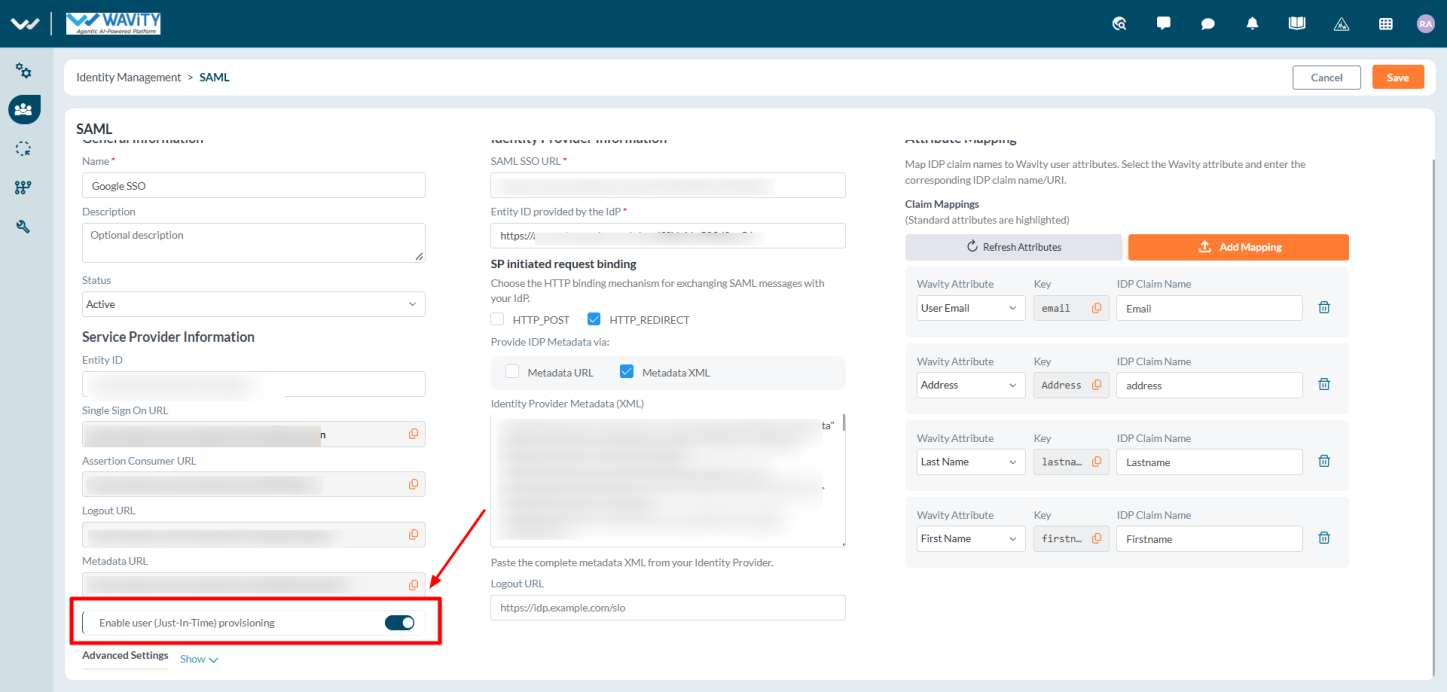
- Ensure that all the links in the Service Provider Information section match the corresponding links configured in google workspace.
- Now click on the Create button.
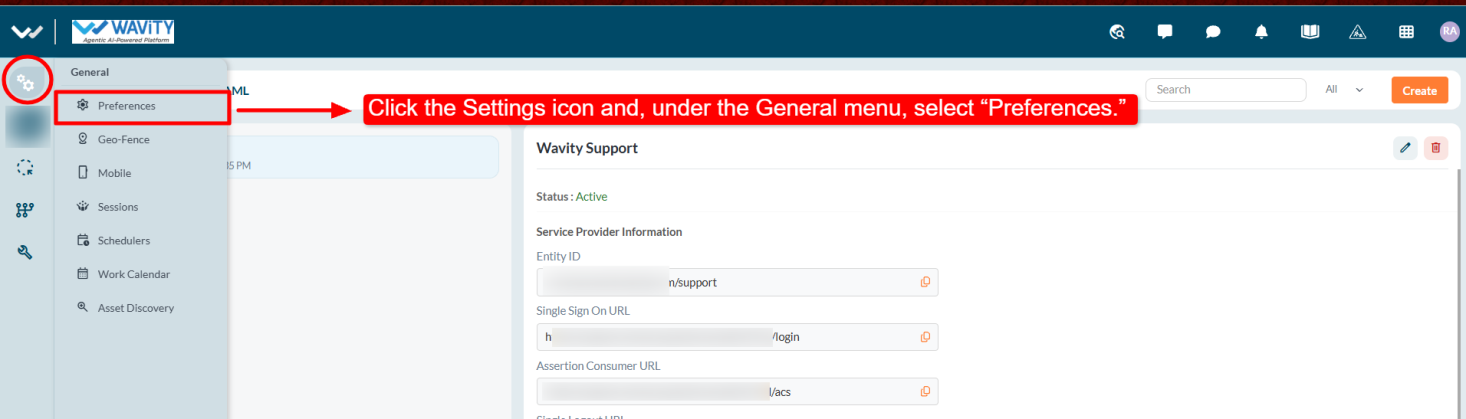
- After saving, you will be redirected to the SAML page. On the left side, click the General Settings icon and select Preferences.
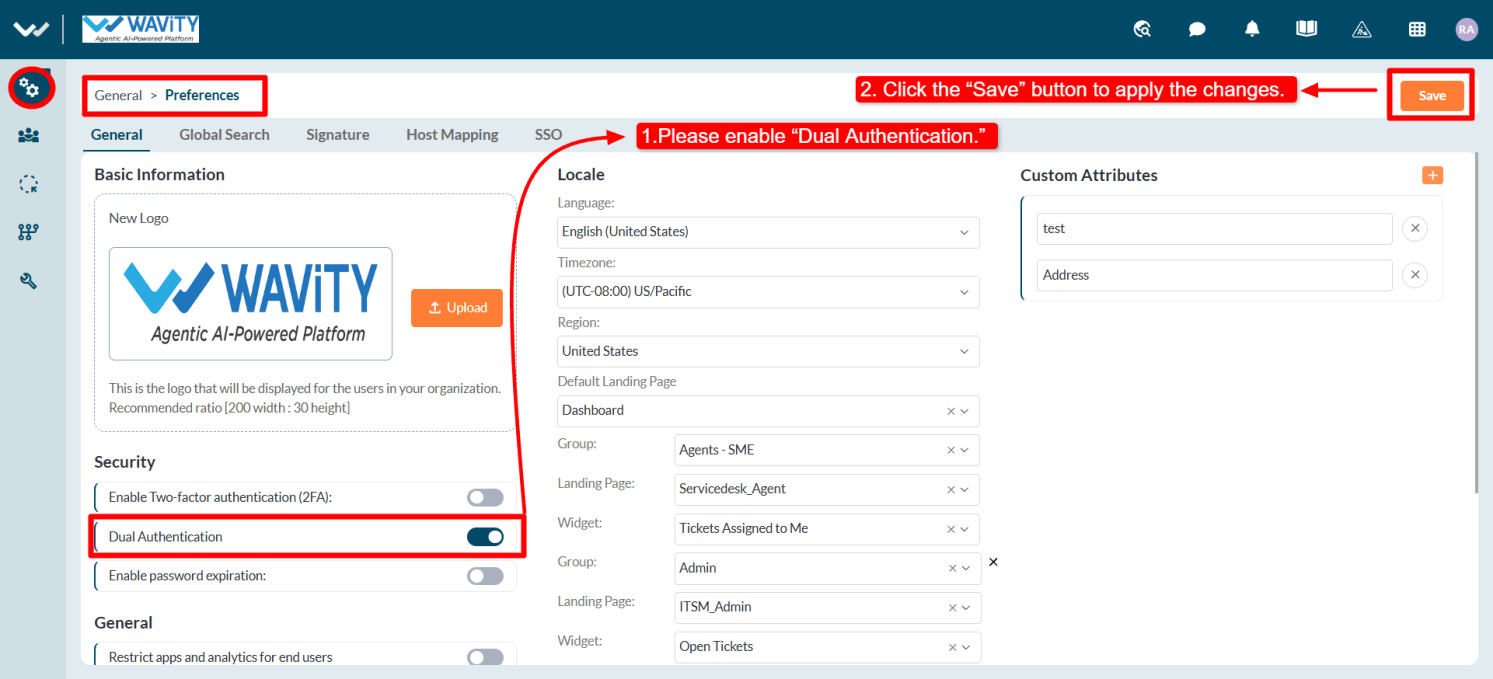
- Under Preferences, go to the General tab and enable Dual Authentication and click save to apply changes
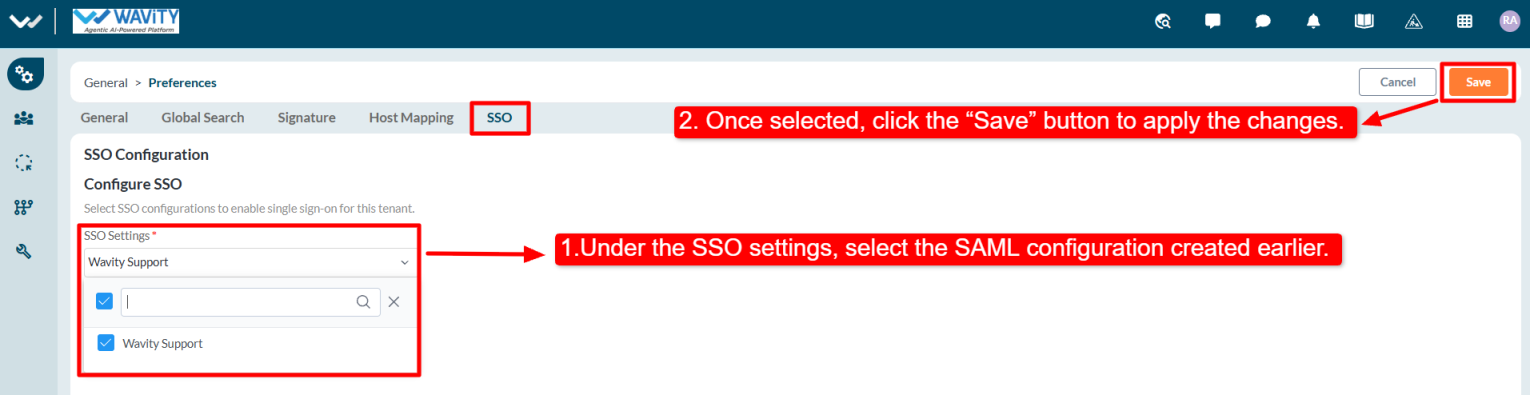
- Select the SSO tab. Under SSO Configuration, choose the previously created SAML configuration from SSO Settings, then click “Save” to apply the changes.
- Once you copy the App attributes from Google Workspace and paste them into the “IDP Claim Name” fields in Wavity, click “Finish” to complete the configuration in google admin console
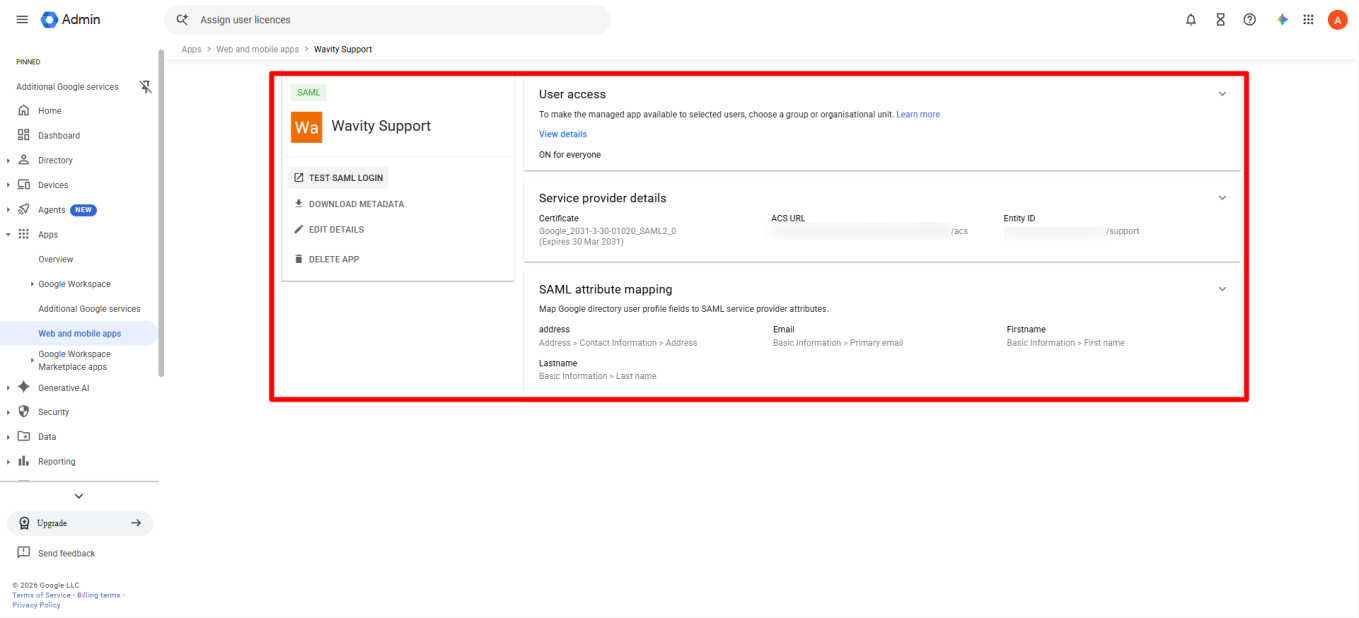
- The Custom SAML app will be created, and you will be automatically redirected to the app.
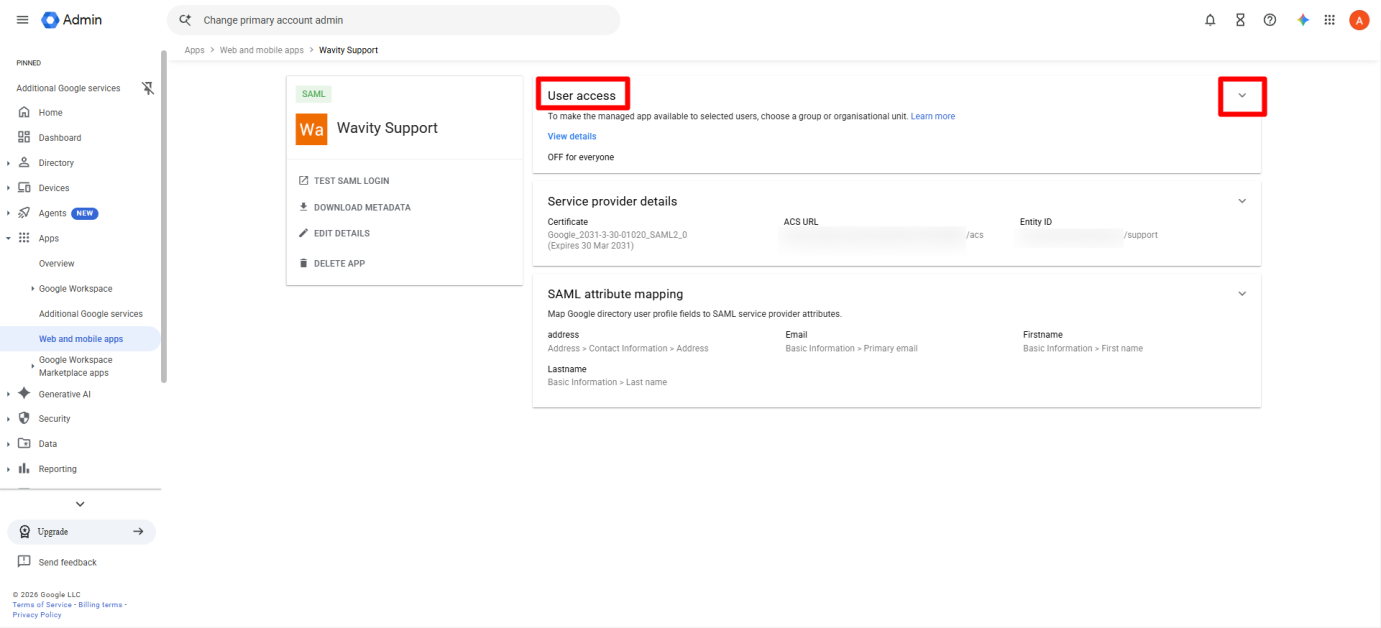
- In the User Access section on the right side, expand the section to update the Service Status.
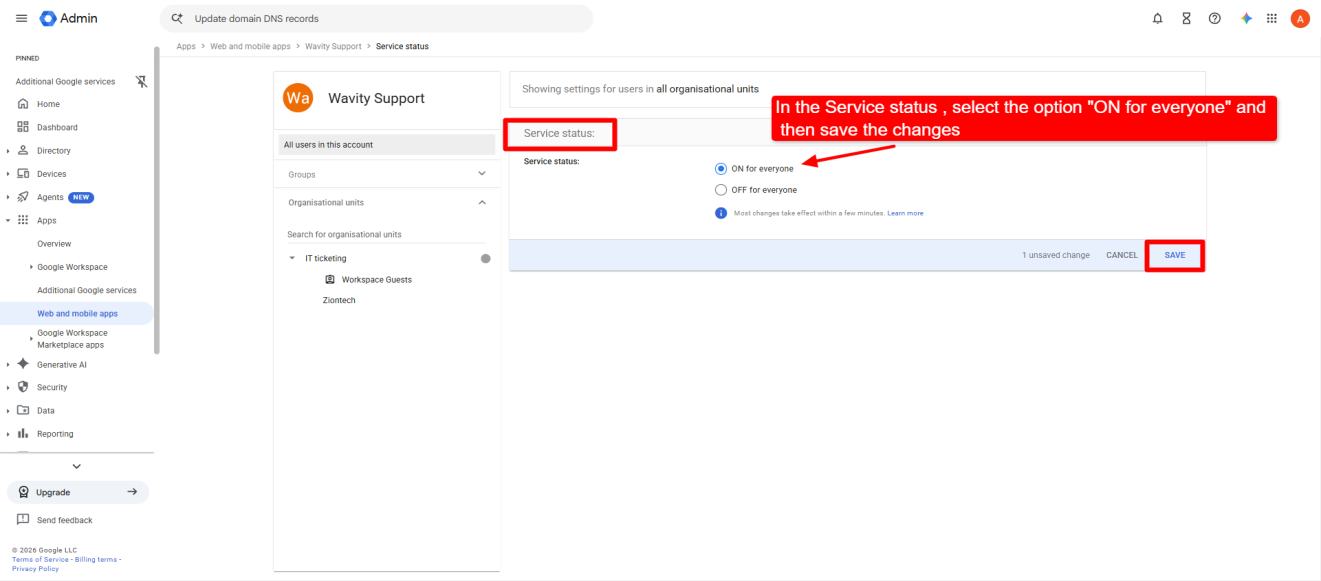
- In “Service Status,”select “ON for everyone” and click “Save” to apply the changes.
- After updating the SSO configuration in Wavity, return to Google admin console and click “TEST SAML LOGIN” in the wavity app which you created to verify that the SSO is working as expected.
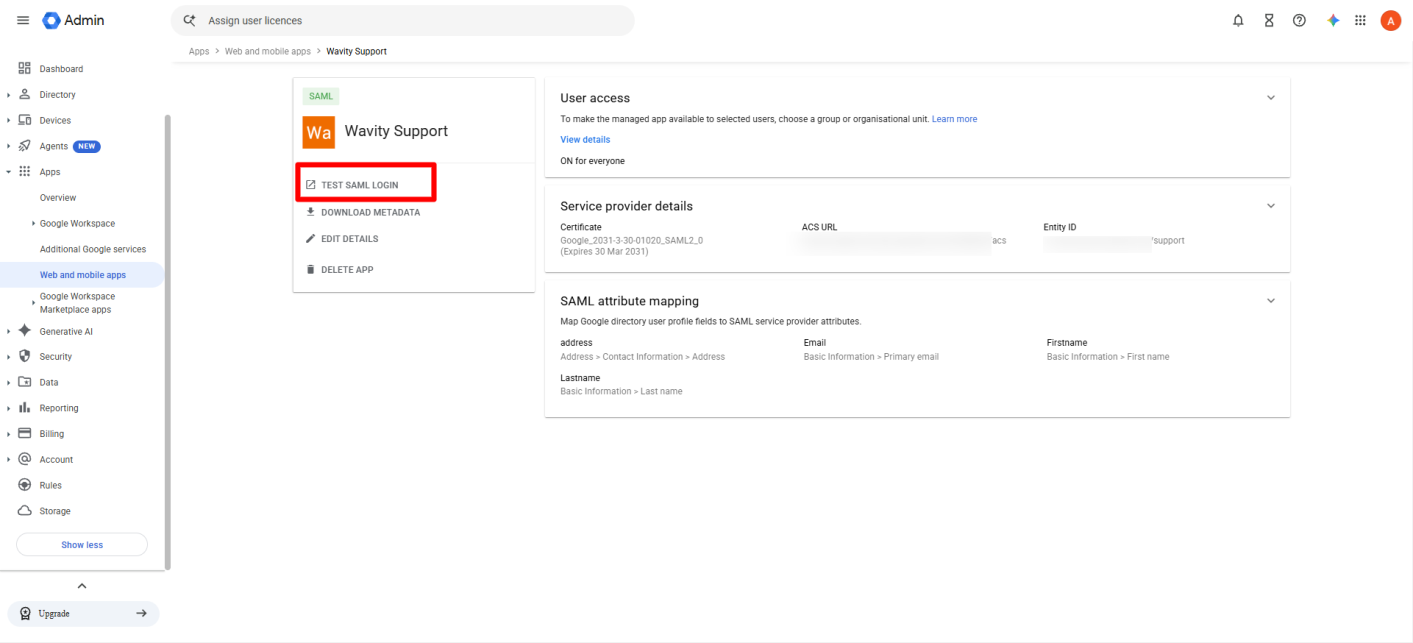
- Once the admin clicks “TEST SAML LOGIN,” they will be redirected to the account selection page, where they need to select their Google account