Roles: Administrator Guide
Roles: Administrator Guide
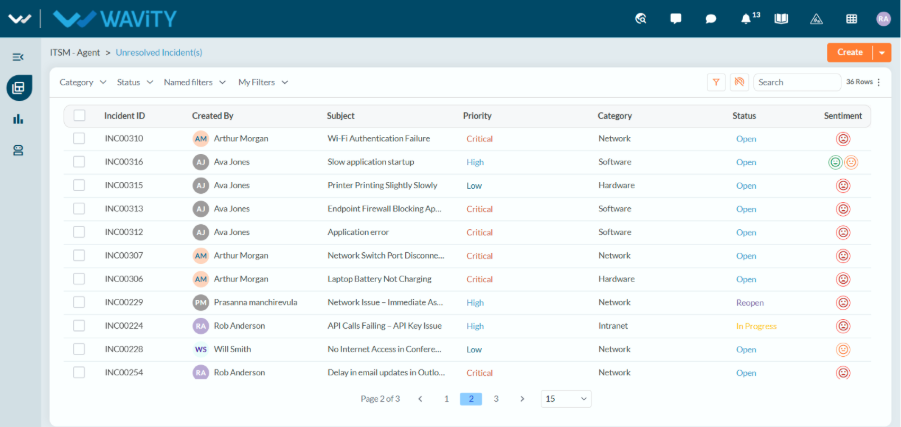
- After logging in, Administrators are directed to the Default Landing Page.
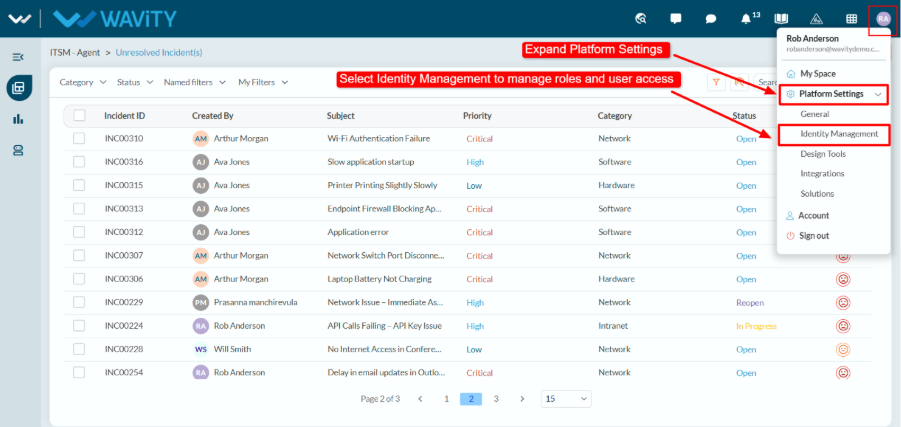
- Click the profile icon in the upper-right corner. Expand Platform Settings, and then select Identity Management to manage roles and user access.
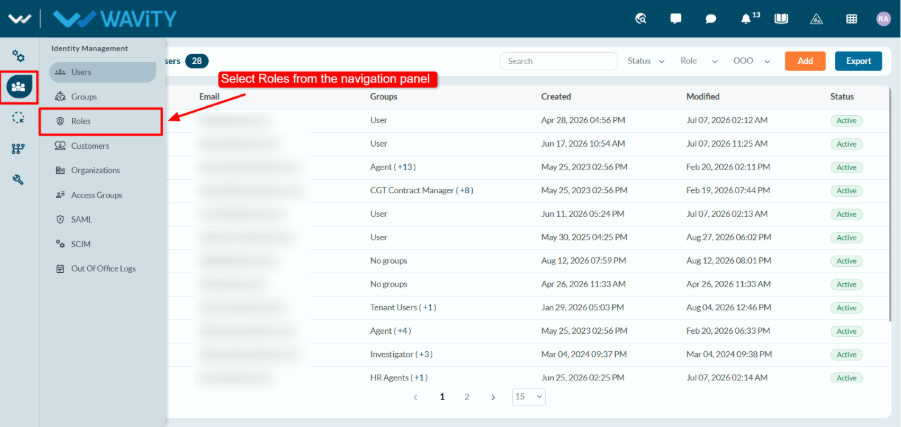
- From the left navigation panel, select Roles under Identity Management.
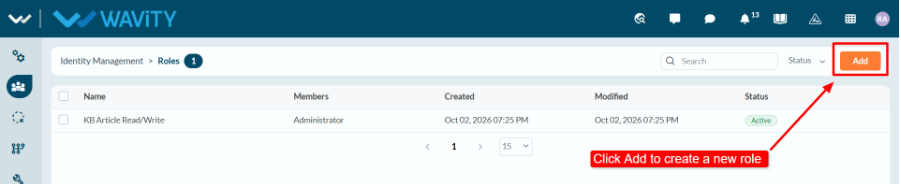
- On the Roles page, click Add in the top-right corner to create a new role
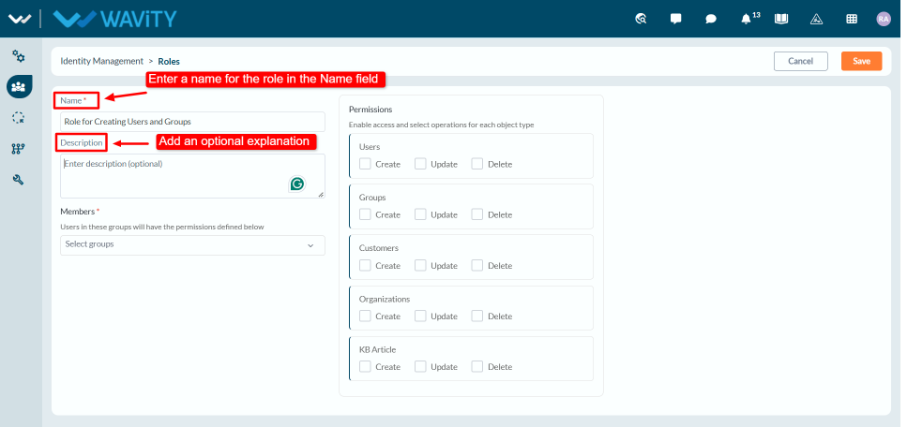
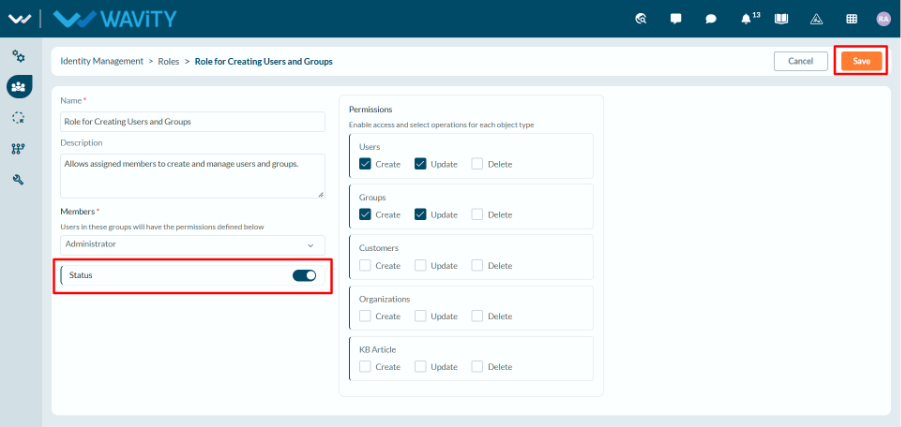
- Enter the Role Name and, optionally, provide a Description for the role.
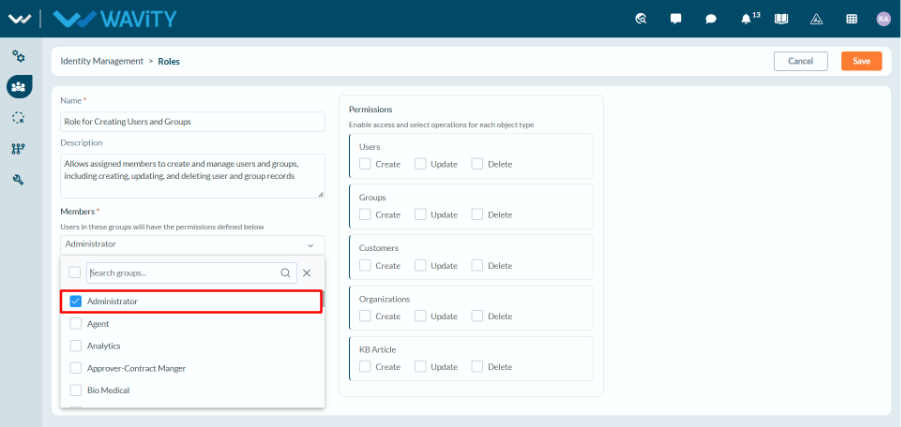
- Select the required Member Groups. Users belonging to these groups will inherit the permissions assigned to the role.
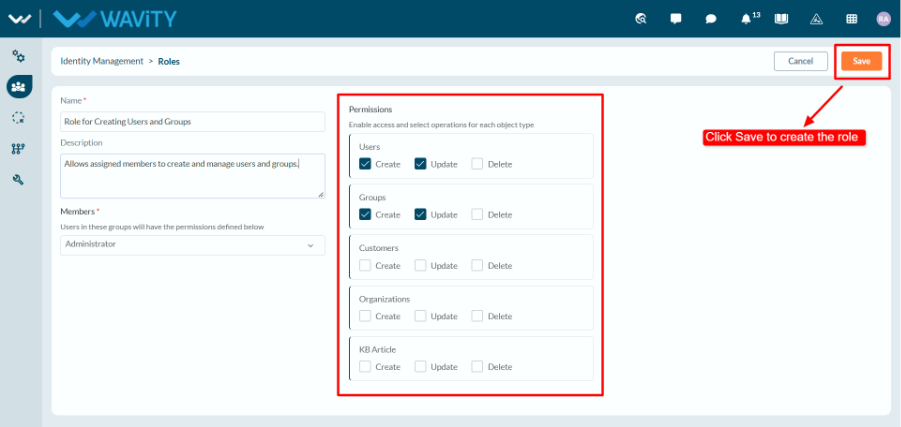
- Under the Permissions section, select the required access (Create, Update, and/or delete) for the applicable modules (Users, Groups, Customers, Organizations, and KB Articles) and Click Save to create the role
- The new role is created successfully and is displayed in the Roles list.
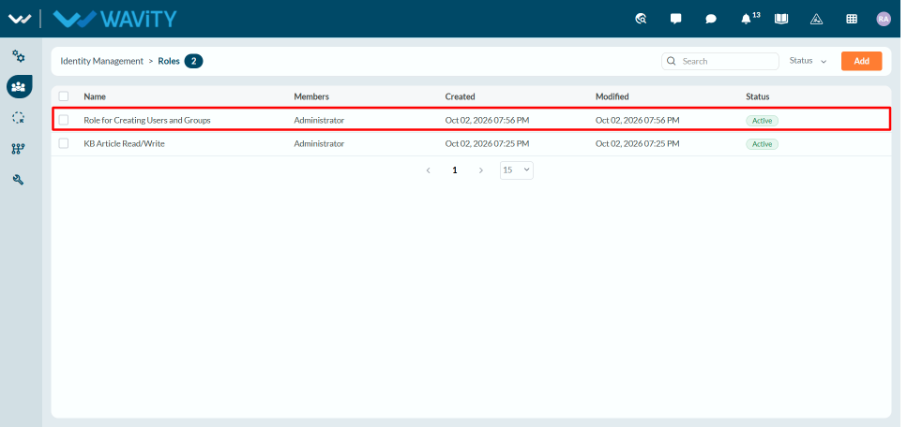
- To disable a role, toggle the Status switch to set the role as inactive and save.
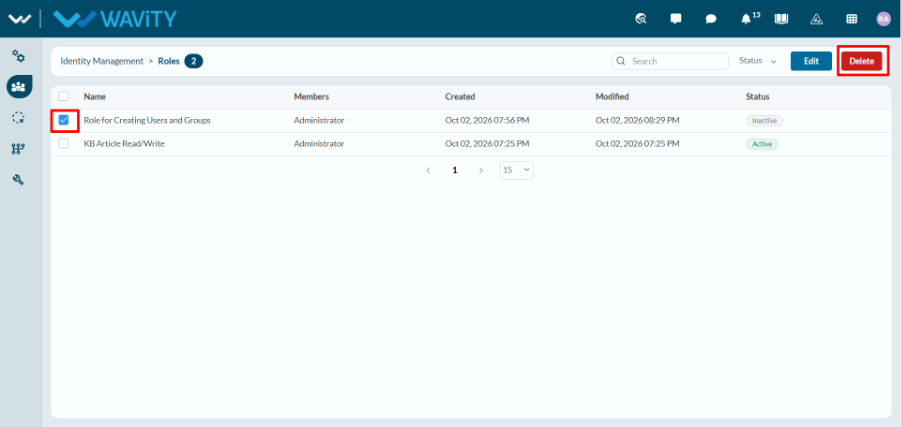
- To delete a role, select the checkbox corresponding to the role and click Delete.