Service Catalog : Administrator Configuration Guide
Service Catalog: Administrator Configuration Guide
Admin Guide
Overview
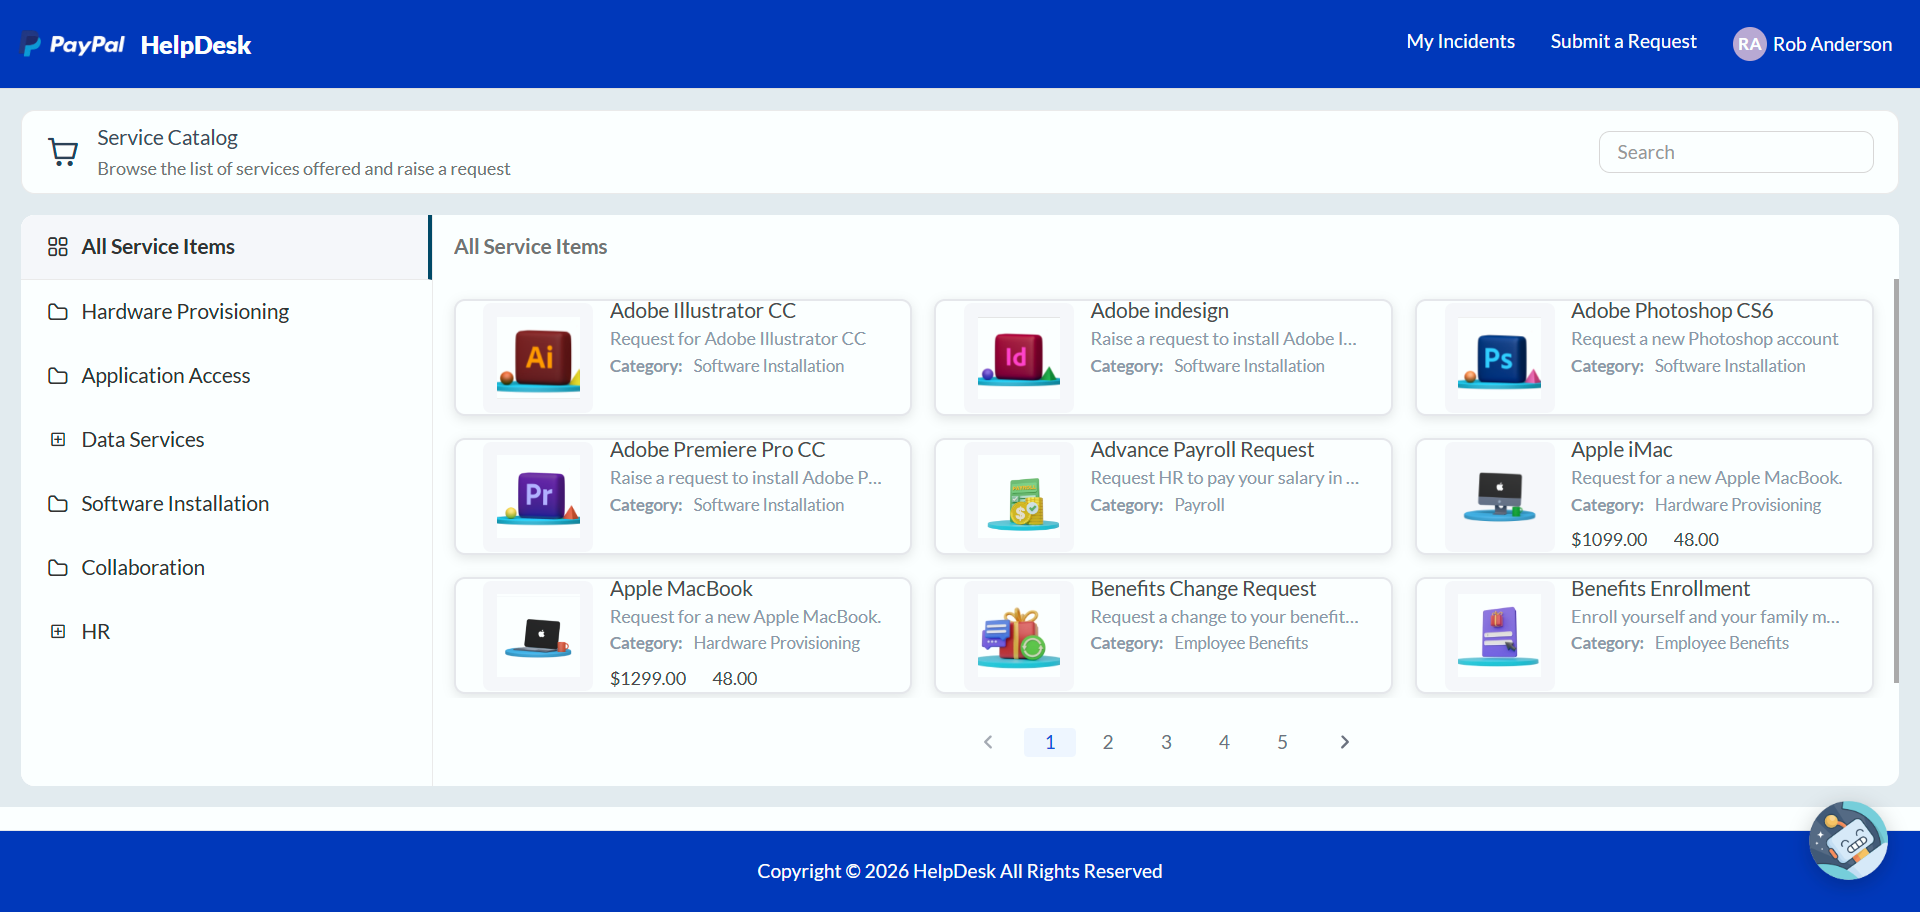
The Service Catalog gives users one place to browse the services your organization offers and submit requests for them. Each service in the catalog is a Wavity application. This guide shows administrators how to build a service catalog application, publish it to a catalog category, and make the catalog available in the self-service portal.
Note: These steps describe the standard workflow. Your organization may have customized the applications, settings or layout, but the core process stays the same.
Create the service catalog application
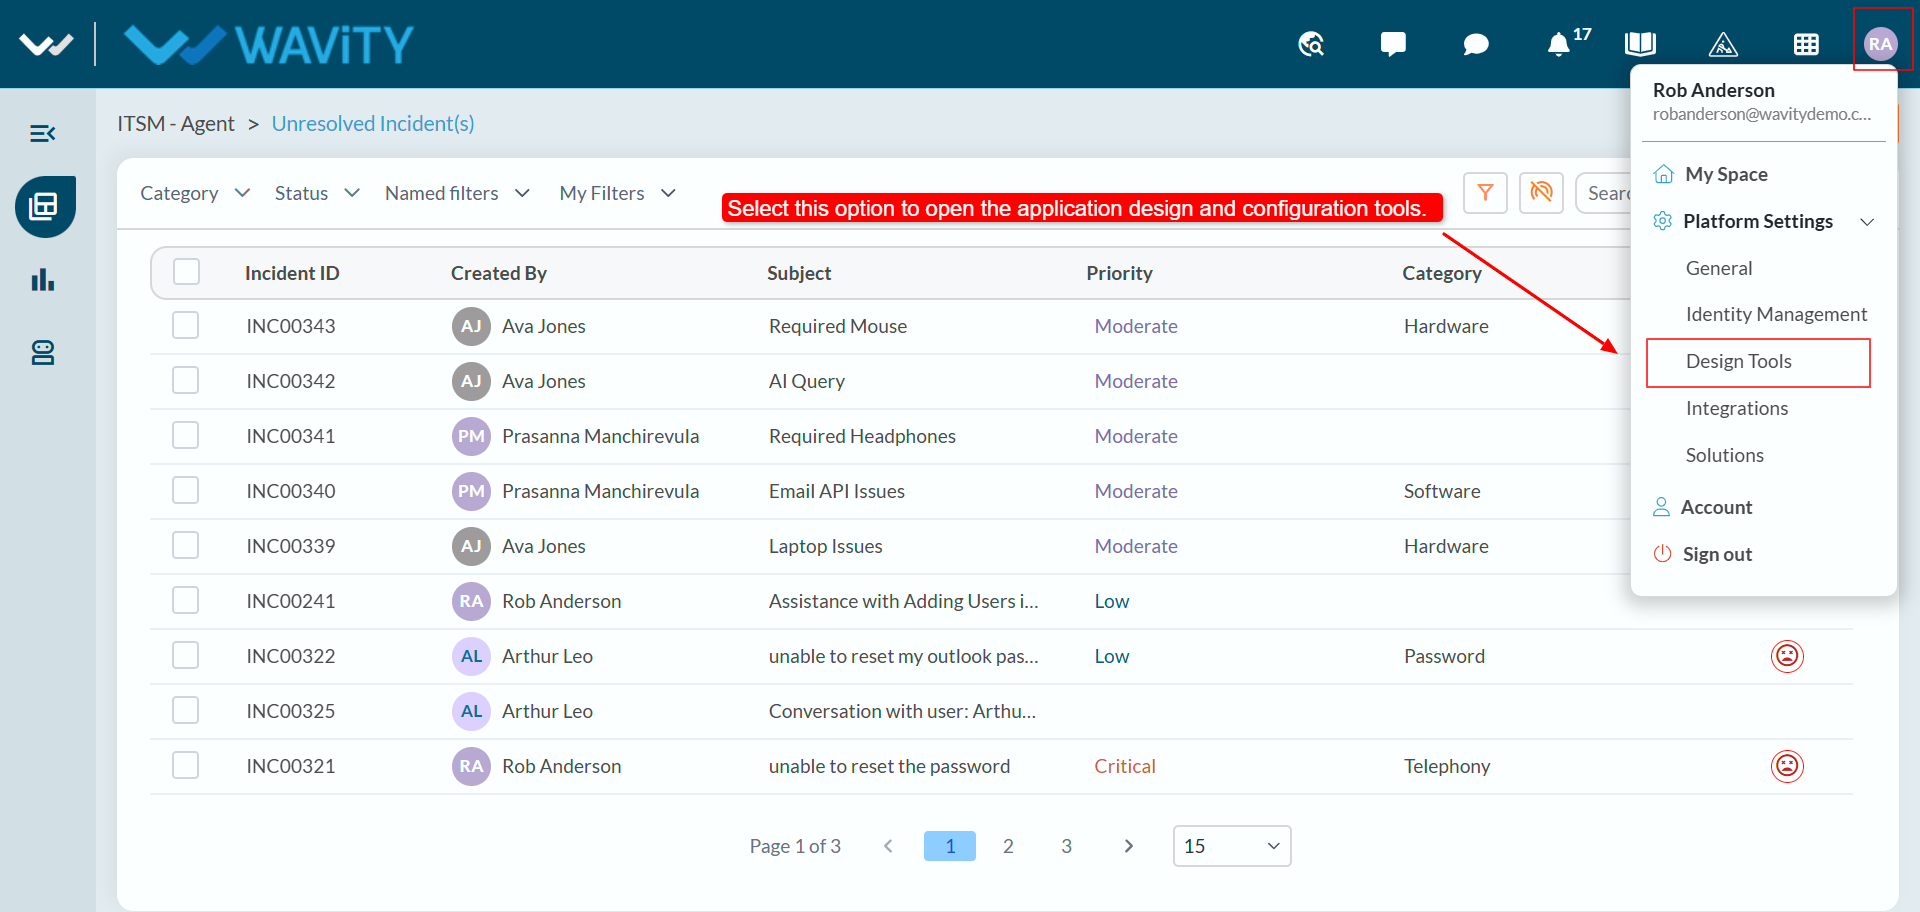
- Open Design Tools. After you sign in, click your profile picture in the top-right corner, expand Platform Settings and select Design Tools.
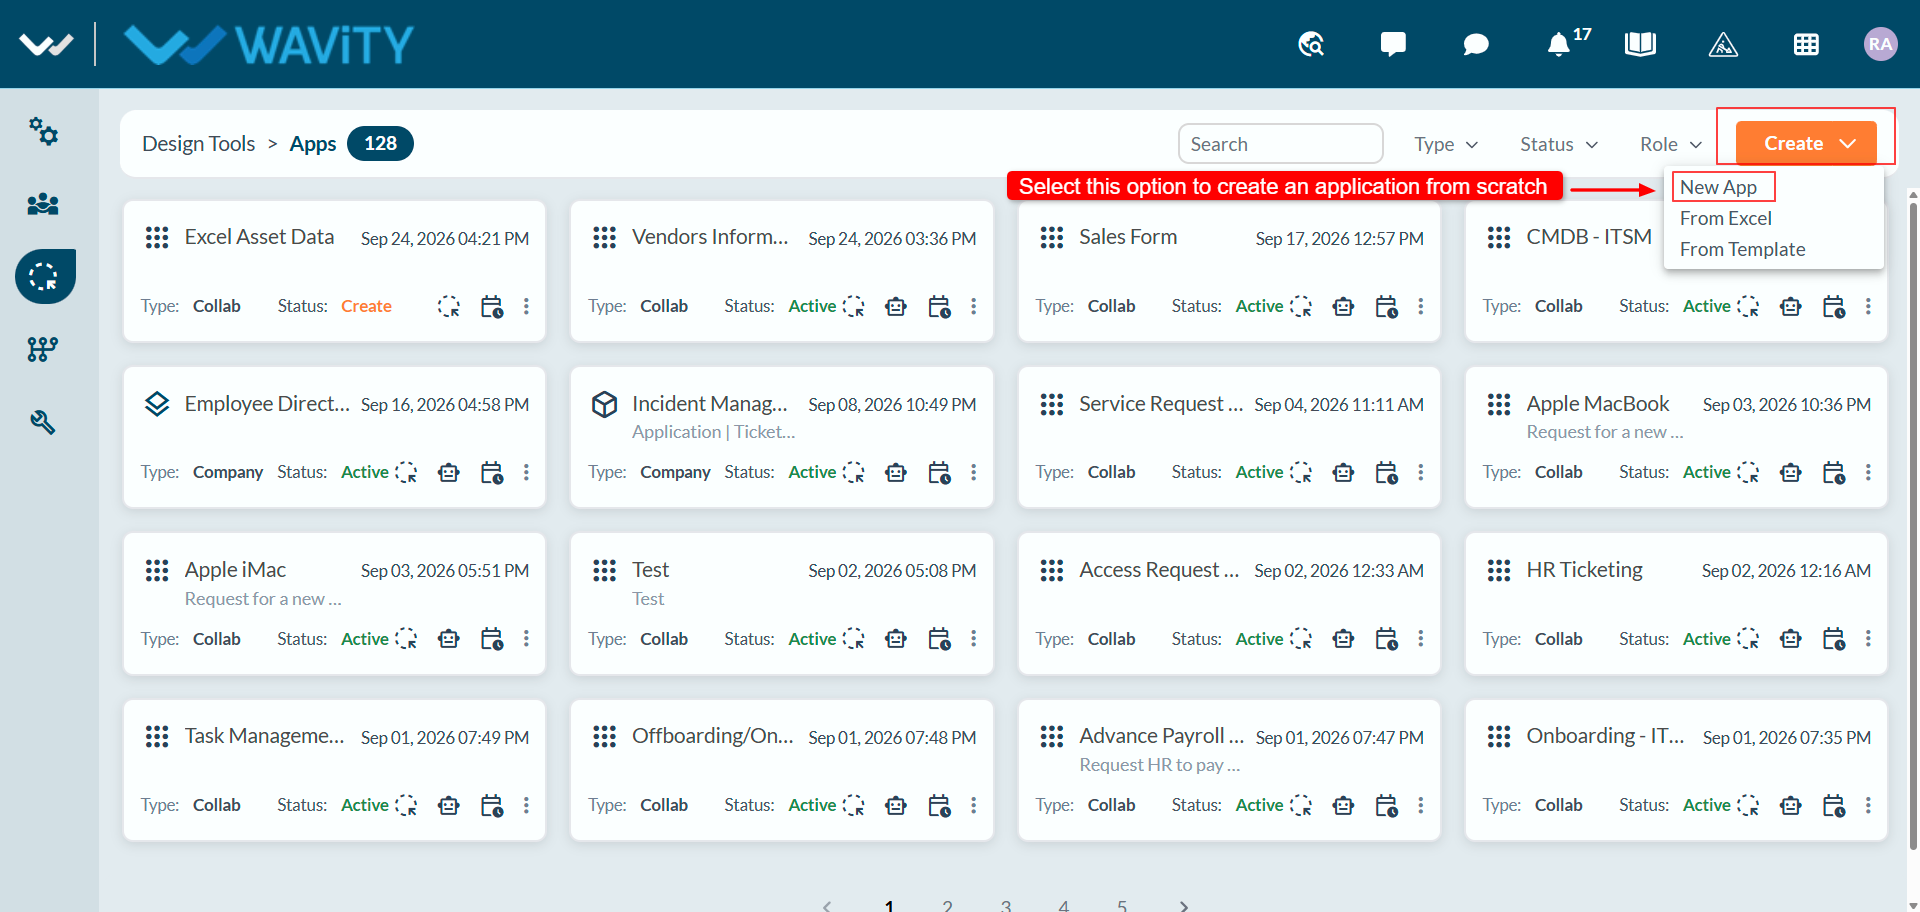
- Create a new app. On the Design Tools > Apps page, click Create in the top-right corner and select New App. (The menu also offers From Excel and From Template.)
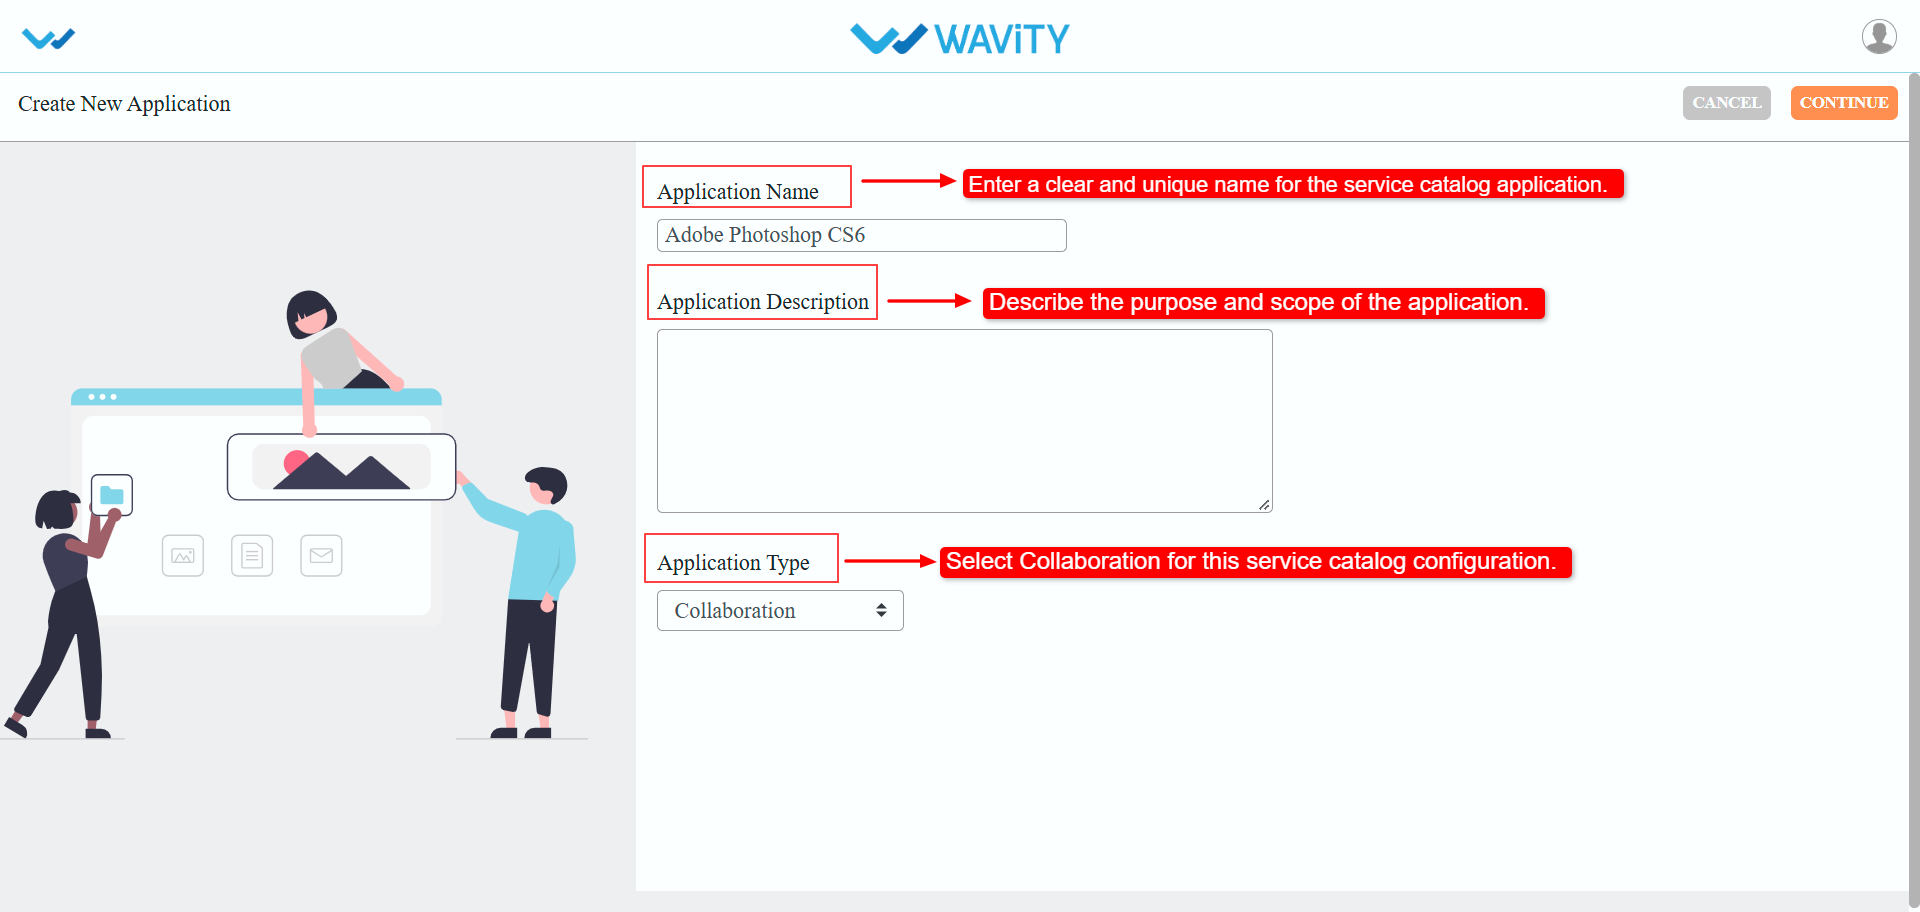
- Name the application. On the Create New Application page, enter an Application Name and Application Description. Set Application Type to Collaboration, then click Continue.
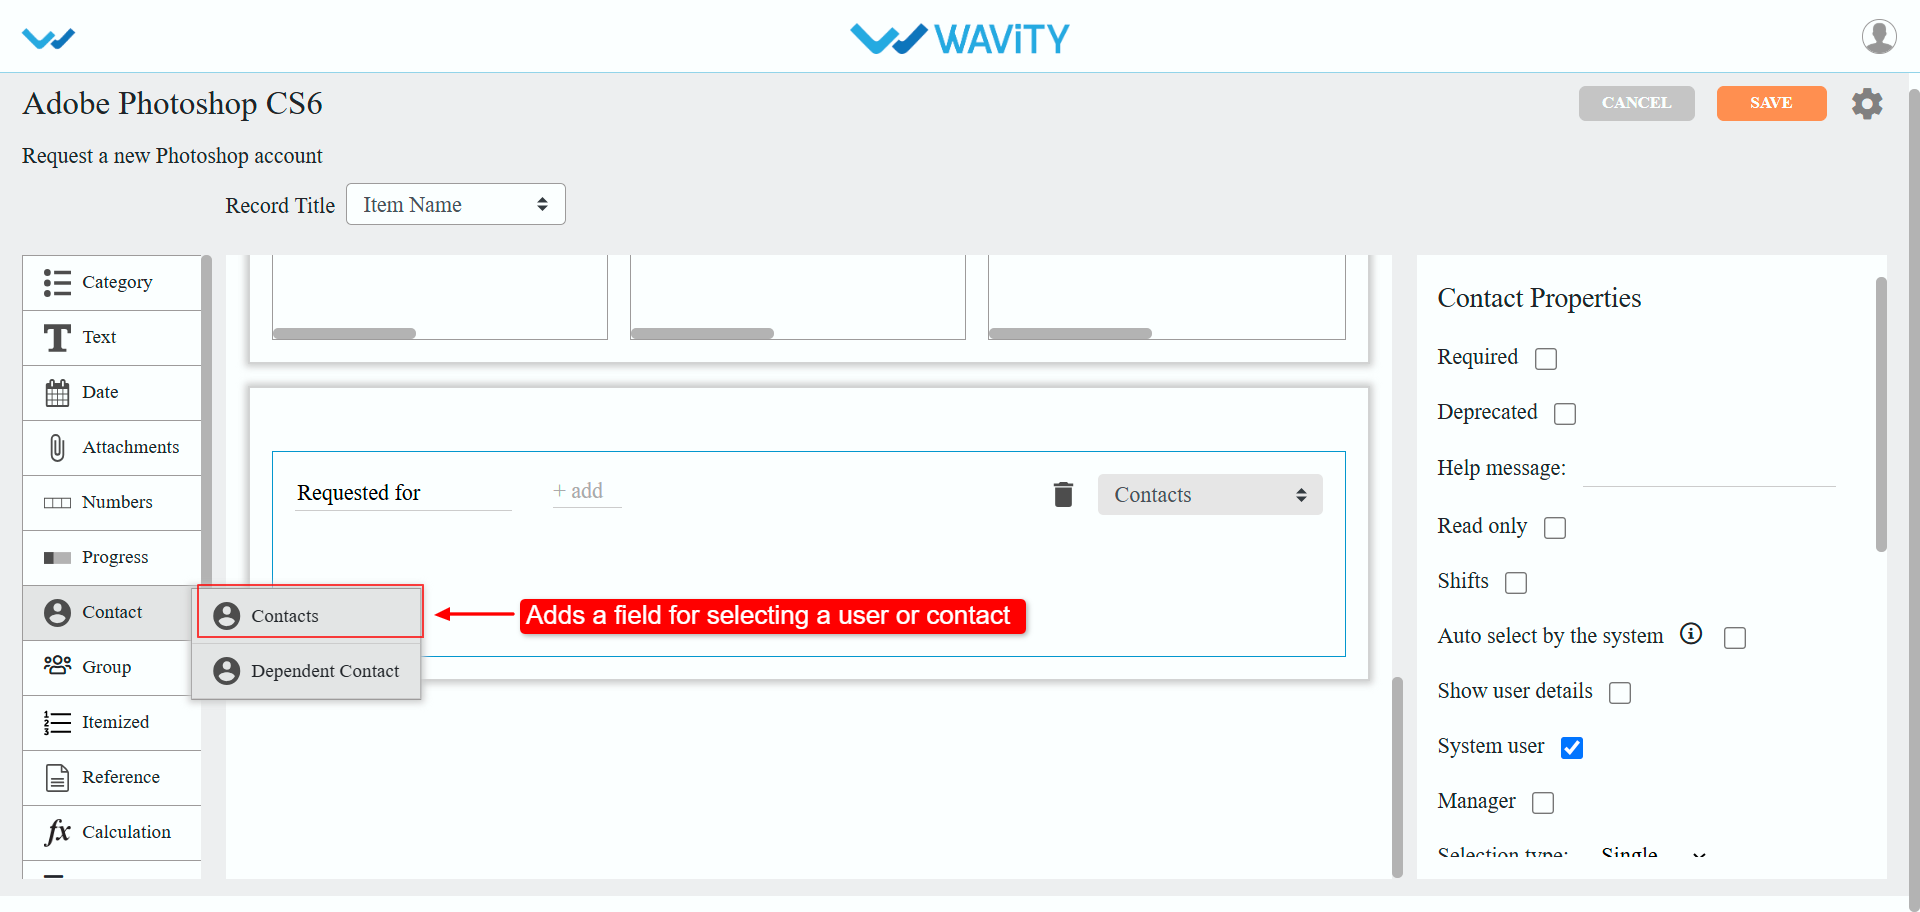
- Review the application settings. In the settings window, use Change icon to choose an icon and check the name and description. Confirm that App Type is Collaboration. Under Data Creator(s), select the group allowed to create records. If submitted requests should become read-only at a certain stage, set Lock data when. Use Advanced settings for further options, then click Apply.
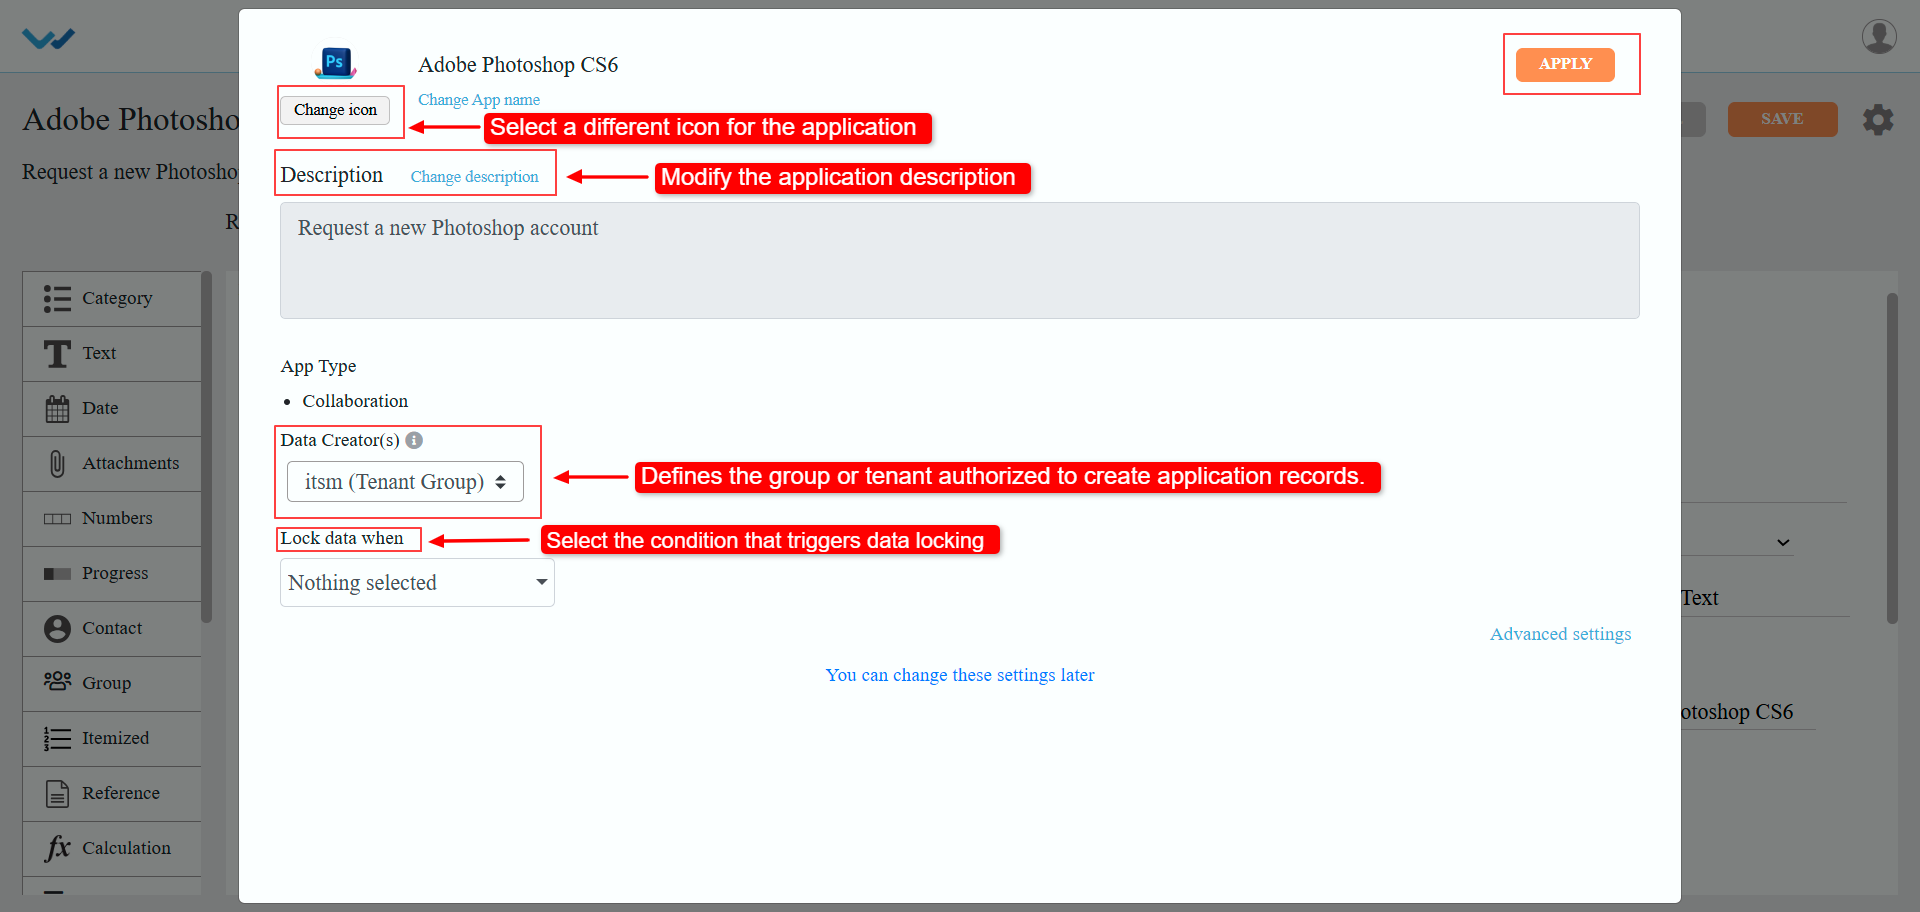
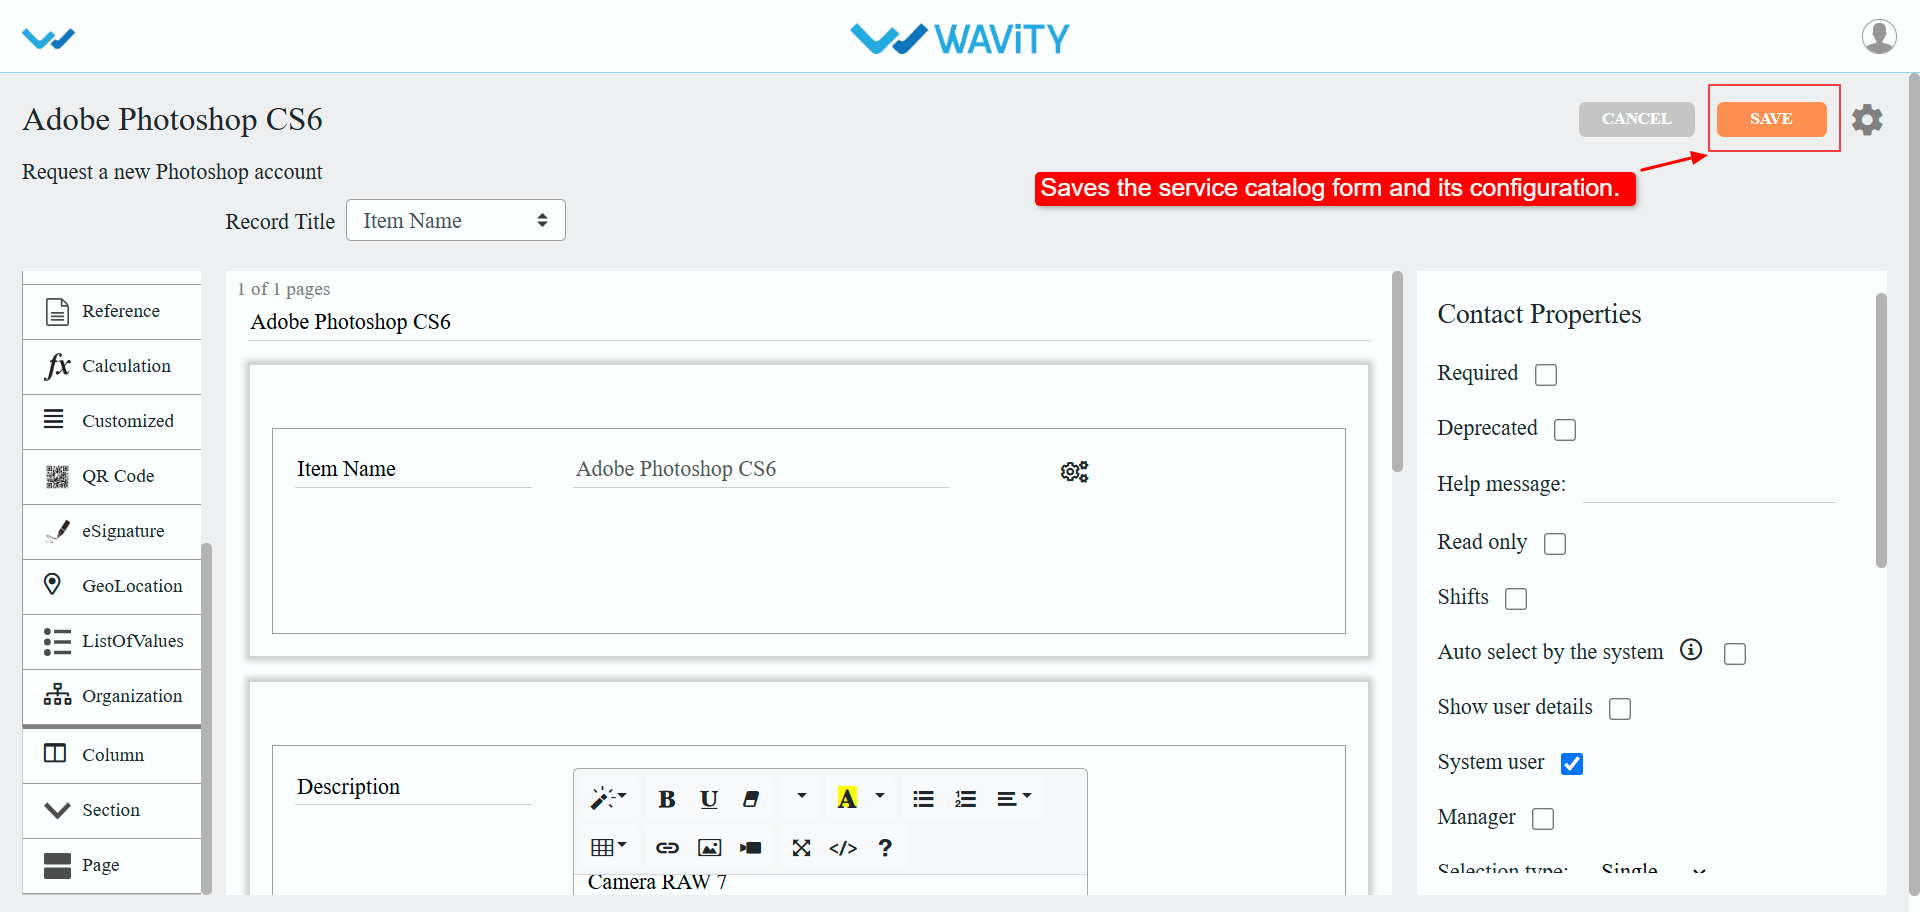
- Add the item name field. From the field palette on the left, select Text > Plain and label the field Item Name.
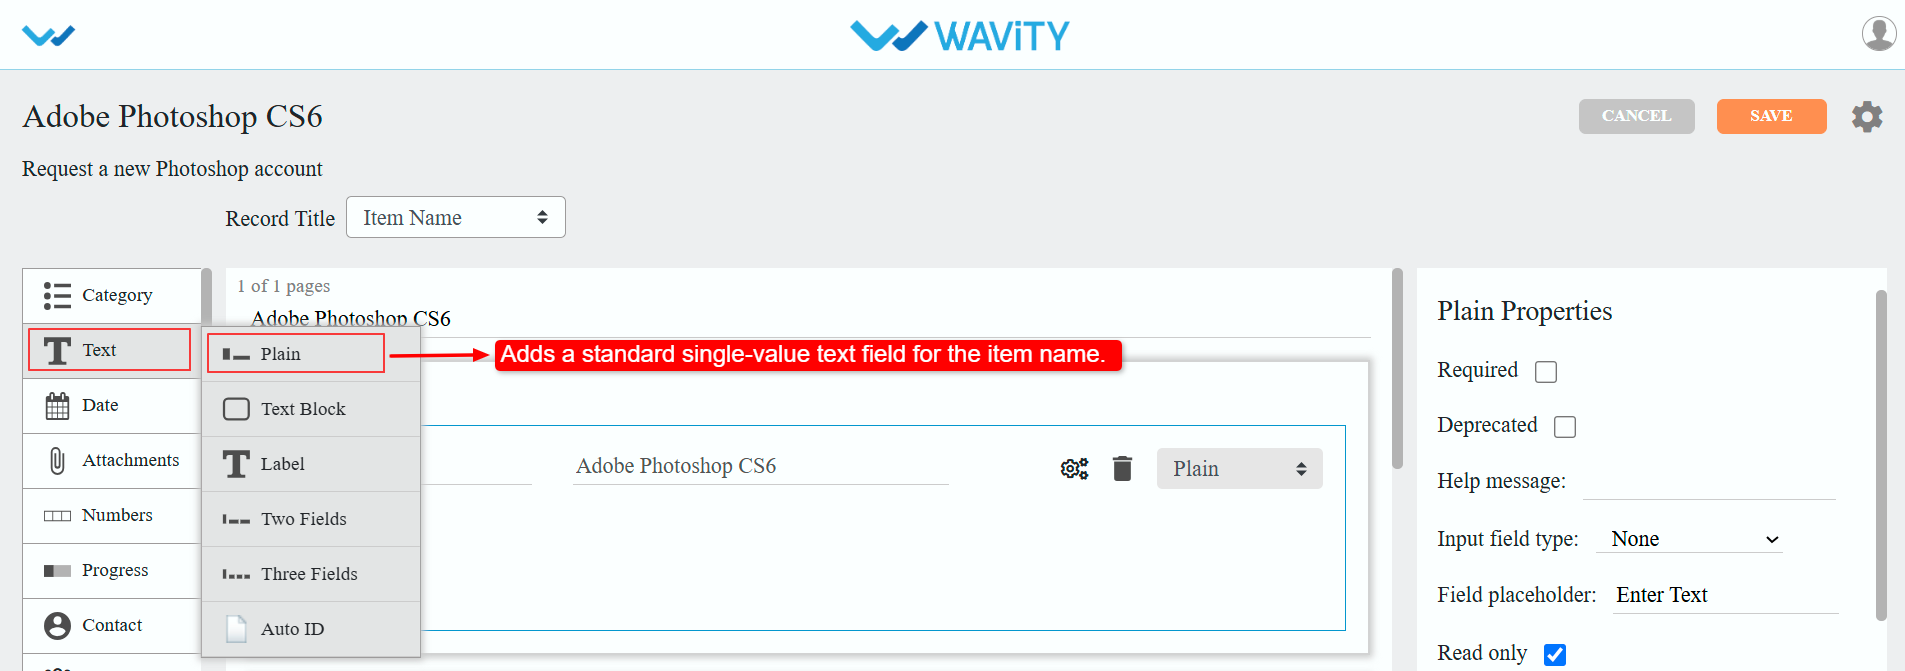
- Add the description. Select Text > Text Block and label the field Description. Use the rich-text editor to enter the service details. You can format text and add lists, links and images.
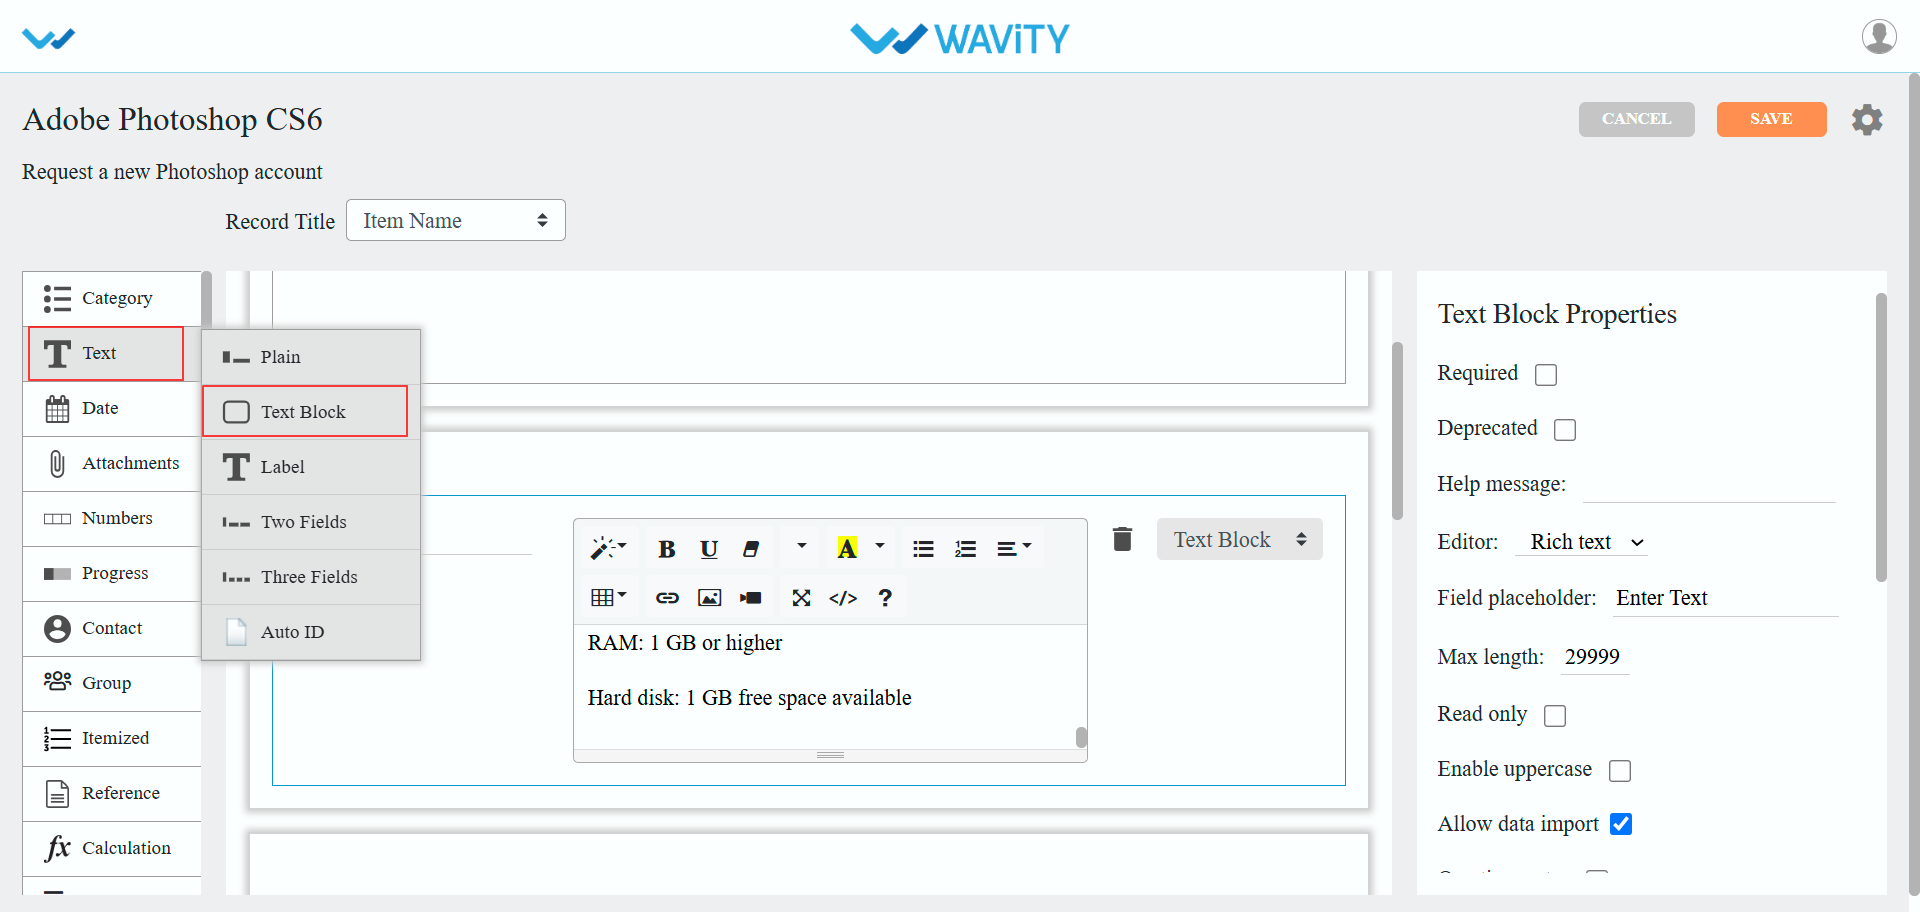
- Add the Requested for field. Select Contact > Contacts and label the field Requested for. In Contact Properties, turn on Required if a beneficiary must be named, and keep System user selected so users can be picked from the Wavity directory. Turn on Auto select by the system to fill the field automatically.
- Save the form. Check that all fields are in place and that Record Title is set to Item Name. Then click Save in the top-right corner.
Activate the application
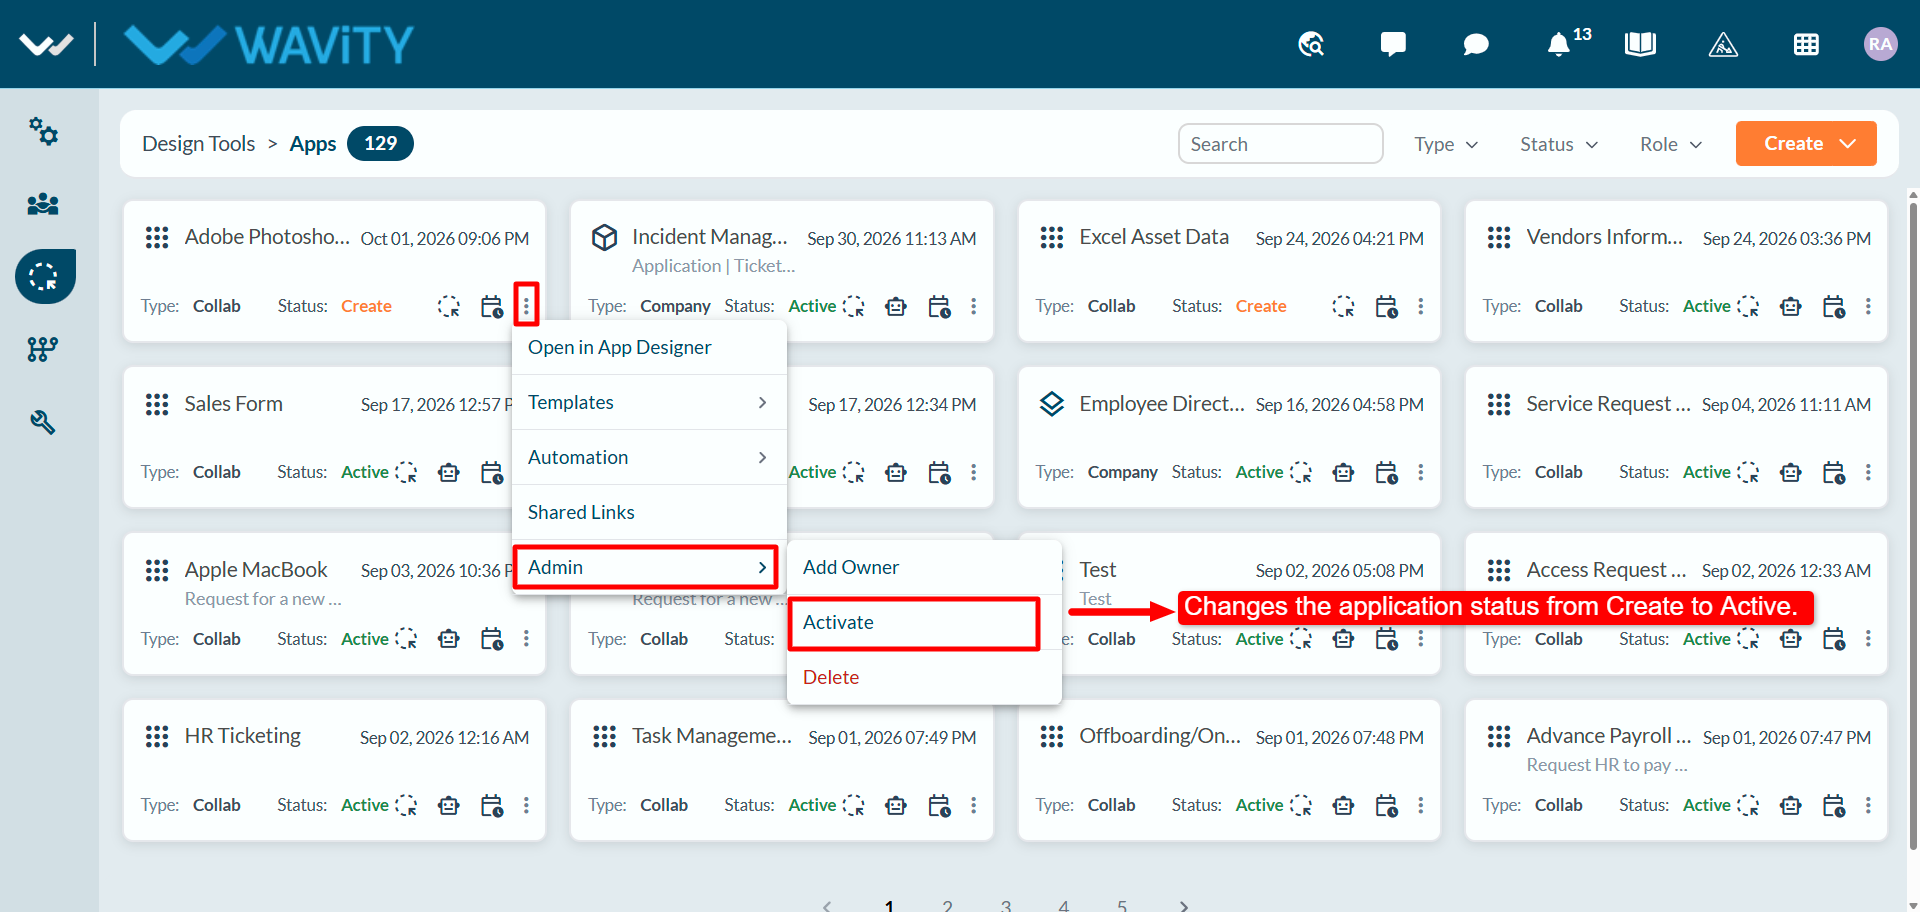
- Activate the app. On the Apps page, find the application card and click its three-dot menu. Select Admin > Activate. The application’s status changes from Create to Active.
Publish the application in the Service Catalog
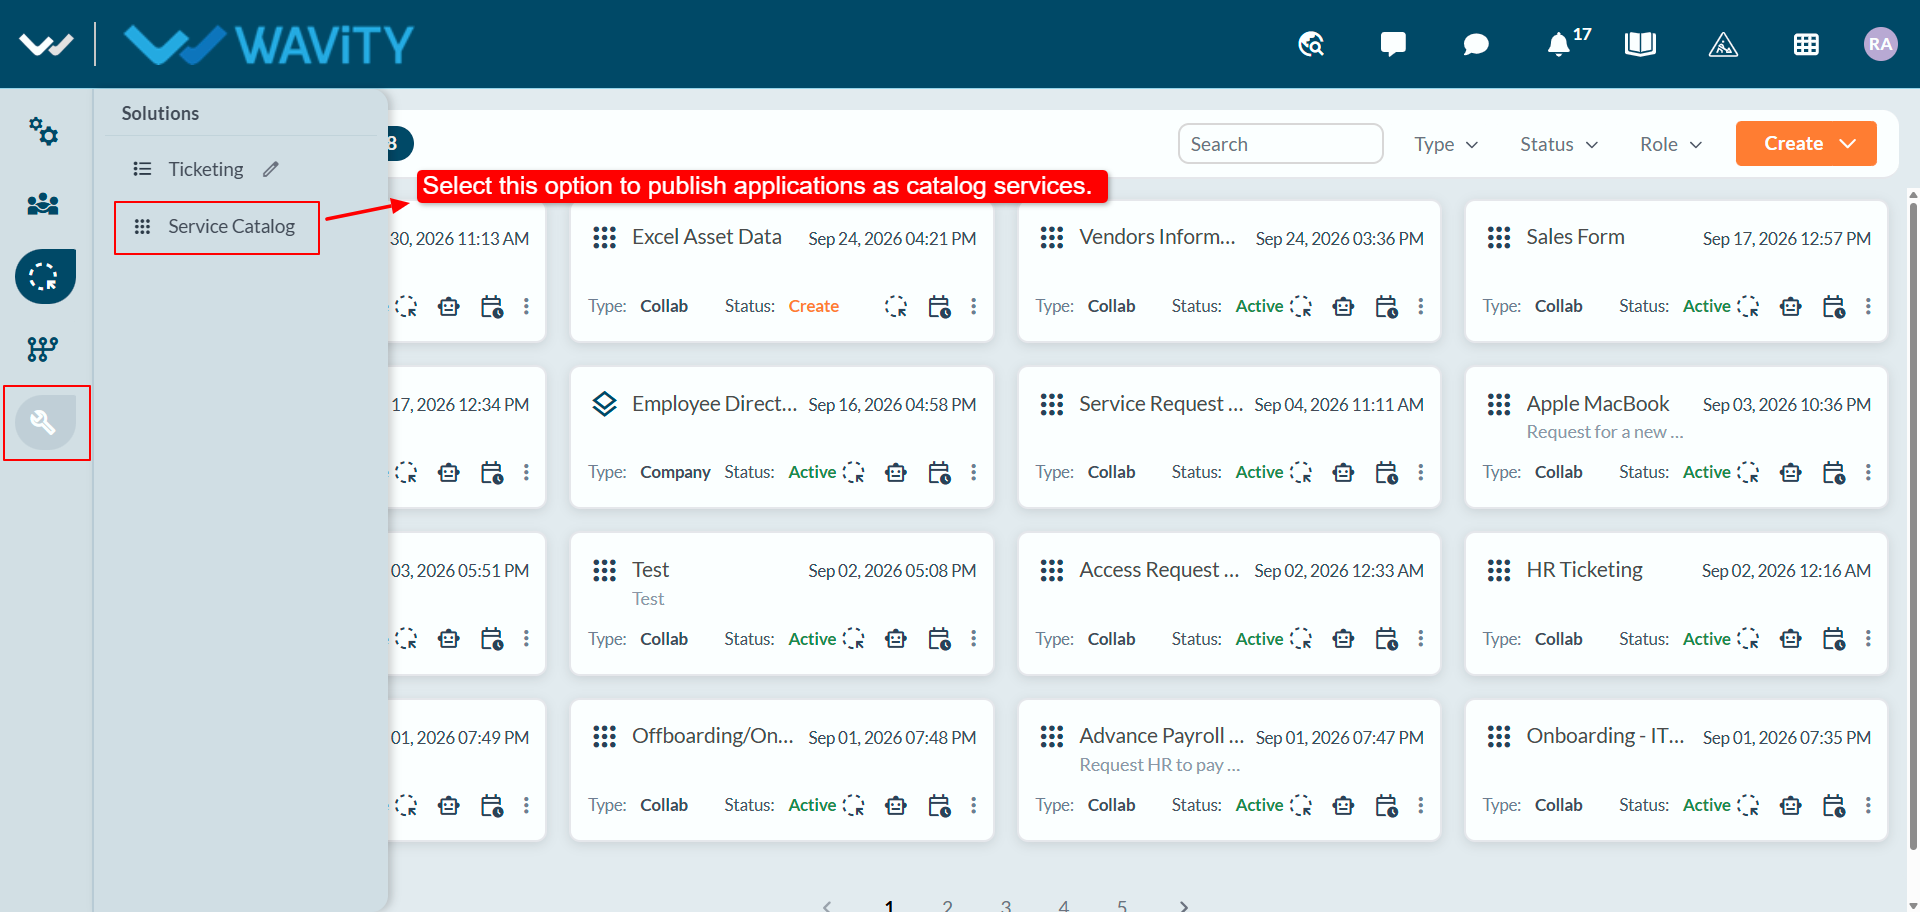
- Open the Service Catalog settings. In the left navigation bar of Design Tools, click the Solutions icon (the wrench). Under Solutions, select Service Cata
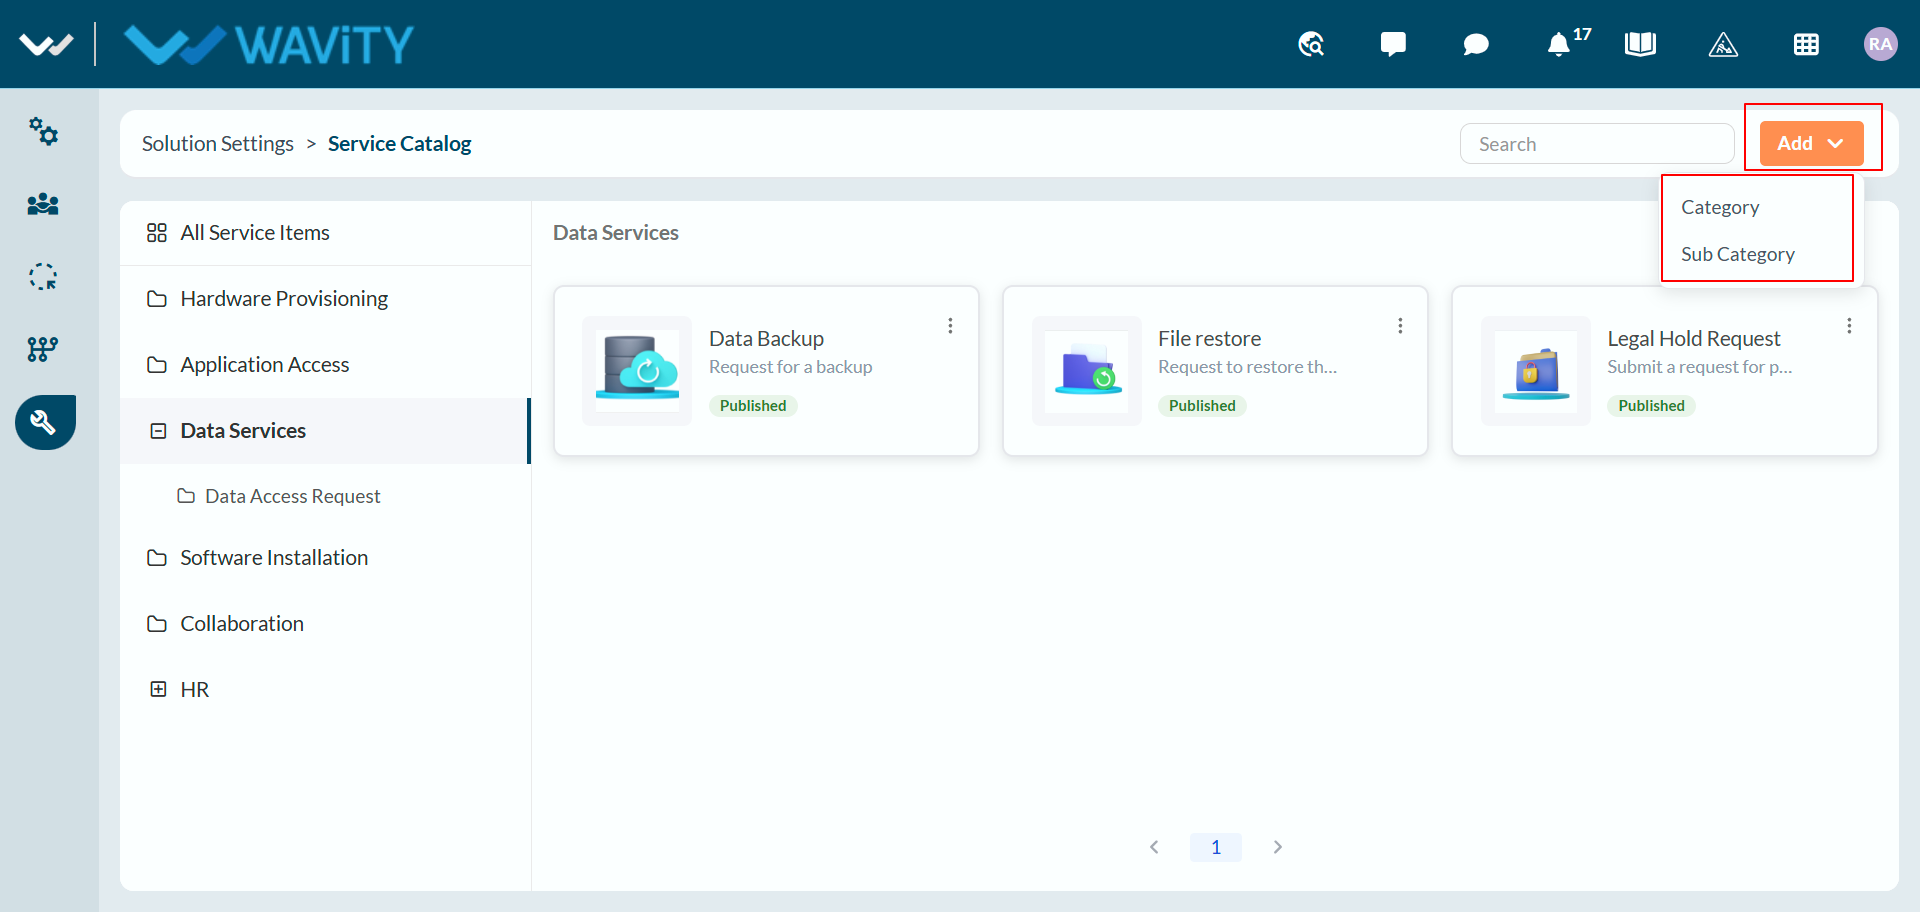
- Create categories (if needed). On the Service Catalog page, click Add in the top-right corner and select Category to create a top-level group. To create a group inside a category, click Add again and select Sub Category.
- Edit the category. Select the category you want to add the application to, then click the Edit Category pencil icon next to it.
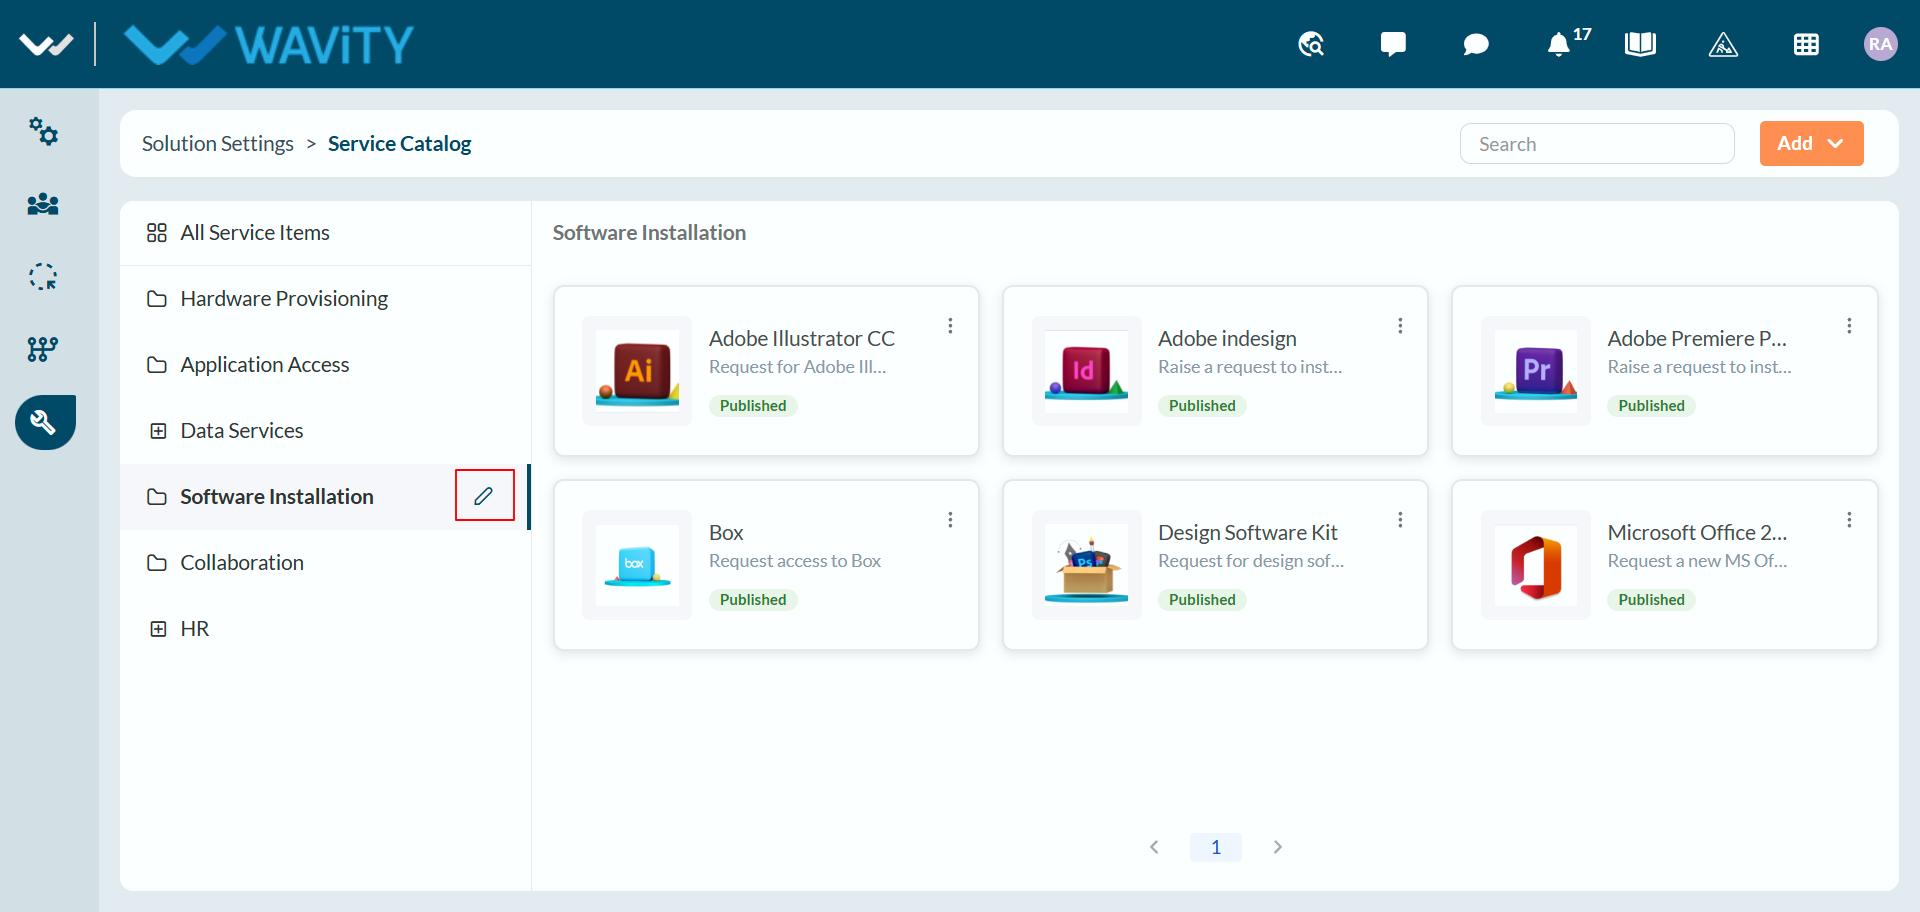
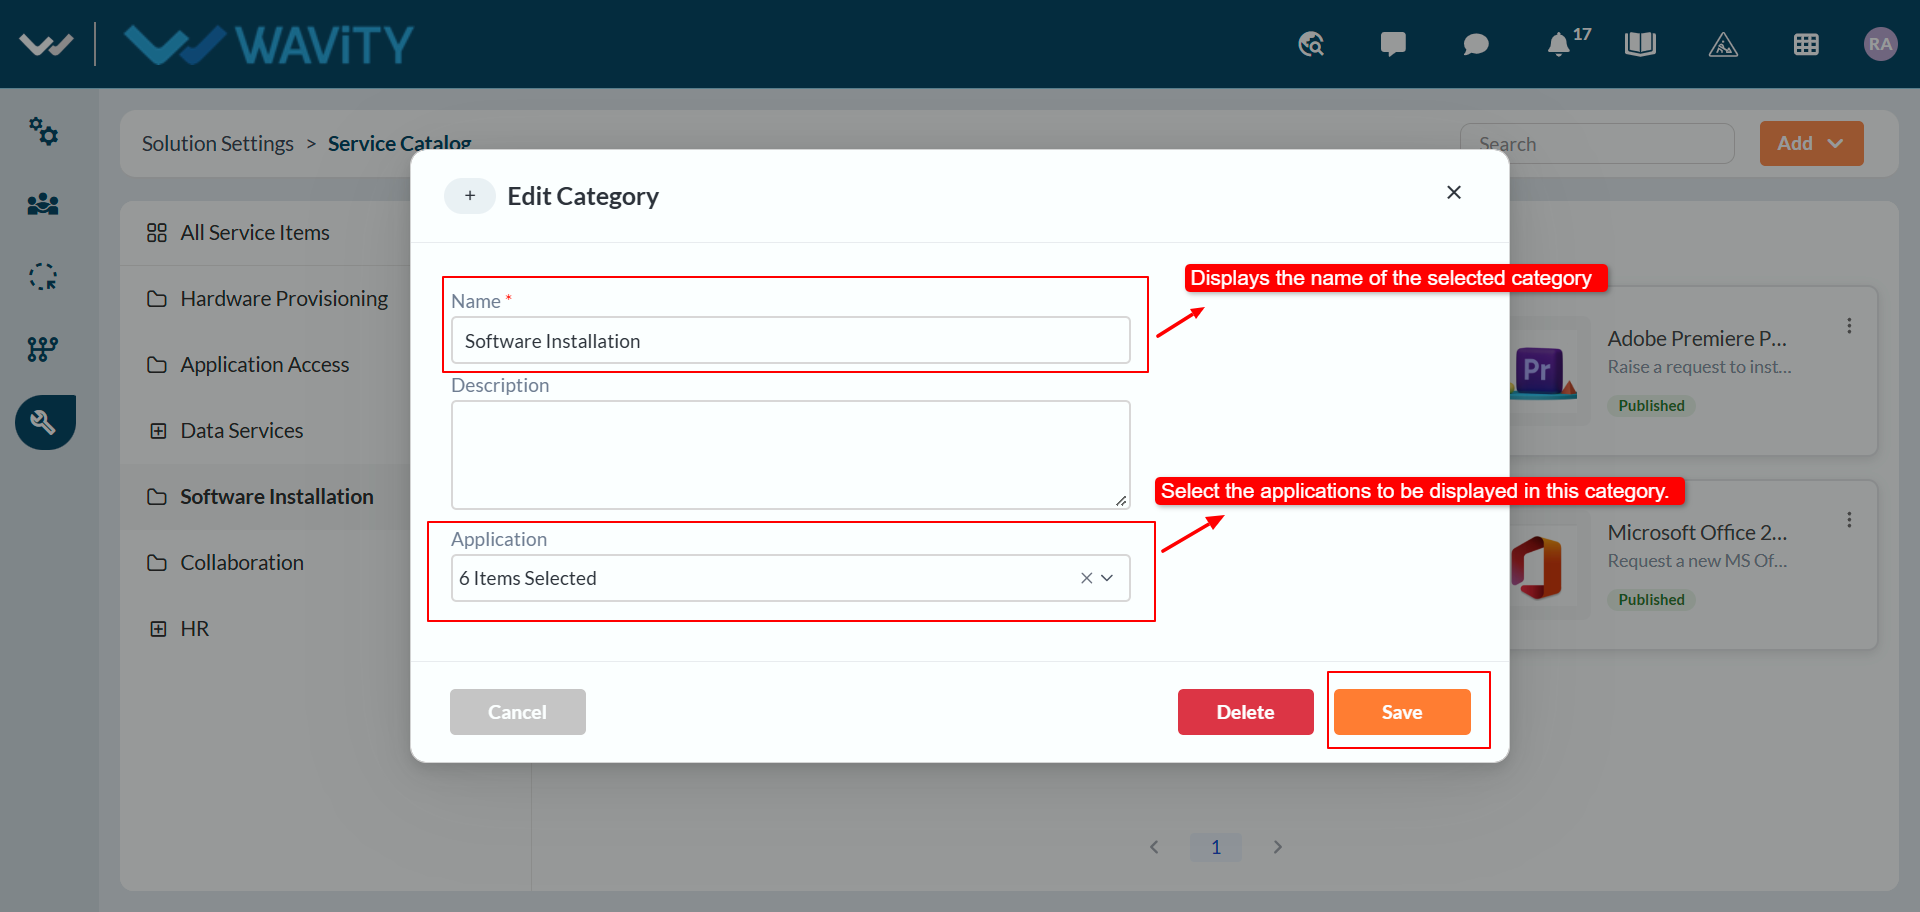
- Add the application to the category. In the Edit Category window, check the Name and update the Description if needed. In Application, select the applications that should appear in this category, then click Save.
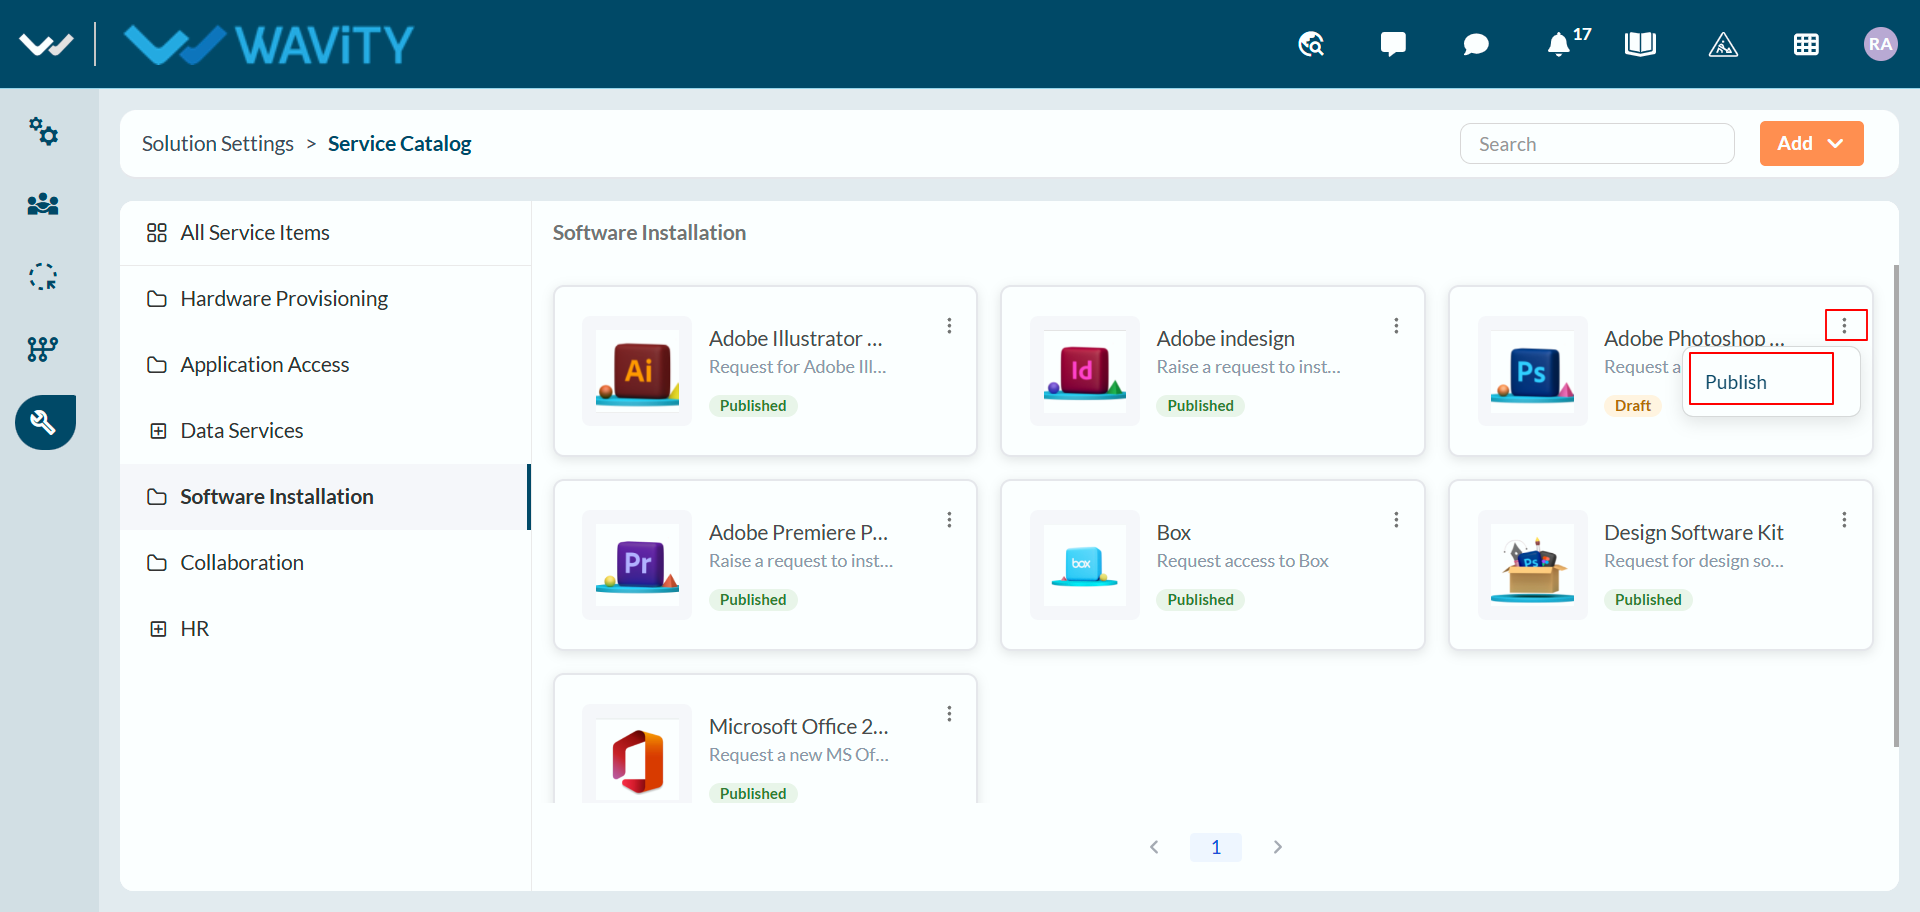
- Publish the application. The new application appears in the category with a Draft status. Click the three-dot menu on its card and select Publish.
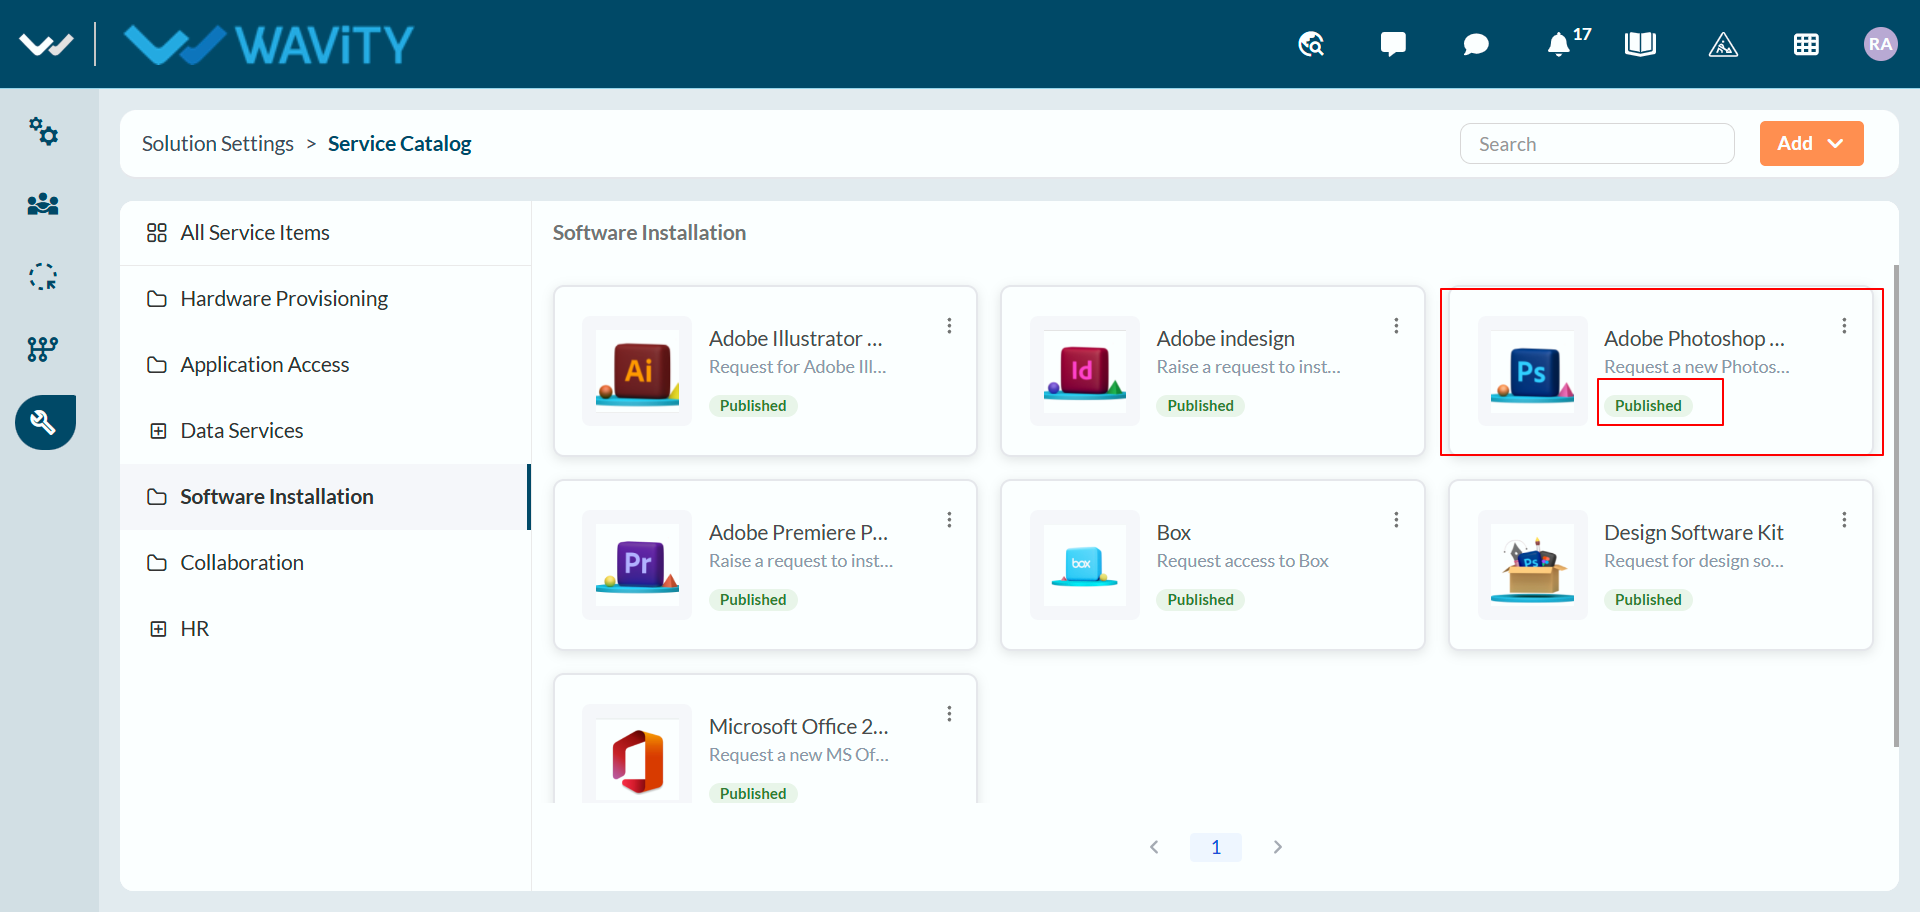
- Confirm it is published. The application card now shows a Published status.
Add the Service Catalog to the portal
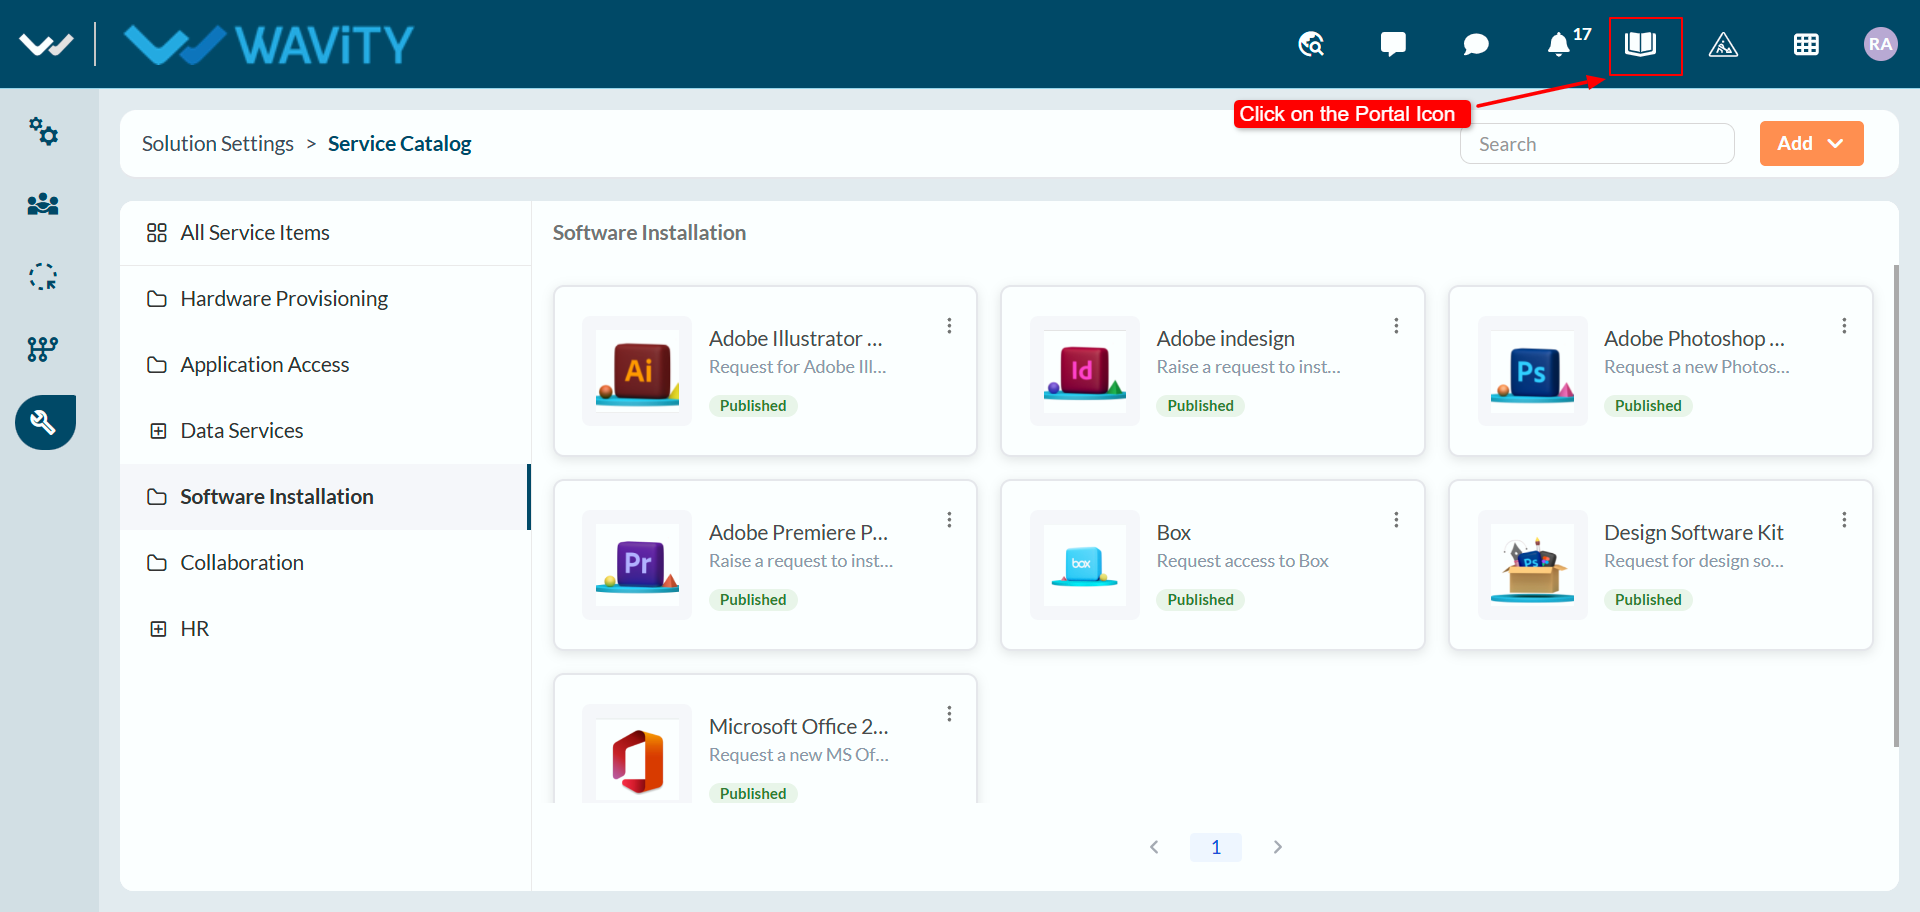
- Open the portal. Click the Portal icon (the open book) in the top navigation bar.
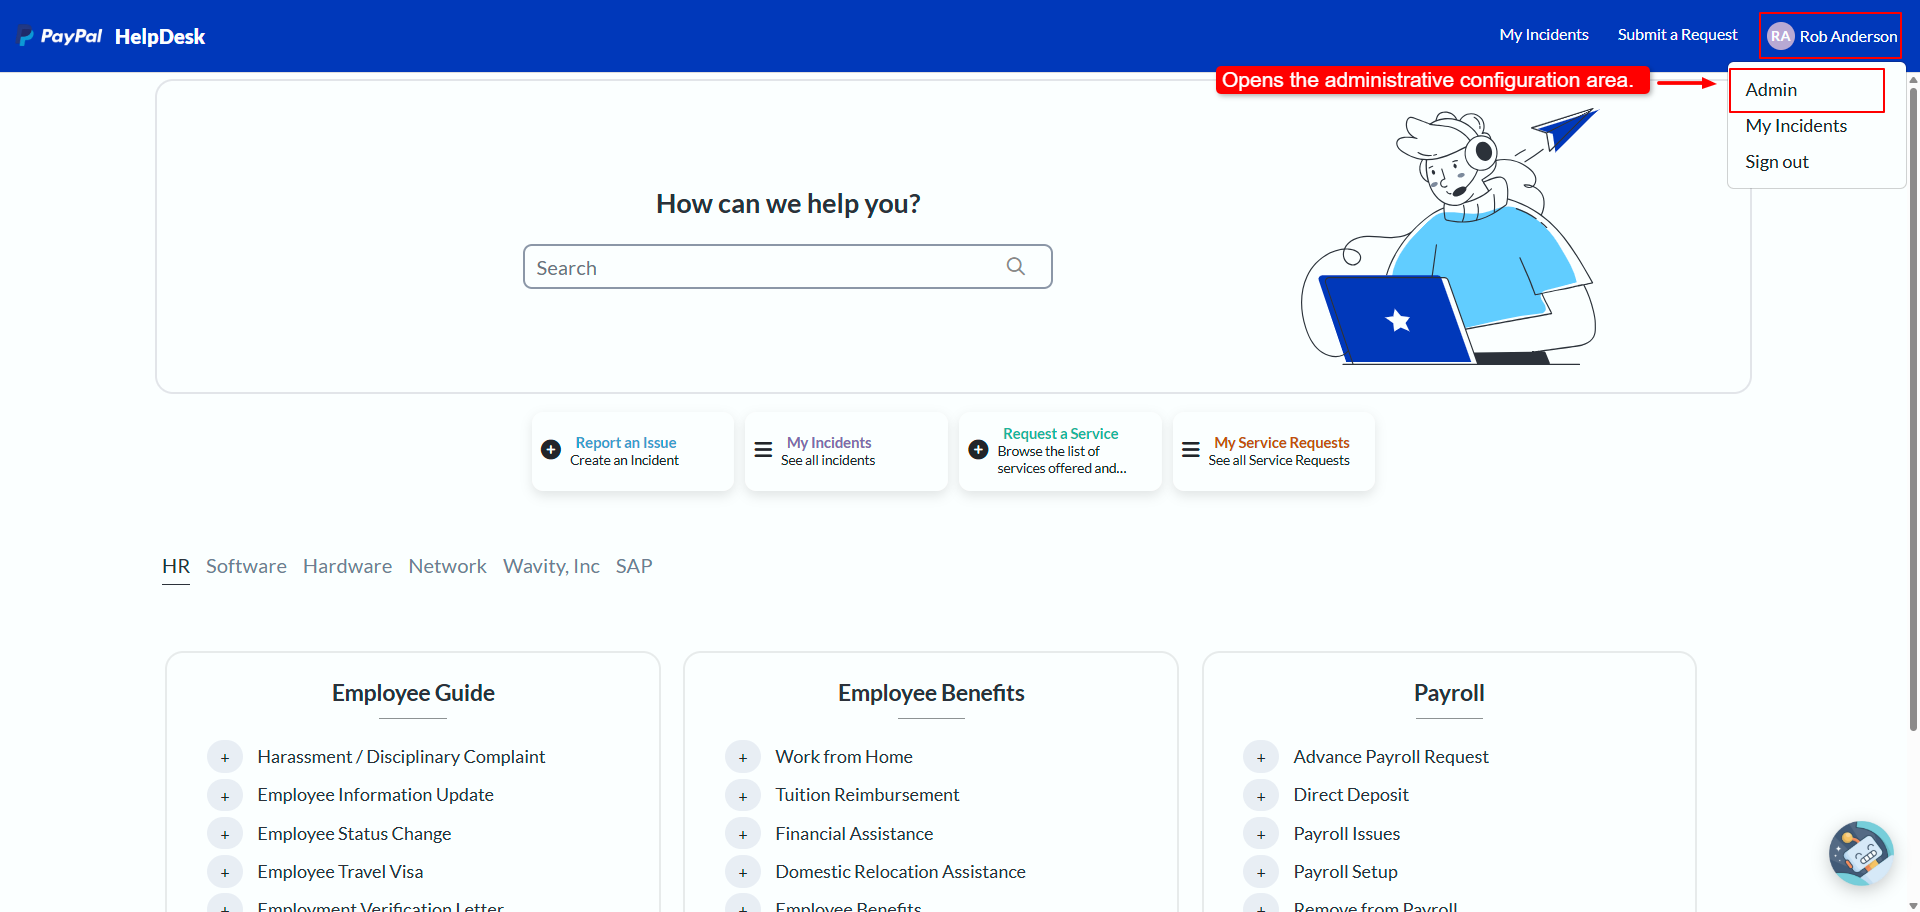
- Open the portal Admin area. In the portal, click your name in the top-right corner and select Admin.
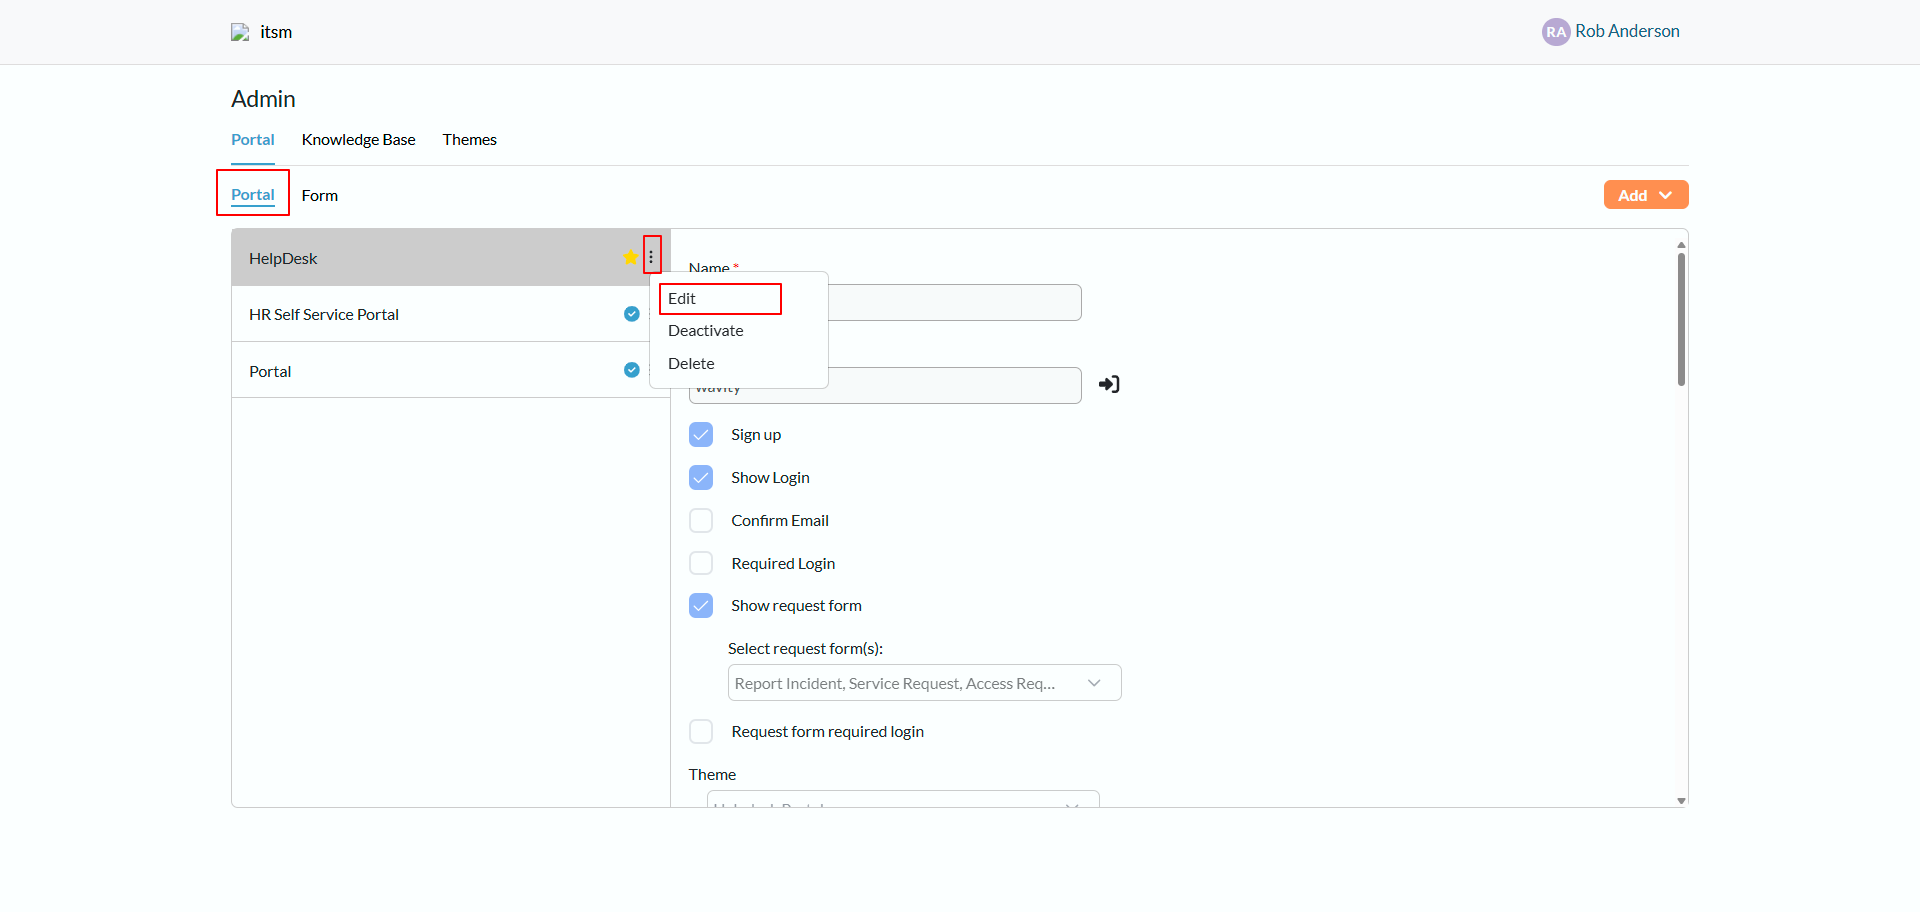
- Edit the portal. On the Portal tab, select the Portal sub-tab. Click the three-dot menu next to the portal you want to configure and select Edit.
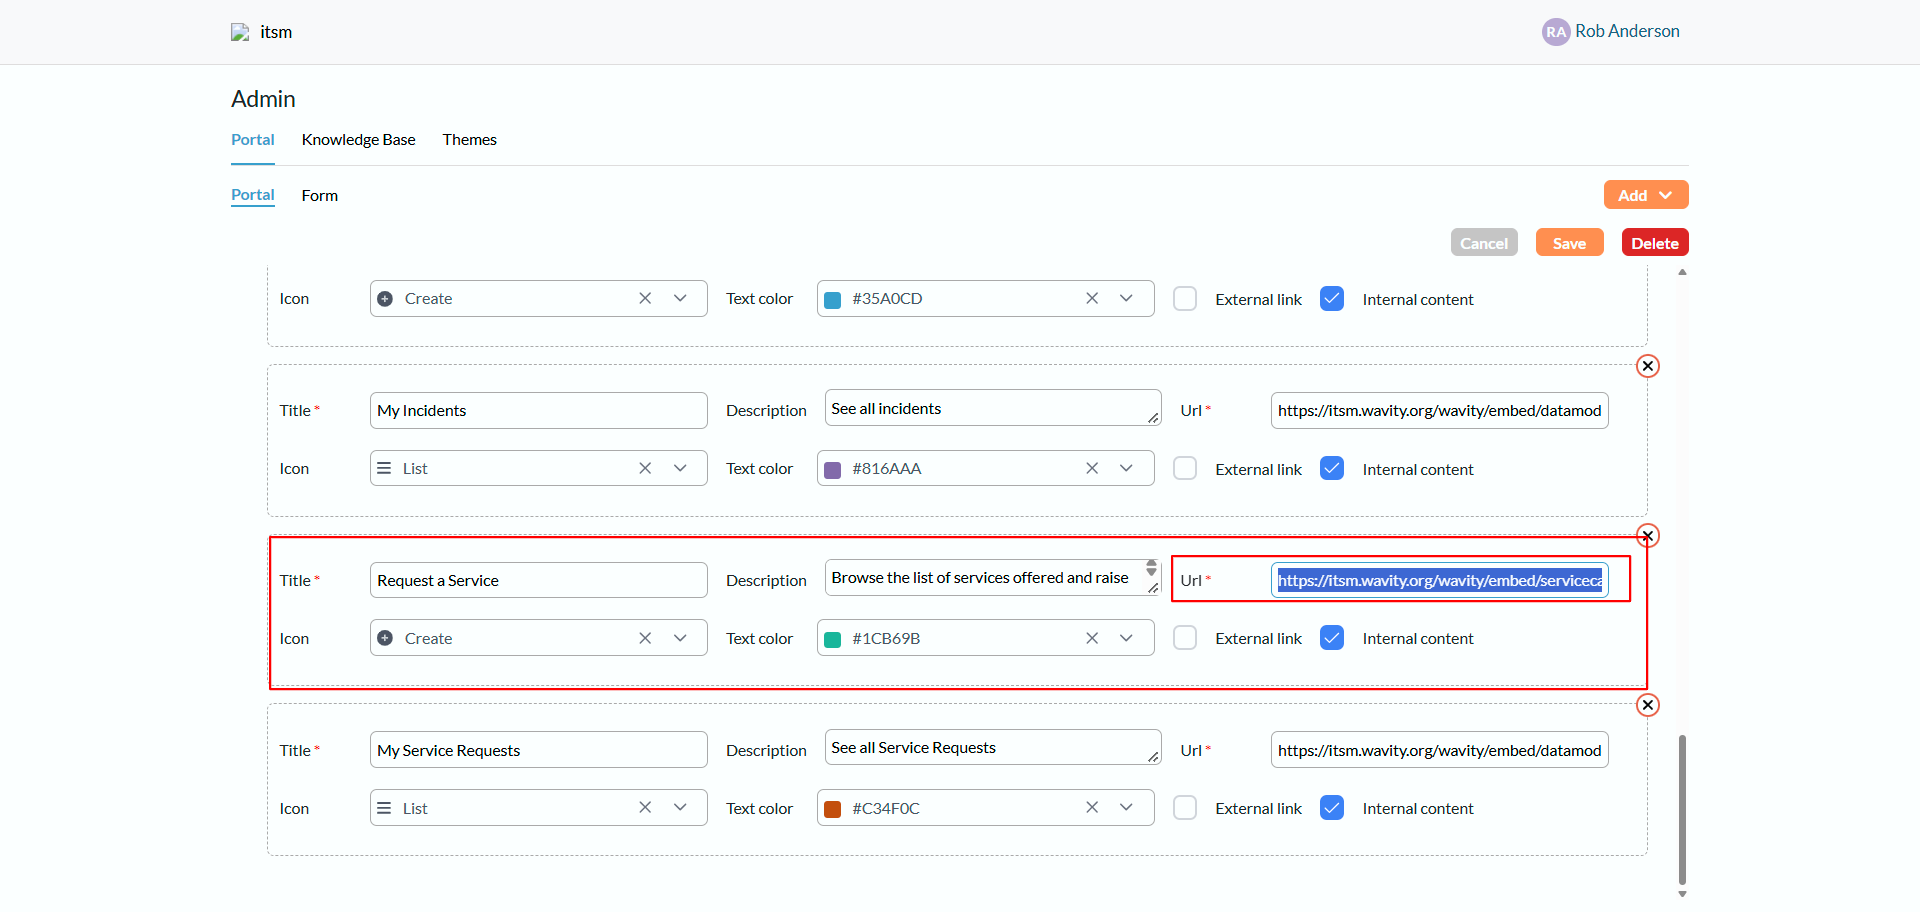
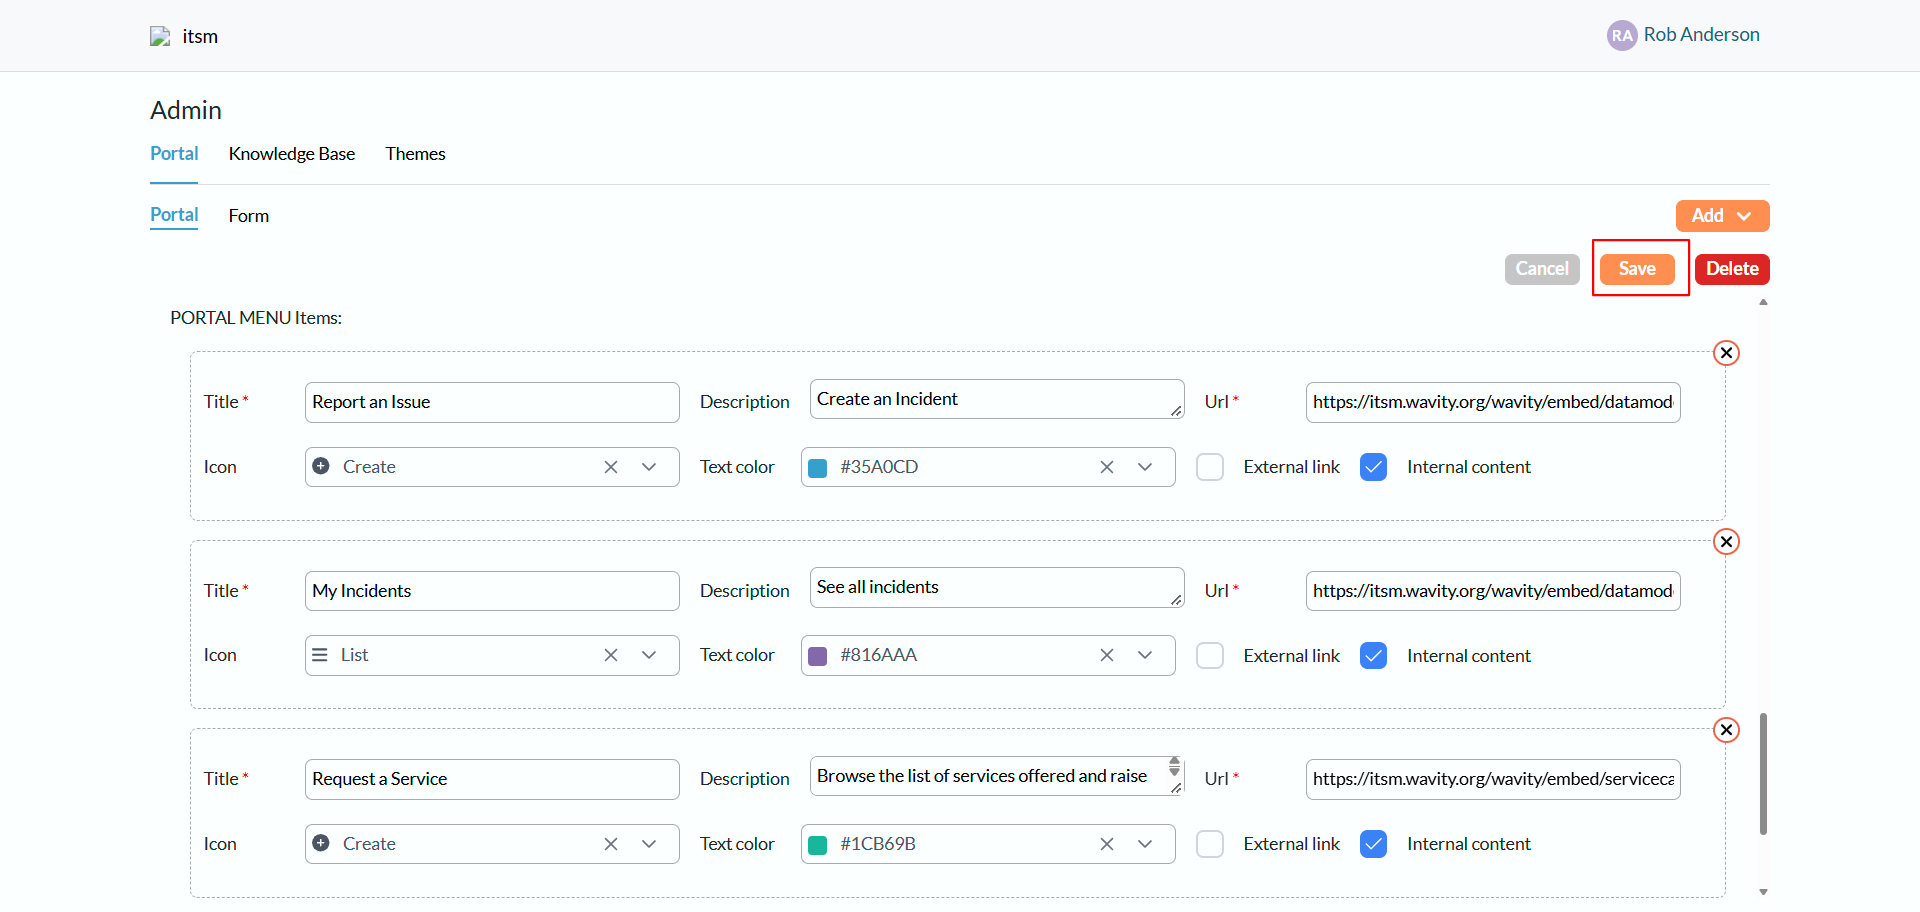
- Set up the Request a Service tile. Under PORTAL MENU Items, find or add the menu item for the catalog. Set Title to Request a Service and add a short Description, such as “Browse the list of services offered and raise a request”. In Url, enter the Service Catalog URL in this format, replacing <Tenant> with your Wavity tenant address:
https://<Tenant>/wavity/embed/servicecatalog
- Save the portal. Click Save at the top of the page.
Check the Service Catalog in the portal
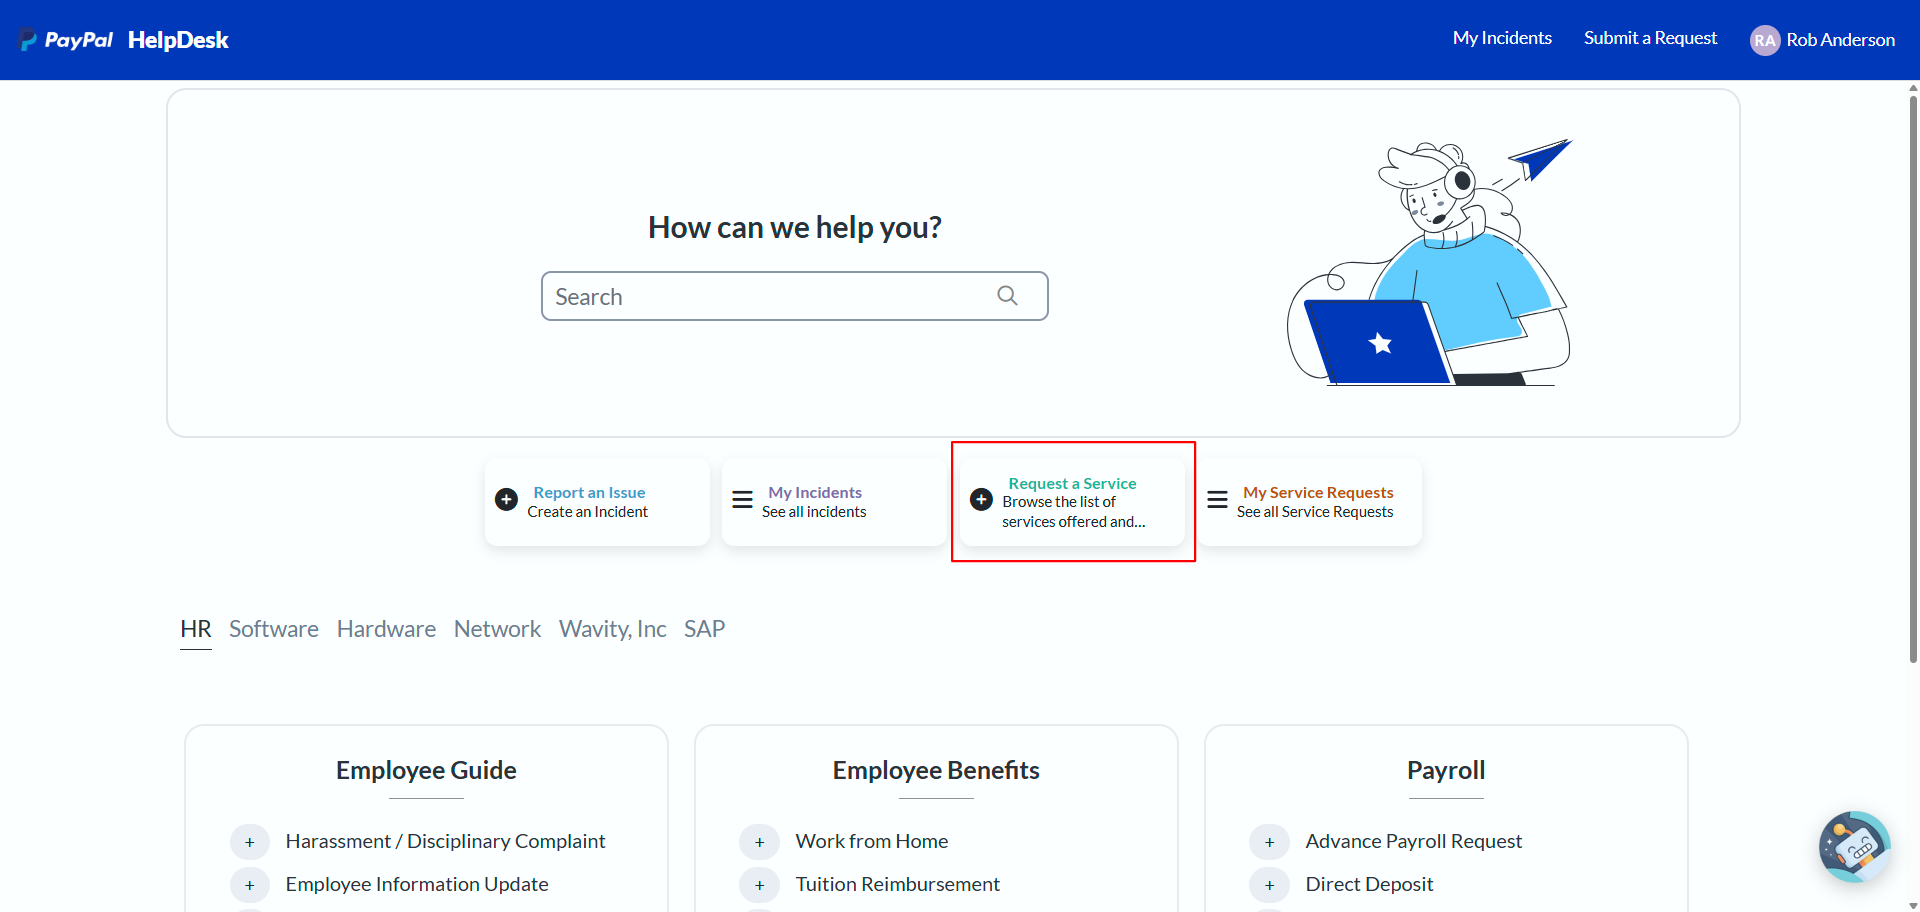
- Open the catalog. On the portal home page, click Request a Service.
- Browse the services. The Service Catalog lists every published application. Browse All Service Items, or select a category on the left to filter the list.